















IVP85800 Inglis Range - Instructions
Keep searches simple. Use keywords, e.g. "leaking", "pump", "broken" or "fit".
Replacing the bulb in the freezer side
Removed the ice brucket,
Removed the light shield by releasing one screw using a nutdriver.
Replacing the bulb and reinstalled the light shield.
Your web site is one of the best and most helpfull service sites I ever used. Just wish that in the future you will ship parts overseas.
Removed the light shield by releasing one screw using a nutdriver.
Replacing the bulb and reinstalled the light shield.
Your web site is one of the best and most helpfull service sites I ever used. Just wish that in the future you will ship parts overseas.
Parts Used:

-
Yafa (and David) from Bothell, WA
-
Difficulty Level:Easy
-
Total Repair Time:Less than 15 mins
-
Tools:Nutdriver
5 of 11 people
found this instruction helpful.
Was this instruction helpful to you?
Thank you for voting!
Oven not reaching temperature
Simple-pulled range away from wall, unplug from socket. Removed back panel unscrewed thermoses and replace. Put back panel back on plug in, tested temperature setting before sliding range back on place
Parts Used:

-
Marsha from Clermont, FL
-
Difficulty Level:Really Easy
-
Total Repair Time:Less than 15 mins
-
Tools:Screw drivers
2 of 2 people
found this instruction helpful.
Was this instruction helpful to you?
Thank you for voting!
Extremely easy repair
Unplug stove. Remove the two screws attaching the element to the rear of the oven. Carefully pull out. Disconnect wires. Reconnect wires. Screw back in. Done. The hardest part was moving the stove away from the wall.
Parts Used:

-
Melissa from MILL CITY, OR
-
Difficulty Level:Very Easy
-
Total Repair Time:Less than 15 mins
-
Tools:Screw drivers
2 of 2 people
found this instruction helpful.
Was this instruction helpful to you?
Thank you for voting!
Baking element had burned into
-
Rebecca from LANCASTER, SC
-
Difficulty Level:Very Easy
-
Total Repair Time:Less than 15 mins
-
Tools:Screw drivers
2 of 2 people
found this instruction helpful.
Was this instruction helpful to you?
Thank you for voting!
Replaced screw

-
Judith from SALEM, OR
-
Difficulty Level:Very Easy
-
Total Repair Time:Less than 15 mins
-
Tools:Screw drivers
2 of 2 people
found this instruction helpful.
Was this instruction helpful to you?
Thank you for voting!
Oven bake would not heat up at all.
Very simple.
Remove 2 mount screws using a #2 phillips screwdriver.
Pull the element out to expose the 2 wires.
Using pliers, slip both wire terminals off the existing element.
Push wires onto the new element and install both mounting screws..
Done!
NOTE: The existing element showed no exterior signs of being bad.
The damage must have been internal.
Remove 2 mount screws using a #2 phillips screwdriver.
Pull the element out to expose the 2 wires.
Using pliers, slip both wire terminals off the existing element.
Push wires onto the new element and install both mounting screws..
Done!
NOTE: The existing element showed no exterior signs of being bad.
The damage must have been internal.
Parts Used:
-
Wilton from CANYON LAKE, TX
-
Difficulty Level:Very Easy
-
Total Repair Time:Less than 15 mins
-
Tools:Pliers, Screw drivers
2 of 2 people
found this instruction helpful.
Was this instruction helpful to you?
Thank you for voting!
Old lower element fell apart
1. Unplug the power
2. Unscrew the two screws that hold the element
3. Pull the element out a little to expose the wires.
4. Gently pull off each wire (best done with needle nose) MAKE SURE THE WIRES DONT FALL INTO THE BACK OF THE OVEN.
5. Firmly seat wires back onto new element and replace screws
6. Bake stuff!
2. Unscrew the two screws that hold the element
3. Pull the element out a little to expose the wires.
4. Gently pull off each wire (best done with needle nose) MAKE SURE THE WIRES DONT FALL INTO THE BACK OF THE OVEN.
5. Firmly seat wires back onto new element and replace screws
6. Bake stuff!
Parts Used:
-
Matthew from MIDDLETOWN, CT
-
Difficulty Level:Very Easy
-
Total Repair Time:Less than 15 mins
-
Tools:Pliers, Screw drivers
2 of 2 people
found this instruction helpful.
Was this instruction helpful to you?
Thank you for voting!
Bottom element stopped working
Unplug the stove from outlet so no power going to appliance. Had to use wd on screws to help loosen
Little bit of effort to loosen. Took new element from package. Replaced screws just tight donot over tighten. Plug stove into outlet turned on. Did a automatic clean. Oven clean and baked cake later I am back in business and 63 years. Was quote 240.00 to from a local repair person. When using wd make sure you wipe any drip from before turning on oven.
Little bit of effort to loosen. Took new element from package. Replaced screws just tight donot over tighten. Plug stove into outlet turned on. Did a automatic clean. Oven clean and baked cake later I am back in business and 63 years. Was quote 240.00 to from a local repair person. When using wd make sure you wipe any drip from before turning on oven.
Parts Used:
-
ArLinda from ALTON, IL
-
Difficulty Level:Really Easy
-
Total Repair Time:30 - 60 mins
-
Tools:Screw drivers
2 of 2 people
found this instruction helpful.
Was this instruction helpful to you?
Thank you for voting!
Paint peeling from strip

-
Myron from Punta Gorda, FL
-
Difficulty Level:Easy
-
Total Repair Time:15 - 30 mins
-
Tools:Nutdriver
3 of 5 people
found this instruction helpful.
Was this instruction helpful to you?
Thank you for voting!
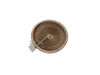
Dual inner element stopped working. The ceramic portion had a crack most likely from thermal stress over the years.
First I found a YouTube video for Maytag Range Repair – How to replace the Surface Element with Limiter - 6" - 1200W
The steps are very easy-
1. Open oven door and locate and remove 2 screws holding top cook surface. These are located near the top inside edge
2. Lift surface cook top and then remove 4 screws holding this section to the cook top. This may require 2 people but I was able to hold the cook top and loosen the 4 screws myself. Then put the cook top aside.
3. Take a photo of the element being replaced for wiring connections.
4. Removing the wiring and element holding clips was very easy. I used needle nose pliers for both
5. The clips have to be removed from the old element and put on the new one. Place them in the same locations
6. Make sure to reconnect the wires to the same pin locations. The replacement element I had the red (hot) wire pin 2b was in
A different location so I had to use the extension wire supplied with the new replacement element
7. Put everything back together in reverse order.
Easy peasy, took me about 40 minutes to complete the entire replacement and have it back in place working.
The steps are very easy-
1. Open oven door and locate and remove 2 screws holding top cook surface. These are located near the top inside edge
2. Lift surface cook top and then remove 4 screws holding this section to the cook top. This may require 2 people but I was able to hold the cook top and loosen the 4 screws myself. Then put the cook top aside.
3. Take a photo of the element being replaced for wiring connections.
4. Removing the wiring and element holding clips was very easy. I used needle nose pliers for both
5. The clips have to be removed from the old element and put on the new one. Place them in the same locations
6. Make sure to reconnect the wires to the same pin locations. The replacement element I had the red (hot) wire pin 2b was in
A different location so I had to use the extension wire supplied with the new replacement element
7. Put everything back together in reverse order.
Easy peasy, took me about 40 minutes to complete the entire replacement and have it back in place working.
Parts Used:
-
Dominique from ASHLAND, MA
-
Difficulty Level:Very Easy
-
Total Repair Time:30 - 60 mins
-
Tools:Pliers, Screw drivers
2 of 2 people
found this instruction helpful.
Was this instruction helpful to you?
Thank you for voting!
Old dual burner lost one half. It appeared the metal strip that wound into and around the circle, broke right where it came into the inside of the entrance, and I wasn't about to try and break everything open to try and fix it, as it didn't look like soldering would be easy, or that it would fix it.
Verified via ohmmeter that one of the two burners was open and not working. I also tested the switch and that appeared to be working okay. I then took out the old unit and compared it to the new one, and found that they upgraded the new unit. I followed the instructions to match the labeled parts and move the wire to the newer location of that. i.e the old one had 2B and 2A at the top and 1B and 1A at the bottom. The new one had 2B and 1B at the top and 2A and 1A at the bottom. It did come with wire extenders and insulated tubes on top of them, and extra to cover additional. After a couple of tries, I decided which wire I needed to use on which (small connectors to match small, and large to match large.) In a second try I decided to flip it over to have it face up instead of down. Overall, it worked out very well, and I was very pleased when I did the power up test and everything worked as desired.
Parts Used:
-
Chris from WHEATON, IL
-
Difficulty Level:Easy
-
Total Repair Time:30 - 60 mins
-
Tools:Nutdriver, Screw drivers
2 of 2 people
found this instruction helpful.
Was this instruction helpful to you?
Thank you for voting!
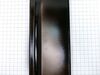
chemical etching of black painted finish on drawer front panel
took out the drawer by removing two fillips head screws, four more screws removed the drawer front. Two plastic push pins and the front panel was off. Put the new panel on secured it with the pins, attached it back on the drawer front, put in the screws and slid the drawer back in the stove, put the two screws back in, done deal!
Parts Used:
-
michael from mesa, AZ
-
Difficulty Level:Really Easy
-
Total Repair Time:15 - 30 mins
-
Tools:Screw drivers
2 of 3 people
found this instruction helpful.
Was this instruction helpful to you?
Thank you for voting!
small inner burnner out
looked on internet on how to remove top. an easy fix after watching video
Parts Used:
-
phillip from RUTH, NV
-
Difficulty Level:Easy
-
Total Repair Time:15 - 30 mins
-
Tools:Pliers, Screw drivers
2 of 3 people
found this instruction helpful.
Was this instruction helpful to you?
Thank you for voting!
temp level uneven
-
Paul from HARMONY, MN
-
Difficulty Level:Very Easy
-
Total Repair Time:15 - 30 mins
2 of 3 people
found this instruction helpful.
Was this instruction helpful to you?
Thank you for voting!
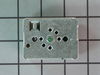
Burner did not always reduce heat when temp. Was lowered.
My husband unscrewed the bad switch and replaced with the new one.
Parts Used:
-
Annie S from RIDGEVILLE, SC
-
Difficulty Level:Really Easy
-
Total Repair Time:15 - 30 mins
-
Tools:Screw drivers
2 of 3 people
found this instruction helpful.
Was this instruction helpful to you?
Thank you for voting!