















IES426AS0 Inglis Range - Instructions
Keep searches simple. Use keywords, e.g. "leaking", "pump", "broken" or "fit".
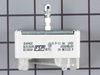
This burner on our range had no temperature control - it was either full-on or full-off
1. Pull range out from wall
2. Unplug range
3. Remove back cover using drill and screwdriver bit
4. Remove dial handle on affected burner dial
5. Remove two screws to unattach broken infinite switch
6. Disconnect wires from broken infinite switch
7. Reconnect wires to new infinite switch
8. Attach new infinite switch using two screws
9. Use pliers to snap off end of post to fit your burner dial, if necessary. It was on ours.
10. Reconnnect dial handle.
11. Reattach back cover using drill and screwdriver bit.
12. Plug range back in
13. Relocate stove against wall
2. Unplug range
3. Remove back cover using drill and screwdriver bit
4. Remove dial handle on affected burner dial
5. Remove two screws to unattach broken infinite switch
6. Disconnect wires from broken infinite switch
7. Reconnect wires to new infinite switch
8. Attach new infinite switch using two screws
9. Use pliers to snap off end of post to fit your burner dial, if necessary. It was on ours.
10. Reconnnect dial handle.
11. Reattach back cover using drill and screwdriver bit.
12. Plug range back in
13. Relocate stove against wall
Parts Used:
-
Justin from BEND, OR
-
Difficulty Level:Easy
-
Total Repair Time:15 - 30 mins
-
Tools:Pliers, Screw drivers
3 of 4 people
found this instruction helpful.
Was this instruction helpful to you?
Thank you for voting!
Busted door hinge
Wrestled with it for ten minutes and then watched a youtube video on how to set the locks on the oven door hinges in order for the door to be installed. The video was instrumental
Parts Used:
-
Robert from DEERING, NH
-
Difficulty Level:A Bit Difficult
-
Total Repair Time:15 - 30 mins
-
Tools:Screw drivers
3 of 4 people
found this instruction helpful.
Was this instruction helpful to you?
Thank you for voting!
Could not control temperature for 8" burner (front right).
The repair was easy. I unplugged the stove, removed back panel, pulled knob and removed 2 screws to remove switch. Unplugged old switch, plugged in new one and installed the 2 screws for switch. Had to snap off stem for new switch to fit knob (easily done with pliers with provided notch). Put knob and back panel back on. Total time, maybe 20 minutes.
Parts Used:
-
Sean from LISLE, NY
-
Difficulty Level:Really Easy
-
Total Repair Time:15 - 30 mins
-
Tools:Pliers, Screw drivers
2 of 2 people
found this instruction helpful.
Was this instruction helpful to you?
Thank you for voting!
Drawer guides missingJust
-
Mark from Killbuck, OH
-
Difficulty Level:Really Easy
-
Total Repair Time:15 - 30 mins
-
Tools:Screw drivers
3 of 5 people
found this instruction helpful.
Was this instruction helpful to you?
Thank you for voting!
Sparks flying out of the oven, broiler element melting
First Things first, unplug unit, remove rear cover with Phillips head screwdriver, disconnect, wires from broiler element which is the top, one, open oven, unscrew top screws first, then two at the back, wiggle out element, then reverse Steps , test repair before putting cover back on. Then ta-da, you saved yourself a $300. Service call to the appliance repair guy.
Parts Used:

-
corey from SHAKER HEIGHTS, OH
-
Difficulty Level:Really Easy
-
Total Repair Time:15 - 30 mins
-
Tools:Screw drivers
2 of 2 people
found this instruction helpful.
Was this instruction helpful to you?
Thank you for voting!
8" surface element stayed on high.
Pulled range out from wall, unplugged AC, unplugged infinite switch, plugged in new switch, broke off end of stem, plugged AC in put range back and tested.
Parts Used:

-
Donald from STOCKTON, NJ
-
Difficulty Level:Really Easy
-
Total Repair Time:15 - 30 mins
-
Tools:Pliers
2 of 2 people
found this instruction helpful.
Was this instruction helpful to you?
Thank you for voting!
Compressor would not shut off at the maximum recommended pressure (150psi)
Removed face plate (4 screws). Removed 2 screws holding manifold in place. Detached wires from the switch. No need to mark them - they don't have to go back on any particular terminal. Remove the switch from the manifold with an adjustable wrench. Replace with new switch (thread sealing compound on the new switch is sufficient - no need for teflon tape). Reattach wires and reassemble manifold and face plate. Easy fix!
Parts Used:
-
Mark from SYLVA, NC
-
Difficulty Level:Really Easy
-
Total Repair Time:15 - 30 mins
-
Tools:Screw drivers, Wrench (Adjustable)
2 of 2 people
found this instruction helpful.
Was this instruction helpful to you?
Thank you for voting!
Broiler element burned out
After doing a YouTube search. I successfully completed the repair by easily diagnosing the issue with the element.
I watched a video about 5 most common problems with whirlpool broiler elements.
The first being to inspect the element for damage. I found a small section that appeared to be rough and had a raised bump.
I decided to order a new element because the oven is older and it wouldn’t hurt to install a new one even if this wasn’t the issue.
Once the part arrived, which it did quickly, I followed the video instructions. It was easy and straight forward. I completed the task in under thirty minutes. It was very simple and I now have a functional broiler element.
I watched a video about 5 most common problems with whirlpool broiler elements.
The first being to inspect the element for damage. I found a small section that appeared to be rough and had a raised bump.
I decided to order a new element because the oven is older and it wouldn’t hurt to install a new one even if this wasn’t the issue.
Once the part arrived, which it did quickly, I followed the video instructions. It was easy and straight forward. I completed the task in under thirty minutes. It was very simple and I now have a functional broiler element.
Parts Used:
-
chris from HILTON HEAD, SC
-
Difficulty Level:Really Easy
-
Total Repair Time:15 - 30 mins
-
Tools:Screw drivers
3 of 5 people
found this instruction helpful.
Was this instruction helpful to you?
Thank you for voting!
Dual burner would go to highn heat.
Watched video & did just guy in video did. Very easy job & the burner works like new.
Parts Used:
-
LOUIS C from GRAND JCT, CO
-
Difficulty Level:Really Easy
-
Total Repair Time:15 - 30 mins
-
Tools:Screw drivers
2 of 2 people
found this instruction helpful.
Was this instruction helpful to you?
Thank you for voting!
Replacing the bulb in the freezer side
Removed the ice brucket,
Removed the light shield by releasing one screw using a nutdriver.
Replacing the bulb and reinstalled the light shield.
Your web site is one of the best and most helpfull service sites I ever used. Just wish that in the future you will ship parts overseas.
Removed the light shield by releasing one screw using a nutdriver.
Replacing the bulb and reinstalled the light shield.
Your web site is one of the best and most helpfull service sites I ever used. Just wish that in the future you will ship parts overseas.
Parts Used:

-
Yafa (and David) from Bothell, WA
-
Difficulty Level:Easy
-
Total Repair Time:Less than 15 mins
-
Tools:Nutdriver
5 of 11 people
found this instruction helpful.
Was this instruction helpful to you?
Thank you for voting!
Oven not reaching temperature
Simple-pulled range away from wall, unplug from socket. Removed back panel unscrewed thermoses and replace. Put back panel back on plug in, tested temperature setting before sliding range back on place
Parts Used:

-
Marsha from Clermont, FL
-
Difficulty Level:Really Easy
-
Total Repair Time:Less than 15 mins
-
Tools:Screw drivers
2 of 2 people
found this instruction helpful.
Was this instruction helpful to you?
Thank you for voting!
Extremely easy repair
Unplug stove. Remove the two screws attaching the element to the rear of the oven. Carefully pull out. Disconnect wires. Reconnect wires. Screw back in. Done. The hardest part was moving the stove away from the wall.
Parts Used:

-
Melissa from MILL CITY, OR
-
Difficulty Level:Very Easy
-
Total Repair Time:Less than 15 mins
-
Tools:Screw drivers
2 of 2 people
found this instruction helpful.
Was this instruction helpful to you?
Thank you for voting!
Burner would stay on when switch set to low heat
Unplug and pull out range.
Unscrew the back of the range with Phillips #2.
Unplug wiring harness from switch.
Unscrew the switch from the front of the range with P2 driver.
Install and plug in new switch.
Remove the spring steel knob retainer from shaft.
Cut off extra knob shaft with dremel to match others (there is a narrow segment at the proper length).
Reinstall knob retainer, knob, and range panels.
Unscrew the back of the range with Phillips #2.
Unplug wiring harness from switch.
Unscrew the switch from the front of the range with P2 driver.
Install and plug in new switch.
Remove the spring steel knob retainer from shaft.
Cut off extra knob shaft with dremel to match others (there is a narrow segment at the proper length).
Reinstall knob retainer, knob, and range panels.
Parts Used:
-
Casey from WARBA, MN
-
Difficulty Level:Really Easy
-
Total Repair Time:Less than 15 mins
-
Tools:Screw drivers
2 of 2 people
found this instruction helpful.
Was this instruction helpful to you?
Thank you for voting!
Baking element had burned into
-
Rebecca from LANCASTER, SC
-
Difficulty Level:Very Easy
-
Total Repair Time:Less than 15 mins
-
Tools:Screw drivers
2 of 2 people
found this instruction helpful.
Was this instruction helpful to you?
Thank you for voting!
Oven bake would not heat up at all.
Very simple.
Remove 2 mount screws using a #2 phillips screwdriver.
Pull the element out to expose the 2 wires.
Using pliers, slip both wire terminals off the existing element.
Push wires onto the new element and install both mounting screws..
Done!
NOTE: The existing element showed no exterior signs of being bad.
The damage must have been internal.
Remove 2 mount screws using a #2 phillips screwdriver.
Pull the element out to expose the 2 wires.
Using pliers, slip both wire terminals off the existing element.
Push wires onto the new element and install both mounting screws..
Done!
NOTE: The existing element showed no exterior signs of being bad.
The damage must have been internal.
Parts Used:
-
Wilton from CANYON LAKE, TX
-
Difficulty Level:Very Easy
-
Total Repair Time:Less than 15 mins
-
Tools:Pliers, Screw drivers
2 of 2 people
found this instruction helpful.
Was this instruction helpful to you?
Thank you for voting!