















HTS18ICSULWW Hotpoint Refrigerator - Instructions
Keep searches simple. Use keywords, e.g. "leaking", "pump", "broken" or "fit".
Light would no longer turn on
I watched the video online, followed the instructions and within minutes had the part installed. The frig light was working once again! I will say the original switch was very snug and I had to do some very minor scraping of the plastic to get the new part to slide in.
Parts Used:

-
paypal_shipping_address from Ripon, CA
-
Difficulty Level:Really Easy
-
Total Repair Time:Less than 15 mins
-
Tools:Pliers
3 of 6 people
found this instruction helpful.
Was this instruction helpful to you?
Thank you for voting!
water overflowing in ice cube tray
Remove the rear cover, shut off the water, removed the hose, unplugged the electrical connector, removed the screw holding the valve on. Removed the plastic tube going into the freezer and reversed the steps
Parts Used:

-
Matthew from Sunland, CA
-
Difficulty Level:Really Easy
-
Total Repair Time:Less than 15 mins
2 of 3 people
found this instruction helpful.
Was this instruction helpful to you?
Thank you for voting!
Light out
Turned off the breaker to the fridge because I couldn't reach the power plug to unplug it . Use small flat head screwdriver to pop out the piece, disconnected the rubber prong connectors, inserted the new piece into the rubber prongs snapped it back into place. Flipped the breaker back on and prayed it worked. It did and I saved myself $120 service call.
Parts Used:
-
Jodi from Benton Harbor, MI
-
Difficulty Level:Very Easy
-
Total Repair Time:Less than 15 mins
-
Tools:Pliers, Screw drivers
2 of 3 people
found this instruction helpful.
Was this instruction helpful to you?
Thank you for voting!
broken part
easy - replaced it
i am totally impressed with your company how effective it is.... i will go to yours if anything is broken or replaced
thanks
i am totally impressed with your company how effective it is.... i will go to yours if anything is broken or replaced
thanks
Parts Used:
-
Michael from E. Hartland, CT
-
Difficulty Level:Really Easy
-
Total Repair Time:Less than 15 mins
-
Tools:Nutdriver
2 of 3 people
found this instruction helpful.
Was this instruction helpful to you?
Thank you for voting!
Noise in the back of freezer
I must thank yo for sending the fan so fast. If I ever have to deal with any appliance again, you are first on my list.
Parts Used:
-
MaryLou from Levittown, NY
-
Difficulty Level:A Bit Difficult
-
Total Repair Time:Less than 15 mins
3 of 6 people
found this instruction helpful.
Was this instruction helpful to you?
Thank you for voting!
light switch freezer door
put the gratefruit knife behind the old switch pooped it out pluged the new one in piece of cake 5min.even vacumed the dust off the coil
Parts Used:
-
Sumlorq from Cleveland, OH
-
Difficulty Level:Really Easy
-
Total Repair Time:Less than 15 mins
3 of 7 people
found this instruction helpful.
Was this instruction helpful to you?
Thank you for voting!
Light would stay on when door closed
Extremely easy repair, the hardest part was getting the old switch out. I used a pair of needle nose pliers to squeeze the tabs in and it came right out.
Parts Used:
-
James from Glendale Heights, IL
-
Difficulty Level:Really Easy
-
Total Repair Time:Less than 15 mins
-
Tools:Nutdriver, Pliers
3 of 7 people
found this instruction helpful.
Was this instruction helpful to you?
Thank you for voting!
Leaking And Making Stalactites
Had to defrost the freezer to melt off all the ice before servicing. Once that was done the icemaker replacement only took about 15-30 minutes to complete. The new icemaker came with many accessories and adaptors that were not needed and the instructions were based on replacing an older model and not really clear for my model. They mentioned not being able to use the new stripper but it was exactly the same as the old one so I left the new one in place. All in all it was easy and did the job.
Parts Used:
-
Richard from Zephyrhills, FL
-
Difficulty Level:Easy
-
Total Repair Time:More than 2 hours
-
Tools:Nutdriver, Screw drivers
2 of 4 people
found this instruction helpful.
Was this instruction helpful to you?
Thank you for voting!
Noisy
I didn’t do the repair because I ordered two grommets. When they arrived, one of the packages was empty! Instead of just sending me another one, they refunded the part so I still need one. By the way, I was not refunded half the shipping either which was more than the part itself.
Parts Used:
-
Brad from SPRING MILLS, PA
-
Difficulty Level:Very Difficult
-
Total Repair Time:More than 2 hours
1 person
found this instruction helpful.
Was this instruction helpful to you?
Thank you for voting!
Broken light switch
This was so easy I think it took me 2 minutes. I am not very mechanically inclined but that didn't matter! Works perfect thank you!
Parts Used:
-
Deborah from BRADLEYVILLE, MO
-
Difficulty Level:Very Easy
-
Total Repair Time:Less than 15 mins
-
Tools:Pliers, Screw drivers
1 person
found this instruction helpful.
Was this instruction helpful to you?
Thank you for voting!
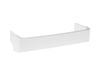
The plastic part which fits into the door as a shelf, was broken by overloadin.
Simple. Remove part from wrapping and box, snap into place on door. All of one minute.
Parts Used:
-
Anne from Siasconset, MA
-
Difficulty Level:Very Easy
-
Total Repair Time:Less than 15 mins
2 of 4 people
found this instruction helpful.
Was this instruction helpful to you?
Thank you for voting!
no water to icemaker
removed back cover--disconnect water supply-- removed screw holding vave and unplugged the
electric from the valve-- disconncect waterline to
the icemaker. reverse the to put on new part.
electric from the valve-- disconncect waterline to
the icemaker. reverse the to put on new part.
Parts Used:
-
Bobby from Lewes, DE
-
Difficulty Level:Really Easy
-
Total Repair Time:15 - 30 mins
-
Tools:Nutdriver, Wrench (Adjustable)
2 of 4 people
found this instruction helpful.
Was this instruction helpful to you?
Thank you for voting!
Light burnt out.
Turned the wire protector to the side. Turned out the old bulb and replaced it with the new. Turned the wire protector back in place and I'm like new.
Parts Used:

-
Roscoe G from ROCHESTER, NY
-
Difficulty Level:Very Easy
-
Total Repair Time:Less than 15 mins
2 of 4 people
found this instruction helpful.
Was this instruction helpful to you?
Thank you for voting!
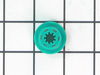
Fan was getting really noisy.
Looked at fan and seen it was rubbing metal cage. After looking and checking fan noticed bushings were worn letting fan hit cage. Repair was very easy. Used a 1/4 inch nut driver to remove bracket holding fan. Pulled fan blade off shaft by just pulling it forward. Removed fan and replaced grommets. Reassembled fan and fan blade. Took just 10 minutes.
Parts Used:
-
frankie from Port Richey, FL
-
Difficulty Level:Really Easy
-
Total Repair Time:15 - 30 mins
-
Tools:Nutdriver
1 person
found this instruction helpful.
Was this instruction helpful to you?
Thank you for voting!
Water valve failed. Constant drip in ice maker.
Removed old valve easily. New WR57XI0033 valve is designed to mount on lower left, but on mine it has to mount on lower right. Had to drill two 1/32 holes in lower rail to mount the new valve.
Parts Used:
-
Steven from RUSHVILLE, IL
-
Difficulty Level:Easy
-
Total Repair Time:30 - 60 mins
-
Tools:Screw drivers, Socket set, Wrench set
1 person
found this instruction helpful.
Was this instruction helpful to you?
Thank you for voting!