















HPS18BTHLRWW General Electric Refrigerator - Instructions
Keep searches simple. Use keywords, e.g. "leaking", "pump", "broken" or "fit".
freezer stoped freezing
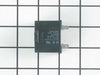
my freezer quit freezing, it would freeze for one day, thaw the next, so I went online, found PARTS SELECT, LOOKED UP MY MODEL #, come to find out it needed three parts to keep my freezer to freeze, first part was a thermistor a small PART took me longer to remove all the covers, and shelving, PULLED THE OLD OUT, CUT THE WIERS TO SIZE, AND REINSTALLED, IT WELL! THAT WASN'T ENOUGH THE FREEZER STILL DIDN'T FREEZE IT THOUT IT WAS A COOL WORMING OVEN, HAD TO INSTALL THE THERMISTOR I, SO I DID, TEN MIN, NOW I THOUGHT THAT WAS IT BECAUSE IT STAYED FROZEN FOR A WEAK, HAVE YOU EVER EATEN SOUPY ICE CREAM? SO BACK TO PARTS SELECT, THIS TIME I BOUGHT ONE MORE PT, THE RUN CAPACITOR, FIVE MIN, THAT/S ALL IT TOOK TO INSTALL. I DID NOT KNOW AT THE TIME YOU NEED THE THREE OF THEM TO RUN THE FREEZER ONE TO KEEP THE TEMP., ONE TO KEEP THE FAN RUNNING THE WAY IT SHOULD, AND THE THIRD TO MAKE SURE THE OTHER TWO KEEP RUNNING. NOW I CAN SET IT AT 4- 5 AND. FREEZE.
Parts Used:
-
paul from ENDICOTT, NY
-
Difficulty Level:Very Easy
-
Total Repair Time:15 - 30 mins
-
Tools:Pliers, Screw drivers
2 of 2 people
found this instruction helpful.
Was this instruction helpful to you?
Thank you for voting!
The light inside the oven had burned out
0. As a safety precaution, unplug the range or hit the relevant fuse breaker before you start. You might also want to grab a flashlight. Definitely do not try to do this while the oven is hot.
1. Pinch the wire over the light bulb cap to remove it. This is inside the oven at the back.
2. Pop off the hemispherical glass cap.
3. Unscrew the old light bulb, and screw the new light bulb in its place.
4. Put the cap back.
5. Secure the cap by putting the wire back in its slots on the cap.
No tools needed, the cap is just held in place with pressure from the wire.
1. Pinch the wire over the light bulb cap to remove it. This is inside the oven at the back.
2. Pop off the hemispherical glass cap.
3. Unscrew the old light bulb, and screw the new light bulb in its place.
4. Put the cap back.
5. Secure the cap by putting the wire back in its slots on the cap.
No tools needed, the cap is just held in place with pressure from the wire.
Parts Used:

-
Catherine from SEATTLE, WA
-
Difficulty Level:Very Easy
-
Total Repair Time:Less than 15 mins
3 of 5 people
found this instruction helpful.
Was this instruction helpful to you?
Thank you for voting!
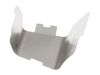
Shield reflector for the refrigerator light
It was easy to take the old shield reflector out and put the new one in, no tools needed. However it did not solve the problem. The refrigerator light is hanging down, in the way of getting items in and out of the refrigerator. Looking through the parts list for this model directed me to the shield reflector. Among the questions was one from another customer asking how to fix a hanging light and was told the shield reflector would solve the problem. So I bought the part. Waste of time and money. The light still hangs.
Parts Used:
-
Joellen from CENTRALIA, WA
-
Difficulty Level:Really Easy
-
Total Repair Time:Less than 15 mins
2 of 2 people
found this instruction helpful.
Was this instruction helpful to you?
Thank you for voting!
Broken draw Glass
Open the fridge slide the glass forward into open slot than placed it down Simple 123.done
Parts Used:
-
Marc from PHILADELPHIA, PA
-
Difficulty Level:Very Easy
-
Total Repair Time:Less than 15 mins
2 of 2 people
found this instruction helpful.
Was this instruction helpful to you?
Thank you for voting!
lights blown out
-
Gerald from WINTERVILLE, GA
-
Difficulty Level:Very Easy
-
Total Repair Time:Less than 15 mins
6 of 14 people
found this instruction helpful.
Was this instruction helpful to you?
Thank you for voting!
The Refridgerator and Freezer were not cooling.
-
Frank from VERO BEACH, FL
-
Difficulty Level:Really Easy
-
Total Repair Time:15 - 30 mins
-
Tools:Pliers, Screw drivers
2 of 2 people
found this instruction helpful.
Was this instruction helpful to you?
Thank you for voting!
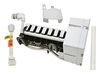
Ice Maker stopped making ice.
Did the repair just as the instruction said, once I read it. The part I didn't read was that if the plug was under the ice maker, you had to take the wire out of the clip on the side. So, had to dismount ice maker, unclip wire, remount maker, plug it in. Still under 30 minutes. Thank you.
Parts Used:
-
Hugh from LADSON, SC
-
Difficulty Level:Really Easy
-
Total Repair Time:15 - 30 mins
-
Tools:Nutdriver
2 of 2 people
found this instruction helpful.
Was this instruction helpful to you?
Thank you for voting!
Ice maker stopped working
-
Mary from WESTON, CT
-
Difficulty Level:Very Easy
-
Total Repair Time:Less than 15 mins
-
Tools:Nutdriver
3 of 5 people
found this instruction helpful.
Was this instruction helpful to you?
Thank you for voting!
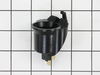
light wouldn't come out of socket
It just unpluged and the new one plugged in. Simple. The part was reasonable and arrived very quickly. It sure is nice to have a light in the frig again.
Parts Used:
-
Joyce from Tacoma, WA
-
Difficulty Level:Really Easy
-
Total Repair Time:Less than 15 mins
3 of 5 people
found this instruction helpful.
Was this instruction helpful to you?
Thank you for voting!
Ice maker stopped making ice
I had made a dry run at the repair after watching the instructional film provided by part select and it seemed easy enough.
The only problem was that i needed to use the electrical cord extender (provided) to adapt to my plug type. That presented a problm because it needed to be tucked up out of the way to allow the ice bin to clear. Just needed to be creative in how you wrapped the cord behind the ice maker unit before snugging the attachment screws.
Cranking out ice like crazy.
The only problem was that i needed to use the electrical cord extender (provided) to adapt to my plug type. That presented a problm because it needed to be tucked up out of the way to allow the ice bin to clear. Just needed to be creative in how you wrapped the cord behind the ice maker unit before snugging the attachment screws.
Cranking out ice like crazy.
Parts Used:
-
Robert from Wyckoff, NJ
-
Difficulty Level:Easy
-
Total Repair Time:15 - 30 mins
-
Tools:Screw drivers
2 of 3 people
found this instruction helpful.
Was this instruction helpful to you?
Thank you for voting!
The icemaker quit making ice and the water started forming on the bottom of the ice bucket.
First I removed the electrical plug from the back of the freezer that plugs into the icemaker. I then removed the two hex head screws that hold the icemaker to the wall of the freezer and removed the icemaker. I removed the plastic cover, which incidentally protects the gears, by prying it off with a srewdriver. I removed three small nuts(7mm) which holds the internal cam in place. I removed the cam by pulling it off the shaft. Once I got the part from you folks I reversed the procedure that I just mentioned, and put the icemaker back together. It works great. The part with shipping was around $16.00. A new icemaker was roughly $159.00. If I would have called a technician it would have cost around $300.00 to repair.
Parts Used:
-
John from Anaheim, CA
-
Difficulty Level:Really Easy
-
Total Repair Time:Less than 15 mins
-
Tools:Nutdriver, Screw drivers, Wrench (Adjustable)
2 of 3 people
found this instruction helpful.
Was this instruction helpful to you?
Thank you for voting!
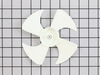
Noise in the back of freezer
I must thank yo for sending the fan so fast. If I ever have to deal with any appliance again, you are first on my list.
Parts Used:
-
MaryLou from Levittown, NY
-
Difficulty Level:A Bit Difficult
-
Total Repair Time:Less than 15 mins
3 of 6 people
found this instruction helpful.
Was this instruction helpful to you?
Thank you for voting!
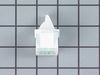
The Light Would Not Go On
Knew the switch was bad. Researched on the internet how to fix. Used a steak knife to pop the old one out, changed the contacts to the new switch and popped it back in. It took longer to open the box than it did to replace the switch. And the part arrived 2 days after I ordered it.
Parts Used:
-
Steve from Littleton, CO
-
Difficulty Level:Really Easy
-
Total Repair Time:Less than 15 mins
3 of 6 people
found this instruction helpful.
Was this instruction helpful to you?
Thank you for voting!
I dropped one of the trays and it hit the light switch and broke off!
It was so darn easy! Took less then 10 minutes to fix. Self explanatory no instructions needed! Very cool!
Parts Used:
-
Cyndy from Rancho Cucamonga, CA
-
Difficulty Level:Really Easy
-
Total Repair Time:Less than 15 mins
-
Tools:Screw drivers
2 of 3 people
found this instruction helpful.
Was this instruction helpful to you?
Thank you for voting!
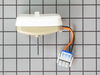
Fridge making LOUD humming sound.
Started removing screws until I got to the fan (it's easy). Then just took out the old fan and put the new one back in the same way. The only challenging part was putting the clamp back on the fan, but I finally got it. The fridge is finally quiet and we can sleep again! PartSelect made it really easy and they were incredibly fast. Thanks!
Parts Used:
-
jack from homestead, FL
-
Difficulty Level:Easy
-
Total Repair Time:15 - 30 mins
-
Tools:Nutdriver, Screw drivers
2 of 3 people
found this instruction helpful.
Was this instruction helpful to you?
Thank you for voting!