















HMG249725A Admiral Refrigerator - Instructions
Keep searches simple. Use keywords, e.g. "leaking", "pump", "broken" or "fit".
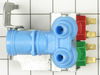
leak in double outlet water valve/solenoid
This was an easy fix. The old one had cracked probably from the frige being left out in cold weather. Just remove the back cover. Unscrew the water line and two plastic lines and unplug the two plugs. Then remove a single screw that holds the valve in place and put on the new one and reattach everything. Good idea to recut the ends of the tubing to remove old crimp.
Parts Used:
-
Joel from East Burke, VT
-
Difficulty Level:Easy
-
Total Repair Time:15 - 30 mins
-
Tools:Nutdriver, Wrench set
10 of 12 people
found this instruction helpful.
Was this instruction helpful to you?
Thank you for voting!
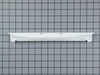
Meat drawer guide rail broken
although this piece s white, my refrigerator had clear plastic guides - both work OK. Remove meat drawer, remove glass shelf from refrigerator. Glass shelf is attached to metal frame by two clips at rear of shelf. Before removing, notice how the clips are fastened to the chrome trim so replacement will be easier. Remove clips with fingers. Glass shelf will then swing up and away from metal frame, allowing easy removal of drawer guide(s). Remove broken guide and replace with new. Lower the glass and re-attach metal clips. Replace metal shelf in refrigerator and re-insert drawer. That's it.
Parts Used:
-
Robert from Kelso, WA
-
Difficulty Level:Really Easy
-
Total Repair Time:Less than 15 mins
8 of 9 people
found this instruction helpful.
Was this instruction helpful to you?
Thank you for voting!
Evaporator coils would freeze up solid
Removed everything from inside freezer compartment (food and shelves) Removed inside backpanel that covered the coils. At the top of the coils is where the thermostat was attached. Removed old one and installed new. Has been working since.
Parts Used:

-
Walt from Sutter, CA
-
Difficulty Level:Really Easy
-
Total Repair Time:15 - 30 mins
-
Tools:Pliers, Screw drivers
7 of 8 people
found this instruction helpful.
Was this instruction helpful to you?
Thank you for voting!
the rail split on the lower ridge & drawer sagged
I removed the drawer, and removed the shelf and both rails. In the back were 2 clips to secure the shelf to the frame and stabilize the rails. Then I could move the glass shelf and access the broken rail and replace it with the beautiful new one. I feel like I Have a new fridge! I found the part on line even though I could not find the plate with the model number or year!
Parts Used:
-
Linda from Columbia, MO
-
Difficulty Level:Really Easy
-
Total Repair Time:Less than 15 mins
5 of 6 people
found this instruction helpful.
Was this instruction helpful to you?
Thank you for voting!
No water to Ice Maker
Very easy. Pull out refrig from wall to access the rear, turn off ice water line and Unplug refrig from wall outlet. Take socket and unscrew the one (1) tap holding the unit.
Remove the electric conections, pulling out from unit (there is nothing holding it in place but friction).
Remove the main water tube (have papber towel for water drip, there will be some)
Remove the two water tubes on top of unit (noting which tube goes to which relay)
Reconnect electric connectors to the new unit, reonnect water tubes to the new unit, screw down the new unit.
Turn water on and plug refrig back into AC outlet.
That's it, 20-30 min.
Remove the electric conections, pulling out from unit (there is nothing holding it in place but friction).
Remove the main water tube (have papber towel for water drip, there will be some)
Remove the two water tubes on top of unit (noting which tube goes to which relay)
Reconnect electric connectors to the new unit, reonnect water tubes to the new unit, screw down the new unit.
Turn water on and plug refrig back into AC outlet.
That's it, 20-30 min.
Parts Used:
-
James from Jones, OK
-
Difficulty Level:Really Easy
-
Total Repair Time:30 - 60 mins
-
Tools:Nutdriver, Wrench (Adjustable)
5 of 7 people
found this instruction helpful.
Was this instruction helpful to you?
Thank you for voting!
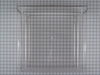
Deli and Crisper Drawer handles cracked
I unboxed the new drawers, measured and cut some 1/8 plexiglass strips to fit. I then glued the strips on the inside of both drawers to strenghten. The original and replacement drawers lack strength at the corners and crack. This was the third set I have replaced. Should not happen again.
Parts Used:

-
David from Garfield, AR
-
Difficulty Level:Easy
-
Total Repair Time:Less than 15 mins
4 of 6 people
found this instruction helpful.
Was this instruction helpful to you?
Thank you for voting!
One side of the dairy door broke right at the little tab site.
I have to say the packaging of the diary door was A+++ It took less than a minute to snap out the old door (that I had tried to hot glue) and snap in the new door. My story is what a fantastic sales department you have. I submitted my order for the dairy door as well as new shelving hinges. The hinges came in right away; however I received an e-mail saying they no longer had the dairy door. I received a message on my cell phone that the sales lady She said she located a couple of dairy doors in other warehouses and was going to check their availability. Sure enought, it took a week or so, but she did come through with the dairy door for me. I was told they only had a couple left and that they were not making them any longer. Whoever this sales lady is.... three cheers for you what an excellent job. She really did not have to pursue the order any further than her own warehouse but she did - thank you for your excellent service!!!
Parts Used:

-
Deborah from Walker, MN
-
Difficulty Level:Really Easy
-
Total Repair Time:Less than 15 mins
3 of 4 people
found this instruction helpful.
Was this instruction helpful to you?
Thank you for voting!
No leveling legs
Ordered the leveling bolts, very fast shipping, parts correct as shown. Purchased a condo by the shore, frige had no levelers, they went in smoothly & was done in no time.
Steve
Steve
Parts Used:

-
stephen from montgomery, NY
-
Difficulty Level:Really Easy
-
Total Repair Time:Less than 15 mins
-
Tools:Wrench (Adjustable)
3 of 4 people
found this instruction helpful.
Was this instruction helpful to you?
Thank you for voting!
leak at water valve for ice maker
removed part., got number, went online,found part, ordered part, paid for part, replaced part.
works great. !
works great. !
Parts Used:
-
Terry from Hendricks, MN
-
Difficulty Level:Really Easy
-
Total Repair Time:Less than 15 mins
-
Tools:Nutdriver, Pliers, Screw drivers
4 of 8 people
found this instruction helpful.
Was this instruction helpful to you?
Thank you for voting!
valve froze and busted was leaking water on floor
took nut driver and removed screw holding valve to refrigerator removed valve. Swapped water lines from old valve to new valve,plugged in selonoid wire harness to new valve reattached the water valve to referigerator and turned water on and forgot it. No leaks,ice and water in 24 hrs.
Parts Used:
-
Bryan from Roberts, ID
-
Difficulty Level:Really Easy
-
Total Repair Time:30 - 60 mins
-
Tools:Nutdriver, Pliers, Wrench (Adjustable)
2 of 2 people
found this instruction helpful.
Was this instruction helpful to you?
Thank you for voting!
No water to ice maker
Turn off refrig water supply, remove cardboard rear lower cover, disconnect two plastic lines (one for icemaker, the other for in-the-door water dispenser) and one copper fitting (supply line). Replace valve (mounted with one screw), reconnect, test for leaks.
The valve I was so sure was bad wasn't, replacing it didn't solve my problem. Turned out to be a frozen up icermaker water feed tube at the top rear of the refrig. The Fix: heat a metal rod of appropriate size in boiling water or with a hair dryer, poke it gently up into the water drop tube (sticks out just above the rear of the icemaker) from the inside and melt out the ice plug. Be sure to test this tube if you have the same problem, you should be able to disconnect the line on back of the refrig and blow air through the tube if it's clear. Saved the valve anyway for a spare.
The valve I was so sure was bad wasn't, replacing it didn't solve my problem. Turned out to be a frozen up icermaker water feed tube at the top rear of the refrig. The Fix: heat a metal rod of appropriate size in boiling water or with a hair dryer, poke it gently up into the water drop tube (sticks out just above the rear of the icemaker) from the inside and melt out the ice plug. Be sure to test this tube if you have the same problem, you should be able to disconnect the line on back of the refrig and blow air through the tube if it's clear. Saved the valve anyway for a spare.
Parts Used:
-
Jerry from Mustang, OK
-
Difficulty Level:Easy
-
Total Repair Time:15 - 30 mins
-
Tools:Nutdriver, Wrench (Adjustable)
2 of 4 people
found this instruction helpful.
Was this instruction helpful to you?
Thank you for voting!
The drawer had cracked from use
-
José from Hialeah, FL
-
Difficulty Level:Really Easy
-
Total Repair Time:Less than 15 mins
1 person
found this instruction helpful.
Was this instruction helpful to you?
Thank you for voting!
Renters removed leveling legs from refrigerator. I don't know why!
I tilted the unit back enough to scew the new legs into the threaded holes.
Parts Used:
-
Don from Frankfort, KY
-
Difficulty Level:Really Easy
-
Total Repair Time:Less than 15 mins
2 of 4 people
found this instruction helpful.
Was this instruction helpful to you?
Thank you for voting!
Water leak in Ice making area
I took Ice maker off and found that water was continuously dripping from water line in to icemaker, I replaced valve and that solved the problem.
Parts Used:
-
Larry from LaPorte, IN
-
Difficulty Level:Easy
-
Total Repair Time:30 - 60 mins
-
Tools:Wrench (Adjustable)
1 of 2 people
found this instruction helpful.
Was this instruction helpful to you?
Thank you for voting!
Glass shelf shattered when I rinsed it off.
I called a local appliance store in town to get a replacement shelf.They did call me back and stated they could not find anything. I found this web site and (had my husband re-measure the size) ordered it on line. I received it in 3 days, and would strongly recommend this web site to anyone.
Parts Used:

-
Pamela from Rhinelander, WI
-
Difficulty Level:Really Easy
-
Total Repair Time:Less than 15 mins
0 of 1 people
found this instruction helpful.
Was this instruction helpful to you?
Thank you for voting!