Your coupon for will be reflected when you check out!
✖
Your coupon for
✖
Hello!
You're visiting the PartSelect site in U.S.
Would you like to shop on the Canadian site?
Stay on this site
Go to Canadian site
✖
Model Number Locations
1Select Category Type
Select Category Type
2Select Product Type
Select Product Type
3Select {MODEL} Type
Select {MODEL} Type
Sample Model Number Tags
Model numbers can be made up of numbers (1005400, for example) or a combination of letters and numbers (LAT1000AAE). The model number will most likely appear on either a paper sticker or a metal plate. Your appliance's model number tag may look similar to the sample model number tags shown here (model number highlighted in yellow):
Model has been saved to My Models. If you're not signed in, your lists are available on this device and will expire within 30 days.
Model has been saved to My Models.
This an authentic OEM 40-Watt replacement light bulb, used in a number of household appliances. It is specially designed to withstand extreme temperatures, which is why these replacement bulbs are mos...
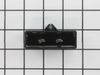
This part helps the compressor kick on and off while maintaining a constant temperature to keep things frozen in your freezer. If you are noticing temperature issues with your refrigerator or freezer,...
This is a cut-to-fit door shelf retainer bar for a refrigerator. The door shelf retainer bar holds food-related items, usually jars and condiments, on your refrigerator or freezer door shelf. This par...
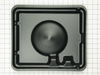
This refrigerator water inlet valve is a single-outlet component that controls the flow of water from your home’s supply line to the ice maker and water dispenser. Designed for select refrigerator mod...
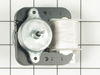
This is an evaporator fan motor for a refrigerator. The fan motor circulates air through the refrigerator to the fresh food compartment for efficient cooling. It is just over three inches long. It is ...
This is an OEM part that is made of metal and sold individually. The leveling leg is generally used with refrigerators, dryers, freezers, ranges, cooktops, and microwaves. The leveling leg is meant to...
1. Unplugged fridge. 2. Unplugged wire harness from valve. 3. Disconnected water supply from valve. 4. Removed valve from fridge chassis 5. Removed plastic tube from valve (supplies ice maker). 6. Removed old fitting from plastic tube and attached to new valve. 7. Attached new valve to fridge (only need 1 scr
... Read moreew) 8. Attached water supply to valve 9. Reattached wiring harness 10. Turned on water supply, checked for leaks 11. Powered on fridge. 12. Enjoy working ice maker.
First you must unplug the refrigerator, then remove the top hinge and freezer door, then you must remove the middle hinge to remove the refrigerator door, after that there are 4 screws located in the refrigerator compartment that must be removed that are holding the plastic control knob trim in place. When you remove these screws and drop
... Read more the trim piece you can unplug the wiring on it, to completly remove it, next right above the plastic trim previously removed there is a metal trim with 3 screws holding it in place they will be removed now. Now you need to remove all of the shelving in the freezer compartment these pieces will just snap out , at the lower left and right sides of the freezer compartment there are two plastic tips that are attached to the main plastic body of this compartment they will need to be snapped out from behind the metal body of the refrigerator this can be done with a flat head screwdriver. Now pull straight out on the plastic body and it should come out , this will expose an insulating cover over the freezer coil where the defrost heater is located,if this is covered with ice you will need a heat gun which is a overgrown hair dryer basically. To melt the ice you will have to remove a insulating cover that is located behind the previously removed front metal trim it will come out by gently snapping it out of place, use caution during this step so not to break the cover in half. This will expose the front of the freezer coil and you can now use the heat gun to melt the ice, keep a check on the drain pan beneath the refrigerator as it will have to be emptied depending on the amount of ice build up. As the ice melts it should release the top cover of the coil and this will lift out of place also again use caution when removing the cover. With the coil exposed melt the remaining ice, if you look in the coil you will see the defrost heater, if the glass tube on the heater is broken please use extreme caution so you will not get cut by it , now you can unplug each wire from each side of the heater you may need a pair of pliers for this. when the wires are unplugged you can now lift out the bad heater again use caution if the glass is broken. There is a gaurd over the heater that will have to be removed by sliding it off the end wires when you have this off, slide it over the wires on the new element, now gently install the new heater back in the coil reconnect the 2 end wires and make sure they are connected good. you can now assemble all of the covers and parts in the reverse order you removed them, when assenbly is complete plug the refrigerator back in and in about three hours or so you should here the fan and compressor stop and the unit should go into a defrost cycle during this you should here the water running to the drain pan as it melts.
I had to adjust the tension wings on the shaft slightly so they would grip the new control. The new control knob slipped right on to the shaft and now I can tell what temperature the refrigerator is positioned at or reposition without having to use a pair of pliers to do it. PartSelect is the easiest and fastest service I've ever used.