















GSS25IYNXHFS General Electric Refrigerator - Instructions
Keep searches simple. Use keywords, e.g. "leaking", "pump", "broken" or "fit".
ice bucket support (glide) had broken allowing misalignment of rotor which then broke.
Removed ice bucket and emptied it, storing ice cubes temporarily in another container; Removed broken support and replaced with new. Removed rotor/crusher assembly from ice bucket assembly, replaced broken rotor (other vendor), reassembled ice bucket, filled with stored cubes and reinstalled in freezer.
Parts Used:
-
Gail from SARATOGA SPGS, UT
-
Difficulty Level:Easy
-
Total Repair Time:1- 2 hours
-
Tools:Nutdriver, Pliers, Screw drivers, Socket set
3 of 3 people
found this instruction helpful.
Was this instruction helpful to you?
Thank you for voting!
Busted water tank
Removed the lower 2 drawers, lower front grill, rear lower compressor cover. Removed the 2 water lines from the quick connects and screws from the water tank. Pulled lines through the hole in the right rear of the refrigerator and removed tank. Then reversed steps to install new tank. The upper plastic tank cover has 2 buttons on top that are really screws with a plastic cap, these are easily removed with pliers.
Parts Used:

-
Larry from Shepherdsville, KY
-
Difficulty Level:Really Easy
-
Total Repair Time:15 - 30 mins
-
Tools:Nutdriver, Pliers, Screw drivers
4 of 6 people
found this instruction helpful.
Was this instruction helpful to you?
Thank you for voting!
drinking water cooler leaked at the seam.
ordered replacement part with the understanding that tubing to the water valve could be easily removed. The tubes were carefully removed with some difficulty, and when the new tubes were inserted one leaked. The tube seat was not snug. Therefore a new water valve was purchased. The installation was successful within about 20 minutes. If I were to do the job again, both the water resevoir and valve would be ordered together.
Parts Used:
-
Alric H from Waynesville, NC
-
Difficulty Level:A Bit Difficult
-
Total Repair Time:15 - 30 mins
-
Tools:Nutdriver, Pliers, Screw drivers
4 of 6 people
found this instruction helpful.
Was this instruction helpful to you?
Thank you for voting!
The lights were on inside however the the water/ice dispenser did not work and the fridge and freezer side was not cooling
Simply take off the back panel. Remove the old run capacitor which is attached to the compressor by a white part. It pulls right off. You will have to unplug two wires. I took a pic to ensure I plugged the wires back up the correct way. Then I attached the new capacitor to the white part and put on the sleeve that was included, plugged it back into the compressor and zip tied the excess part of the sleeve. Once done plug fridge back up (always unplug electric devices when doing maintenance) to check before replacing back panel. It may take a few minutes before it kicks on.
Parts Used:
-
Rickey from DUMAS, AR
-
Difficulty Level:Really Easy
-
Total Repair Time:30 - 60 mins
-
Tools:Socket set
4 of 6 people
found this instruction helpful.
Was this instruction helpful to you?
Thank you for voting!
Refrigerator inside light 1 of 3 went out.
1. Removed light cover.
2. Removed old light assembly board from cable, (1 of 3 lights).
3. Connected cable to light assembly board.
4. Replace light cover.
5. All 3 lights fully lighted.
6. Installation Completed.
2. Removed old light assembly board from cable, (1 of 3 lights).
3. Connected cable to light assembly board.
4. Replace light cover.
5. All 3 lights fully lighted.
6. Installation Completed.
Parts Used:
-
Joseph from SAN JOSE, CA
-
Difficulty Level:Really Easy
-
Total Repair Time:30 - 60 mins
3 of 4 people
found this instruction helpful.
Was this instruction helpful to you?
Thank you for voting!
condenser icing refrigerator warm freezer ok
follow the easy instructions replace 3 temperature sensors cut the wires and crimp them with new sensor and it works like new
Parts Used:
-
Rene from HEBER, CA
-
Difficulty Level:Really Easy
-
Total Repair Time:30 - 60 mins
-
Tools:Pliers
3 of 4 people
found this instruction helpful.
Was this instruction helpful to you?
Thank you for voting!
Fan not working
-
JIAN from Brooklyn, NY
-
Difficulty Level:Really Easy
-
Total Repair Time:30 - 60 mins
-
Tools:Socket set
3 of 4 people
found this instruction helpful.
Was this instruction helpful to you?
Thank you for voting!
I didn't have issues installing the Frame
I just moved the moving parts from the Frame for the humidity level from old to new and all was OK
Parts Used:
-
Juan V from WEST PALM BCH, FL
-
Difficulty Level:Very Easy
-
Total Repair Time:Less than 15 mins
3 of 4 people
found this instruction helpful.
Was this instruction helpful to you?
Thank you for voting!
A jar fell and hit the switch light and broke it.
My father called and asked me if I knew where he could get a new switch light for his refrigerator. I came across your web site and found the part right away. In less than 3 days the part came and my father put it on. He said it was easy and that it was great to have the part come to him instead of having to search all over town. Thanks so much for the fast, easy service.
Parts Used:
-
Theodore from Lake Circle, FL
-
Difficulty Level:Really Easy
-
Total Repair Time:Less than 15 mins
-
Tools:Screw drivers
3 of 4 people
found this instruction helpful.
Was this instruction helpful to you?
Thank you for voting!
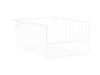
Added parts to interior to improve capacity utilization
The 2 wire baskets FZ with their handles replaced one shelf in the freezer. Thus there was improved utilization of the capacity. When we originally filled the freezer, it was obvious that about 2 cubic feet were not used. Part numbers are WR21x10060 and WR12x10626. A similar situation is in the refrigerator side. We added the snack drawer and shelf pan assy. (replacing one glass shelf) and the shelf module FF to the door. Part numbers are WR32x26244, WR71x10685 and WR71x38318. I had to work with Parts Select Customer Service to identify the correct parts since they are not on the BOM for this model, but are on BOM's for similar capacity refrigerators. The service representatives were very helpful.
Parts Used:

-
Dave from HENDERSON, NV
-
Difficulty Level:Very Easy
-
Total Repair Time:15 - 30 mins
4 of 7 people
found this instruction helpful.
Was this instruction helpful to you?
Thank you for voting!
Light in the Refrigerator don't turn on.
I located the light switch at the bottom of the area where the door closes. I just popped it out with a small screwdriver and installed the new switch. A 2 wire connecter and small clip is all there is to it.
Parts Used:
-
Richard from West Alton, MO
-
Difficulty Level:Really Easy
-
Total Repair Time:Less than 15 mins
-
Tools:Screw drivers
3 of 4 people
found this instruction helpful.
Was this instruction helpful to you?
Thank you for voting!
broken light switch
Really simple... broken light switch easily removed with flat edge screw driver. Once removed unplug and plug new one in and good to go.
Parts Used:
-
Sally from Avon, CO
-
Difficulty Level:Really Easy
-
Total Repair Time:Less than 15 mins
-
Tools:Screw drivers
4 of 7 people
found this instruction helpful.
Was this instruction helpful to you?
Thank you for voting!
The refrige light switch broke when I dropped something on it.
I got the model # off the fridge, ordered the part online. The part was fairly cheap and was at my house 2 days after I ordered it. It was the exact part and I installed it in about 15 minutes and everyting worked out fine and easy and cheap, under $15 total to fix the issue. All I needed to do was use a flathead screwdriver to "pop" out the old switch, remove the 2 wires off the wire connection points, put the wires on the new switch and push it back into place. easy. Great place to get exact parts and fast shipping.
Parts Used:
-
robert from otisville, NY
-
Difficulty Level:Really Easy
-
Total Repair Time:Less than 15 mins
-
Tools:Pliers, Screw drivers
3 of 4 people
found this instruction helpful.
Was this instruction helpful to you?
Thank you for voting!
The light would not turn on!
I pulled the bulb out to see if it was the bulb, no! I took the switch out, of course with the refer unplugged, and jummped out the wires and the light came on. Ordered my switch and put it in in 10 seconds and then there was light! Thanks again for showing me the light!
Tim in NJ
Tim in NJ
Parts Used:
-
TIMOTHY from CLIFTON, NJ
-
Difficulty Level:Really Easy
-
Total Repair Time:Less than 15 mins
-
Tools:Screw drivers
3 of 4 people
found this instruction helpful.
Was this instruction helpful to you?
Thank you for voting!
Tank was leaking.
Followed instruction video. Replaced water tank, flushed line from house water. Reconnected line and cycled until tank filled. I have ice and water now.
Parts Used:
-
Lana from LATHROP, MO
-
Difficulty Level:Easy
-
Total Repair Time:1- 2 hours
-
Tools:Screw drivers, Socket set
3 of 4 people
found this instruction helpful.
Was this instruction helpful to you?
Thank you for voting!