















GSG22KEMCFBB General Electric Refrigerator - Instructions
Keep searches simple. Use keywords, e.g. "leaking", "pump", "broken" or "fit".
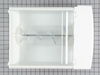
Broken ice dispenser tray
-
Mario from Glenmoore, PA
-
Difficulty Level:Easy
-
Total Repair Time:Less than 15 mins
6 of 8 people
found this instruction helpful.
Was this instruction helpful to you?
Thank you for voting!
light not working
I used pliers to pull lightly on the head of the switch, while I inserted a small flat head screw driver into the base of switch and gently worked around the edges to free it from the panel.
Parts Used:

-
robert from FRANKLIN SQ, NY
-
Difficulty Level:Very Easy
-
Total Repair Time:Less than 15 mins
-
Tools:Pliers, Screw drivers
7 of 11 people
found this instruction helpful.
Was this instruction helpful to you?
Thank you for voting!
Noisy refrigerator
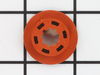
I visually inspected the compressor and narrowed down the source of the noise to the freezer area. Then I removed the doors and the screws securing the divider panel. Next I removed the bottom panel of the freezer, the styrofoam insullation panel and the evaporator motor. The motor is mounted between two grommets. I replaced the grommet facing the fan blades. The aluminum reflector below the styrofoam insulation panel had also come loose. I reattached it and reassembled the refrigerator in reverse order. The noise is gone!
Parts Used:
-
Eric from NEW YORK, NY
-
Difficulty Level:A Bit Difficult
-
Total Repair Time:1- 2 hours
-
Tools:Nutdriver, Screw drivers
6 of 8 people
found this instruction helpful.
Was this instruction helpful to you?
Thank you for voting!
Would not defrost
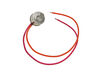
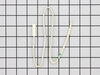
Replaced defrost thermostat along with temp sensor watched the video on this page simple fix
Parts Used:
-
Rachel from LUDOWICI, GA
-
Difficulty Level:Really Easy
-
Total Repair Time:Less than 15 mins
-
Tools:Screw drivers
5 of 5 people
found this instruction helpful.
Was this instruction helpful to you?
Thank you for voting!
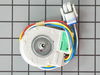
Noisey evap motor
I tried to quite the noisey evap motor with special liquid motor grease from Radio Shack. It did not work, so I ordered the evap motor. My freezer motor was wired slightly different than the motor I received. The replacement motor had a male plug attached to the four wires, the original motor was different, so I cut the wires and spliced them into the original freezer wires (colors were the same). Remounted motor. Works great, and no more groaning motor
Peter
Peter
Parts Used:
-
Peter from Kalispell, MT
-
Difficulty Level:Easy
-
Total Repair Time:30 - 60 mins
-
Tools:Nutdriver
7 of 11 people
found this instruction helpful.
Was this instruction helpful to you?
Thank you for voting!
Rotating "auger" in ice bucket bent/jammed.
-
Robert from Graysville, TN
-
Difficulty Level:Really Easy
-
Total Repair Time:Less than 15 mins
6 of 8 people
found this instruction helpful.
Was this instruction helpful to you?
Thank you for voting!
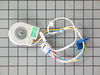
Refrigerator was noisy when running. The noise increased with time and got so loud it hurt your ears with a high pitch sound.
Empy all the food from the freezer and remove the ice container and the lower ice maker section with a 1/4 inch nut driver, unplug the unit and set aside. Remove all shelving and set aside. Remove light cover and unscrew the bulb and remove. Remove cover/with light fixture by removing the necessary screws with the nut driver. The cover has the fan assembly attached; unplug and remove fan assembly, remove the thermistor from coil attached with a clip. Reassemble in the reverse procedure.
Parts Used:
-
Randolph from Lynchburg, VA
-
Difficulty Level:A Bit Difficult
-
Total Repair Time:1- 2 hours
-
Tools:Nutdriver, Screw drivers, Wrench set
9 of 17 people
found this instruction helpful.
Was this instruction helpful to you?
Thank you for voting!
auger which is made of plastic broke and the bucket also had a crack in it
pulled out broken bucket and auger assy. and slid in the replacement. works great so far. The easiest part was ordering the part and it didn't take very long at all to get it. Customer Service was very good at getting the job done. Thanks
Parts Used:
-
David from Punta Gorda, FL
-
Difficulty Level:Really Easy
-
Total Repair Time:Less than 15 mins
7 of 11 people
found this instruction helpful.
Was this instruction helpful to you?
Thank you for voting!
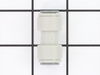
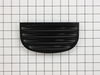
Plastic water line leaking
Removed the bottom front cover, under the two doors, unclipped the water line to have better access, removed old Union connector, cut about a 1/4' off each side of the line, pushed both sides of line in Union Connector, checked for leaks, all done.
Parts Used:
-
Naz from Rocklin, CA
-
Difficulty Level:Easy
-
Total Repair Time:Less than 15 mins
7 of 12 people
found this instruction helpful.
Was this instruction helpful to you?
Thank you for voting!
water reservoir had a hole in it
easy, the ge part had correct length tubing. used the push in connectors, and a screw driver. much easier than anticipated.
Parts Used:

-
James from La Grange, IL
-
Difficulty Level:Really Easy
-
Total Repair Time:1- 2 hours
-
Tools:Screw drivers
5 of 6 people
found this instruction helpful.
Was this instruction helpful to you?
Thank you for voting!
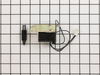
Ice maker solenoid failure
several times I had to remove the ice maker door solenoid due to it sticking. I ordered a new one from parts select. Problem solved!!!
Parts Used:
-
Robert from Mahopac, NY
-
Difficulty Level:Easy
-
Total Repair Time:Less than 15 mins
-
Tools:Screw drivers
5 of 6 people
found this instruction helpful.
Was this instruction helpful to you?
Thank you for voting!
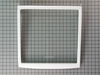
The original shelf was out of square. I tried to adjust it a little and one of the brackets broke off.
I removed the original shelf, took the glass portion off of the bracing and installed the replacement. The replacement was square and fit just fine so I installed it, put the shelf back on top and it works fine.
It was so easy to order the part through here. There were picture breakdowns so you could see exactly what you needed and order the correct part.
It was so easy to order the part through here. There were picture breakdowns so you could see exactly what you needed and order the correct part.
Parts Used:
-
Jennifer from Fircrest, WA
-
Difficulty Level:Really Easy
-
Total Repair Time:Less than 15 mins
5 of 6 people
found this instruction helpful.
Was this instruction helpful to you?
Thank you for voting!
Ice cubes froze in the tray and frost was all underneath
I read stories from the website how others did it so I figured I would give it a try. I put all the frozen stuff in the refrigerator piled up. Took out the shelves. Took out 2 screws with a socket extension ( nut driver will work fine.) Remove the light bulb. lifted up on the back panel...it came right out. Saw the coils and on top the sensor. Took it off, cut the wires, spliced in the color coded new one ( pink to pink, orange to orange) Stuck it in the top coil in the original position and crossed my fingers! I put all the pieces back easily, restocked the freezer and waited. HOORAY!! My ice cubes are all separate and free. NO frost inside. A very easy fix for $20.
Note: If there is a large amount of ice build up on your coils a hair dryer works great. The drain is on the bottom anyway. Also , you may want to seal around the wire nuts to keep moisture out. I did
Note: If there is a large amount of ice build up on your coils a hair dryer works great. The drain is on the bottom anyway. Also , you may want to seal around the wire nuts to keep moisture out. I did
Parts Used:
-
Michael from Sylva, NC
-
Difficulty Level:Easy
-
Total Repair Time:30 - 60 mins
-
Tools:Socket set
5 of 6 people
found this instruction helpful.
Was this instruction helpful to you?
Thank you for voting!
Ice maker door didn't open and close properly
I removed the outer plate by sticking a very small screwdriver in the small holes at the bottom of the plate and pulling the plate toward me.
I then removed the 4 screws from the internal plate and pulled the plate toward me.
Then I romoved the 3 screws holding the old solenoid and unplugged it.
Next I put the new solenoid in place and replaced the three screws.
Finally I plugged in the solenoid and replaced the internal and external plates.
I then removed the 4 screws from the internal plate and pulled the plate toward me.
Then I romoved the 3 screws holding the old solenoid and unplugged it.
Next I put the new solenoid in place and replaced the three screws.
Finally I plugged in the solenoid and replaced the internal and external plates.
Parts Used:
-
M Alan from Lebanon, TN
-
Difficulty Level:Really Easy
-
Total Repair Time:15 - 30 mins
-
Tools:Screw drivers
5 of 6 people
found this instruction helpful.
Was this instruction helpful to you?
Thank you for voting!
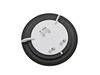
Ice chute frosted up
Procedure for Replacing the Ice Chute Plate
1. Turn off the power.
2. Snap off the outside trim ring. Use a plastic screwdriver to avoid scratching the cabinet.
3. Locate the three small holes below the control panel facing, just above ice chute. The center hole is not used. With a small, blunt, object (wire – blunted nail) that is slightly smaller than the holes, push up rather firmly up through the outer holes to release front control panel.
4. Remove the three wire connectors from printed circuit board. Firmly pull/pry them straight out of retaining clip. Use caution: Excessive force will break clips.
5. Release the secondary panel by removing four screws (one in each corner).
6. Remove the flap assembly.
7. Clean all accessible areas with 1/10 bleach water to sanitize. Rinse the cleaned area with clear water and thoroughly dry everything before re-assembling the panel.
8. Install the new flap assembly.
9. Re-installed everything in the reverse order and check the functionality.
10. Order a spare ice chute flapper to be ready for the next event.
1. Turn off the power.
2. Snap off the outside trim ring. Use a plastic screwdriver to avoid scratching the cabinet.
3. Locate the three small holes below the control panel facing, just above ice chute. The center hole is not used. With a small, blunt, object (wire – blunted nail) that is slightly smaller than the holes, push up rather firmly up through the outer holes to release front control panel.
4. Remove the three wire connectors from printed circuit board. Firmly pull/pry them straight out of retaining clip. Use caution: Excessive force will break clips.
5. Release the secondary panel by removing four screws (one in each corner).
6. Remove the flap assembly.
7. Clean all accessible areas with 1/10 bleach water to sanitize. Rinse the cleaned area with clear water and thoroughly dry everything before re-assembling the panel.
8. Install the new flap assembly.
9. Re-installed everything in the reverse order and check the functionality.
10. Order a spare ice chute flapper to be ready for the next event.
Parts Used:
-
Phillip from Springfield, VA
-
Difficulty Level:Easy
-
Total Repair Time:30 - 60 mins
-
Tools:Screw drivers
6 of 9 people
found this instruction helpful.
Was this instruction helpful to you?
Thank you for voting!