















GRT21LRGD2 Gibson Refrigerator - Instructions
Keep searches simple. Use keywords, e.g. "leaking", "pump", "broken" or "fit".
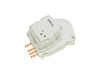
frezzer iceing over and not cooling the refrigerator
Just removed the two screws and unpluged it.
Then I pluged the new one in and replaced the screws. It runs like a brand new reffrigerator.
Thanks for the fast delevery. Will do busness with you in the future.
Then I pluged the new one in and replaced the screws. It runs like a brand new reffrigerator.
Thanks for the fast delevery. Will do busness with you in the future.
Parts Used:
-
Marcus from Pine Hill, AL
-
Difficulty Level:Really Easy
-
Total Repair Time:Less than 15 mins
1 of 4 people
found this instruction helpful.
Was this instruction helpful to you?
Thank you for voting!
The door end caps were broken and not fixable
I simply placed the retention bar between the new end caps and popped it into place. Took about 10 seconds to complete.
Parts Used:
-
Ryan from Coralville, IA
-
Difficulty Level:Really Easy
-
Total Repair Time:Less than 15 mins
0 of 1 people
found this instruction helpful.
Was this instruction helpful to you?
Thank you for voting!
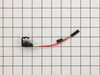
refrigerator and freezer not cooling
removed screws with from the back panel of the freezer; located defrost thermostat attached to coil with a metal clip; unplugged thermostat and replaced with the new one. Put every thing back together and it works perfectly.
Parts Used:
-
Jimmie from Simms, TX
-
Difficulty Level:Really Easy
-
Total Repair Time:Less than 15 mins
-
Tools:Nutdriver
1 of 5 people
found this instruction helpful.
Was this instruction helpful to you?
Thank you for voting!
We Are Moving Out Of Military Housing And We Had To Replace The Freezer Door Holder Before We Moved Or We Would Have Had To Pay For The Wholr Refrigerator
We replace the end pieces to hook the holder back on the door.
Parts Used:
-
Christopher from Fort Sill, OK
-
Difficulty Level:Really Easy
-
Total Repair Time:Less than 15 mins
0 of 2 people
found this instruction helpful.
Was this instruction helpful to you?
Thank you for voting!
Fridge was getting warm while the freezer was cold and running constantly.
After testing and eliminating the temperature control and the timer as the problem, I turned to the thermostat. I had to wait for the ice buildup to thaw and then could remove the rear freezer panel (this was the 3rd time: first, to discover the ice buildup causing the problem, second when it came back after a complete thaw and test the thermostat, and this time to put the Partselect thermostat back in). My thermostat was visibly damaged from water melting into ice and expanding the casing and eventually breaking one of the connections. I connected the thermostat connection wires (not recommended) to get by while ordering the part, which shipped faster than local repair places could get it from their warehouses, and at a fraction of the cost. I'm really impressed with partselect's fast service and all the knowledgable customers who have explained how they installed them. I now have an intimate knowledge of how my fridge works and saved hundreds in repair, or twice that in replacement. Thanks!
Parts Used:
-
Jeremiah from Northglenn, CO
-
Difficulty Level:Easy
-
Total Repair Time:Less than 15 mins
-
Tools:Nutdriver
0 of 2 people
found this instruction helpful.
Was this instruction helpful to you?
Thank you for voting!
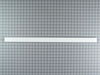
broken shelf bar with missing end brackets.
Ordered the parts from the product discription (photo) as well as chart showing actual size. Got the parts( in two separate shipments) cut the bar to length and snapped them inot place. Bingo!
Parts Used:
-
Robert from Oconomowoc, WI
-
Difficulty Level:Really Easy
-
Total Repair Time:Less than 15 mins
0 of 2 people
found this instruction helpful.
Was this instruction helpful to you?
Thank you for voting!
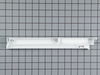
could not use the meat drawer as it kept falling off
I removed the screws that were in the original part that had a broken plastic endpiece on it. Put the new hanging rail on with the screwdriver and good as new!. I also replace some clips that were worn out and kept coming off when I put too much in the freezer doors. They were snap on so it took less than a minute to replace all 4 that I ordered. Now my refriderator and freezer work like it new and doesn't keep falling apart.
Parts Used:
-
Jeffrey from Baltimore, MD
-
Difficulty Level:Really Easy
-
Total Repair Time:Less than 15 mins
-
Tools:Screw drivers
0 of 2 people
found this instruction helpful.
Was this instruction helpful to you?
Thank you for voting!
leaking water down into fridge
-
Ronald from Defiance, OH
-
Difficulty Level:Really Easy
-
Total Repair Time:15 - 30 mins
-
Tools:Nutdriver, Screw drivers
0 of 2 people
found this instruction helpful.
Was this instruction helpful to you?
Thank you for voting!
Getting the light socket to snap back in properly
-
Robert from HELENA, AL
-
Difficulty Level:A Bit Difficult
-
Total Repair Time:Less than 15 mins
-
Tools:Screw drivers
1 of 5 people
found this instruction helpful.
Was this instruction helpful to you?
Thank you for voting!
Freezer was building up ice. Running constantly.
Parts Select is an excellent source for help and parts identification. I highly recomend them.
My first option was to replace the defrost timer.
After still getting ice and frost buildup in freezer I decided to replace the defrost thermostat.
Remove all shelves. Losen icemaker if applicable. Remove light cover and bulb. Remove all screws securing rear vertical cover. Carefully move back panel, disconnect icemaker and bulb assembly. carefully remove styrofoam cover at upper left and remove defrost thermostat. I tested the thermostat and found it was defective. It would not close circuit after being placed in a working freezer. Reverse procedure to replace thermostat.
This solved the problem
My first option was to replace the defrost timer.
After still getting ice and frost buildup in freezer I decided to replace the defrost thermostat.
Remove all shelves. Losen icemaker if applicable. Remove light cover and bulb. Remove all screws securing rear vertical cover. Carefully move back panel, disconnect icemaker and bulb assembly. carefully remove styrofoam cover at upper left and remove defrost thermostat. I tested the thermostat and found it was defective. It would not close circuit after being placed in a working freezer. Reverse procedure to replace thermostat.
This solved the problem
Parts Used:
-
eugene from norwalk, CT
-
Difficulty Level:Really Easy
-
Total Repair Time:30 - 60 mins
-
Tools:Nutdriver, Screw drivers
0 of 2 people
found this instruction helpful.
Was this instruction helpful to you?
Thank you for voting!
coil Iceing up
took 4 screws out of the discharge vent on top of the refrigerator section and unpluged the wiring harness and put the section on the counter and unscrewed the timer and put the new one in and reinstalled the assembly and plugged the Jack and put the 4 screws back in, and rotated the timer and put it on defrost removed the back and check the heaters and drain .
Parts Used:
-
Thomas from Stuart, FL
-
Difficulty Level:Really Easy
-
Total Repair Time:15 - 30 mins
-
Tools:Nutdriver, Screw drivers
0 of 2 people
found this instruction helpful.
Was this instruction helpful to you?
Thank you for voting!
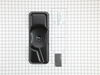
Deforst Drain Pan rusted out
The old drain pan had a 1 ½” tall bushing attached to the center of the pan. The new pan did not have this bushing which was great. I had to cut about 1 inch off the bushing to remove the old pan. Also after cutting the bushing I had to screw the bushing off after cutting the old pan from the bushing. I installed new pan onto the ½” of threads that was left on the top of the compressor. Checked repair two days later all was great.
Parts Used:
-
Gerald from Goldsboro, NC
-
Difficulty Level:A Bit Difficult
-
Total Repair Time:30 - 60 mins
-
Tools:Wrench set
Was this instruction helpful to you?
Thank you for voting!
Heater not coming on - coil frosting up- freezer and Refrig. warm
The instructions given to me by part Select were very good.I replaced the Timer- checked the heater with oham meter it was good- checked the door weather striping it was good and replaced the thermostat with new .So at this point I may need to call a professional unless some one has another solution.
Parts Used:
-
James from merrillville, IN
-
Difficulty Level:Easy
-
Total Repair Time:30 - 60 mins
-
Tools:Pliers, Screw drivers
Was this instruction helpful to you?
Thank you for voting!
Freezer and refrigerator were warm
Thermostat-Thawed freezer, took out drawers and loosened drawer track(back screw)to help remove back panel. Removed five screws from back panel with nut driver and slide panel up and out. Removed thermostat from coils. Two wire connectors pulled apart. Spring loaded connection on coil pulled off. Placed new part from partselect.(reversing sequence) Timer-Took two screws out from behind kickplate at bottom left of freezer. Pulled connector thermostat out of connector. Replaced with new timer. Turned plastic dial on timer until it clicked. Frig turned on, one week ago. Everything appears to be fine.If it doesn't freeze up in the next two weeks, I will start feeling real good.
Parts Used:
-
Gregg from hershey, PA
-
Difficulty Level:Easy
-
Total Repair Time:30 - 60 mins
-
Tools:Nutdriver, Screw drivers
Was this instruction helpful to you?
Thank you for voting!
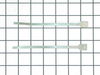
Freezer was freezing up and would run all the time and not cycle off.
Unplug the refrigerator. You will ultimately need to remove the back panel of the freezer. But first, you will need to unscrew 2 screws on a small vertical fan vent and unscrew two screws on the fan. Maneuver the fan out of the round hole in the back panel and unplug the 3 prong wire connection. Then remove the fan. Unscrew the 4 remaining visible screwson the back pannel and remove the panel. This will expose the freon coils. On this model, the heater has two connections at the top of the coils. Unplug those wire connections. The heater extends down each side of the coils and along the bottom of the coils. Unhook two aluminum ties that connect the heater element to the coils. These ties stabilize the heater element and also prevents any current from flowing along the element because of the touching of two different metalic parts. Maneuver the heater element out of the coils. To install the new heater, reverse the above process beginning with installing the new heater element. If it hasn't already been done, it is good idea to test the old heater element with an ohm meter to make sure that the element is actually bad. The circuit should be open. This is the second heater element that I had to replace on this refrigerator, and it was actually burned in half both times, so I knew for sure the element was bad. Then test the new element to make sure it is good, and start the installation..
Parts Used:
-
Ronnie from Abbott, TX
-
Difficulty Level:A Bit Difficult
-
Total Repair Time:30 - 60 mins
-
Tools:Nutdriver, Pliers, Screw drivers
Was this instruction helpful to you?
Thank you for voting!