















GRS22PRBW0 Gibson Refrigerator - Instructions
Keep searches simple. Use keywords, e.g. "leaking", "pump", "broken" or "fit".
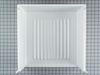
drawer had broken side rails
I removed old drawer. Then I removed the front face panel. I had to wedge the knife in the front bottom so I could remove the face. Installed face on new drawer. Inserted new drawer in fridge.
Voila ! Works great.
Voila ! Works great.
Parts Used:
-
Dan from Lakewood, CO
-
Difficulty Level:Really Easy
-
Total Repair Time:Less than 15 mins
0 of 1 people
found this instruction helpful.
Was this instruction helpful to you?
Thank you for voting!
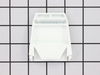
Wrong size listed on website.
The end cap is easy to remove and replace. The personnel at PartSelect was extremely helpful in re-ordering the correct part.
Parts Used:
-
Elizabeth from Weems, VA
-
Difficulty Level:Really Easy
-
Total Repair Time:Less than 15 mins
0 of 1 people
found this instruction helpful.
Was this instruction helpful to you?
Thank you for voting!
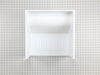
Drawers had broken due to age
Founds parts I needed here. Customer service was very helpful. Parts arrived in very short time frame 1-4 days.
Parts Used:
-
Michael from Tampa, FL
-
Difficulty Level:Really Easy
-
Total Repair Time:Less than 15 mins
0 of 1 people
found this instruction helpful.
Was this instruction helpful to you?
Thank you for voting!
broken drawer
I removed old drawer, removed face plate, installed faceplate on new drawer. Test OK.
Parts Used:
-
Michael from Wesley Chapel, FL
-
Difficulty Level:Really Easy
-
Total Repair Time:Less than 15 mins
0 of 1 people
found this instruction helpful.
Was this instruction helpful to you?
Thank you for voting!
The Bulldog grabbed the Meat and Cheese!
Lower Door in Fridge Broke and all the Meats and Cheeses came tumbling out...Bulldog grabbed a bunch of it and gobbled it down ...so I looked up the part on Wednesday and ordered it, received it on Friday (really fast without paying extra)...took out meat and cheese that was left, presssed old front piece onto new drawer and slid it into place...meat and cheese now safe from bulldog again!!! Thanks PartSelect.com!
Parts Used:
-
Scott from Alexandria, VA
-
Difficulty Level:Really Easy
-
Total Repair Time:Less than 15 mins
0 of 1 people
found this instruction helpful.
Was this instruction helpful to you?
Thank you for voting!
Broken track on upper storage drawer
No tools required! Easy as falling off a log! Drawer face snaps off and reinstalls on new drawer body; slide it in track and you're good to go.
Parts Used:
-
M from Louisville, KY
-
Difficulty Level:Really Easy
-
Total Repair Time:Less than 15 mins
0 of 1 people
found this instruction helpful.
Was this instruction helpful to you?
Thank you for voting!
broken slide rail on lower storage drawer
-
Michael from Anna, IL
-
Difficulty Level:Really Easy
-
Total Repair Time:Less than 15 mins
0 of 1 people
found this instruction helpful.
Was this instruction helpful to you?
Thank you for voting!
drawer slide broke,needed new drawer
I took my time to remove the front off of the old drawer,by gently prying it apart with two screwdrivers, this was the hardest part, the front installed very easily . The shippiong time was 2 days instead of three. Will use partselect again.
Parts Used:
-
Eugene from Hollywood, MD
-
Difficulty Level:Easy
-
Total Repair Time:Less than 15 mins
-
Tools:Screw drivers
0 of 1 people
found this instruction helpful.
Was this instruction helpful to you?
Thank you for voting!
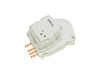
Freezer built ice, fridge not cold enough and running constantly.
Removed front low grill, removed the two screws that hold the element in place. I then pulled the element out about 3 inches and disconnected the wires. Reversed process to install new timer.
Parts Used:
-
LUIS from CENTENNIAL, CO
-
Difficulty Level:Really Easy
-
Total Repair Time:Less than 15 mins
-
Tools:Screw drivers
1 of 4 people
found this instruction helpful.
Was this instruction helpful to you?
Thank you for voting!
broken rail inserts that hold the drawer up and in place
-
LK from LAWRENCE, KS
-
Difficulty Level:Really Easy
-
Total Repair Time:Less than 15 mins
0 of 1 people
found this instruction helpful.
Was this instruction helpful to you?
Thank you for voting!
Broken storage drawer
First I removed the old drawer front. When put the old front onto the new drawer I noticed that the two little rubber plugs had nowhere to push into as the holes were not drilled out. I got my portable drill and drilled out the holes, then I slid the drawer front into place snapped it in and pushed in the plugs.
Parts Used:
-
Jeff from Willoughby, OH
-
Difficulty Level:Really Easy
-
Total Repair Time:15 - 30 mins
0 of 1 people
found this instruction helpful.
Was this instruction helpful to you?
Thank you for voting!
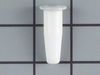
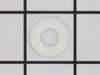
Left bottom part of door rusting out
took door off. sanded rusting hinge and greased. installed door hinge washer. I had to install a larger washer over hinge bearing to help support the door where it was rusting. no sweat. works like its new. thanks to you guys for having the parts.
Parts Used:
-
William from Moulton, TX
-
Difficulty Level:Easy
-
Total Repair Time:15 - 30 mins
-
Tools:Pliers, Socket set
0 of 1 people
found this instruction helpful.
Was this instruction helpful to you?
Thank you for voting!
loud noise fan blade broke,off balance
take 1/4 hex screws out clean out dust ,remove old fan blade replace with new install bolts .
Parts Used:

-
EDWIN from ELWOOD, IN
-
Difficulty Level:Really Easy
-
Total Repair Time:15 - 30 mins
-
Tools:Nutdriver
0 of 1 people
found this instruction helpful.
Was this instruction helpful to you?
Thank you for voting!
freezer worked frig was warm. Ice maker is still not working
Removed two screws to get to defrost time pull panel down remove two screws holding time and reinstall
Parts Used:
-
steve from Kirkland, WA
-
Difficulty Level:Really Easy
-
Total Repair Time:15 - 30 mins
-
Tools:Screw drivers
0 of 1 people
found this instruction helpful.
Was this instruction helpful to you?
Thank you for voting!
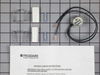
Freezer okay, but fridge was warm
Website was great!
The defrost timer was right in front. 2 minutes and a screwdriver and I had it replaced.
To replace the thermostat, I had to take out the back panel, defrost it and then install the new part. the only problem was that the heatshrink tubing they sent was too large. Otherwise, it worked great.
The defrost timer was right in front. 2 minutes and a screwdriver and I had it replaced.
To replace the thermostat, I had to take out the back panel, defrost it and then install the new part. the only problem was that the heatshrink tubing they sent was too large. Otherwise, it worked great.
Parts Used:
-
brad from minneapolis, MN
-
Difficulty Level:Easy
-
Total Repair Time:30 - 60 mins
-
Tools:Nutdriver, Screw drivers
0 of 1 people
found this instruction helpful.
Was this instruction helpful to you?
Thank you for voting!