















GRCR3620ZWW-1 General Electric Range - Instructions
Keep searches simple. Use keywords, e.g. "leaking", "pump", "broken" or "fit".
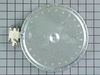
Large burner would not get hot
Repair was very simple. Removed 2 screws under the cooktop, tilt the cooktop back, unplug 4 wires from 8" burner, remove two screws holding retaining clips, install new burner in reverse order. Very simple!
Parts Used:
-
Kevin from Leominster, MA
-
Difficulty Level:Easy
-
Total Repair Time:Less than 15 mins
-
Tools:Nutdriver, Screw drivers
70 of 95 people
found this instruction helpful.
Was this instruction helpful to you?
Thank you for voting!
Coil Burned Out
Open lid,un screw coil,pop in new coil snap holders in place,then cook a steak
Parts Used:

-
Frank from St Augustine, FL
-
Difficulty Level:Really Easy
-
Total Repair Time:15 - 30 mins
-
Tools:Screw drivers
62 of 93 people
found this instruction helpful.
Was this instruction helpful to you?
Thank you for voting!
Heating element burned out.
Unplugged range. Opened oven door and removed two screws from top of oven opening. Lifted oven top and propped up
with a 2 x 3.Unscrewed the two screws that were holding
with a 2 x 3.Unscrewed the two screws that were holding
Parts Used:
-
LANCE from ORELAND, PA
-
Difficulty Level:Really Easy
-
Total Repair Time:15 - 30 mins
-
Tools:Screw drivers
41 of 62 people
found this instruction helpful.
Was this instruction helpful to you?
Thank you for voting!
Left rear element would not get hot.
FIRST TURN OFF THE CIRCUIT BREAKERS THAT POWER THE COOKTOP!! Remove the cooktop from the counter by removing the screws from the mounting straps under the counter. Then remove the screws that hold the glass cooktop to the frame and lift off the glass top. Next lift up the bad element and unplug one wire from the bad element and plug it into the new element. Make sure to put it on the exact same terminal of the new element. Do this for all the wires. Remove the two mounting tabs from the old element and put them on the new element. Turn on circuit breakers and your done.
Parts Used:
-
John from Hopewell Junction, NY
-
Difficulty Level:Easy
-
Total Repair Time:15 - 30 mins
-
Tools:Nutdriver, Screw drivers
19 of 25 people
found this instruction helpful.
Was this instruction helpful to you?
Thank you for voting!
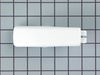
Oven Door Bracket Broke
After several temporary fixes, one of the end caps finally broke completely, so the handle fell off. Ordered both caps, they arrived remarkably fast, and were installed easily.
Parts Used:
-
Scott from Columbia, MD
-
Difficulty Level:Really Easy
-
Total Repair Time:15 - 30 mins
-
Tools:Pliers, Screw drivers
14 of 23 people
found this instruction helpful.
Was this instruction helpful to you?
Thank you for voting!
The small burner inside the double burner shortd out.
The first thing was to watch U-Tube . The replacement burner was being
replaced in a GE glass top range. Exter tools were required than depicted
in the U-Tube project. The project overall was not dificult for me however I was a general contracter for over 25 years
replaced in a GE glass top range. Exter tools were required than depicted
in the U-Tube project. The project overall was not dificult for me however I was a general contracter for over 25 years
Parts Used:
-
david from PORT ORANGE, FL
-
Difficulty Level:Easy
-
Total Repair Time:30 - 60 mins
-
Tools:Nutdriver, Pliers, Screw drivers, Socket set
5 of 5 people
found this instruction helpful.
Was this instruction helpful to you?
Thank you for voting!
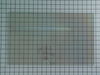
broken inner glass
I removed the oven door by unlocking the hinges and pulling out. Set on workbench (with towel/pad) and removed handle, four screws, then bottom and inside panel screws, then one nut to finally be able to get at the inner glass insert. Removed insulation and then took an extra hour to really clean all surfaces (middle glass was quite greasy due to inner glass being broken for a while. Reassembly wasn't bad, but took a while to figure out that the two thin 2" red spacers belonged around the two handle screws. This was tough to figure out as they come off when taking the handle off, but you can't see them, so didn't know where they came from! Anyway, if you're just a bit handy, you can do this job.
Parts Used:
-
Sharon from EDISON, NJ
-
Difficulty Level:A Bit Difficult
-
Total Repair Time:1- 2 hours
-
Tools:Screw drivers, Wrench (Adjustable)
4 of 4 people
found this instruction helpful.
Was this instruction helpful to you?
Thank you for voting!
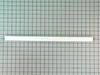
replaced door handle and end caps
the first end cap broke when I tried to tighten the screws, the end cap holes were too small, Thirty some dollars down the drain. Drilled out the second end cap before I tighten the screws, worked fine. Make sure you drill out the holes of the end caps or they will split out and you lose your money. There are no warnings about this problem.
Parts Used:
-
Thomas from COXS CREEK, KY
-
Difficulty Level:Really Easy
-
Total Repair Time:15 - 30 mins
-
Tools:Screw drivers
4 of 5 people
found this instruction helpful.
Was this instruction helpful to you?
Thank you for voting!
Small front burner on our glass top stove died.
Robert did not do the repairs. I did! 70 year old housewife. I watched a Utube video and thought I could certainly handle that. Ordered my part from your site. It came in two days. Burnet was replaced in under 20 minutes by me! Anyone can do this. Super easy, parts just plug in.
Parts Used:
-
Robert from FLEMING ISLE, FL
-
Difficulty Level:Really Easy
-
Total Repair Time:15 - 30 mins
-
Tools:Screw drivers
3 of 3 people
found this instruction helpful.
Was this instruction helpful to you?
Thank you for voting!
remove and replace

-
Perry from Flushing, NY
-
Difficulty Level:Really Easy
-
Total Repair Time:Less than 15 mins
10 of 24 people
found this instruction helpful.
Was this instruction helpful to you?
Thank you for voting!
replaced more for cosmetic reasons
Your support team helped tremendously in ordering the parts. Parts arrived in only 2 days. Upon taking the door off the oven we had to remove several screws, then more screws. Was able to take it almost fully apart, replace old broken parts with new. Putting it back together was like a puzzle. We did it though and saved money! Thanks
Parts Used:

-
Glenda from Port Richey, FL
-
Difficulty Level:A Bit Difficult
-
Total Repair Time:1- 2 hours
-
Tools:Screw drivers
4 of 7 people
found this instruction helpful.
Was this instruction helpful to you?
Thank you for voting!
bottom trim had rusted, so we needed new piece
Removed oven door (made sure hinges were locked open and stayed open). Remove part on top of trim, removed rusted trim and replaced with new trim. Replaced part on top of trim and screwed all back together. Put oven door back on and unlocked hinges. It was easier than the trial run (when I hadn't realized that the hinges weren't locked open!)
Parts Used:
-
Robin from Apple Valley, MN
-
Difficulty Level:Really Easy
-
Total Repair Time:Less than 15 mins
-
Tools:Socket set
3 of 4 people
found this instruction helpful.
Was this instruction helpful to you?
Thank you for voting!
rusted trim strip
-
Larry from Sarasota, FL
-
Difficulty Level:Really Easy
-
Total Repair Time:15 - 30 mins
-
Tools:Socket set
3 of 5 people
found this instruction helpful.
Was this instruction helpful to you?
Thank you for voting!
The trim piece on the bottom of the door was rusted making the unit look really dirty and used.
It was pretty simple. Just remove the door as the bottom piece holds all the parts together. Place on table top and remove old trim. Install new trim and install door. The only difficult part was the trim had a space for the glass door front. I opened up the space so that the glass would seat easier. Went together real easy. Stove looks like it's brand new.
Parts Used:
-
Glenn from West Melbourne, FL
-
Difficulty Level:Really Easy
-
Total Repair Time:15 - 30 mins
-
Tools:Nutdriver
2 of 2 people
found this instruction helpful.
Was this instruction helpful to you?
Thank you for voting!
No Spin Cycle
Lid Switch.
Rewiring connection.
Function is satisfactory.
Fan belt ordered is saved.
A 1970 Clothes Washer.
Rewiring connection.
Function is satisfactory.
Fan belt ordered is saved.
A 1970 Clothes Washer.
Parts Used:

-
Richard from LORDSBURG, NM
-
Difficulty Level:Really Easy
-
Total Repair Time:30 - 60 mins
-
Tools:Nutdriver, Pliers, Screw drivers, Socket set, Wrench (Adjustable)
2 of 2 people
found this instruction helpful.
Was this instruction helpful to you?
Thank you for voting!