















GR2SHKXKB03 Whirlpool Refrigerator - Instructions
Keep searches simple. Use keywords, e.g. "leaking", "pump", "broken" or "fit".
defective light switch
inserted a knife between the switch and the plastic interior in order to pop the switch out.
then took off the 2 wires on the old switch put them on the new switch and reinserted the switch into the plastic interior.
then took off the 2 wires on the old switch put them on the new switch and reinserted the switch into the plastic interior.
Parts Used:

-
THOMAS from WILLARD, OH
-
Difficulty Level:Really Easy
-
Total Repair Time:Less than 15 mins
3 of 4 people
found this instruction helpful.
Was this instruction helpful to you?
Thank you for voting!
Light switch wasn't working.. As I would close the door I would notice our frig light wasn't going off...
I simply removed the old switch by gently pulling down on the old switch with a screwdriver. When it was about half way out I just gently pulled down on the old switch and it popped out... I removed the two connectors attached to the old switch by pulling on the connectors with a pliers...I tried using my fingers but wasn't able to pull the connectors off so I used pliers. It worked perfectly.. When pulling off the old connectors, make sure you attach the new switch to the same tabs on the new switch... It was very easy to do and took under 5 mins.....The light switch works perfect....P.S. You should unplug the frig while making the connection just in case....Safety first....!!!
Parts Used:
-
David from Hemet, CA
-
Difficulty Level:Really Easy
-
Total Repair Time:Less than 15 mins
-
Tools:Pliers, Screw drivers
3 of 4 people
found this instruction helpful.
Was this instruction helpful to you?
Thank you for voting!
changed the light bulb still would not work so I figured it was the switch sure enough.
I took a chance and ordered a switch that is next to the top of the door. looked for how to remove it easily done in ten minutes works fine last long time.
Parts Used:
-
anthony from HAVELOCK, NC
-
Difficulty Level:Really Easy
-
Total Repair Time:15 - 30 mins
3 of 4 people
found this instruction helpful.
Was this instruction helpful to you?
Thank you for voting!
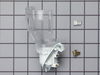
the light socket broke apart
I took out the old socket by moving a clip. Reattached the electrical wires, clicked in the socket and that was it.
Parts Used:
-
Elyse from Skokie, IL
-
Difficulty Level:Really Easy
-
Total Repair Time:15 - 30 mins
-
Tools:Screw drivers
4 of 7 people
found this instruction helpful.
Was this instruction helpful to you?
Thank you for voting!
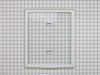
Missing shelf from refrigator that was in house I purchased.
-
Doris from TUSTIN, MI
-
Difficulty Level:Very Easy
-
Total Repair Time:Less than 15 mins
3 of 4 people
found this instruction helpful.
Was this instruction helpful to you?
Thank you for voting!
Freezer Bulb failed
-
Kevin from SWANVILLE, ME
-
Difficulty Level:Very Easy
-
Total Repair Time:Less than 15 mins
3 of 5 people
found this instruction helpful.
Was this instruction helpful to you?
Thank you for voting!
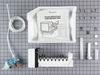
ice maker
-
Ann from MC CUNE, KS
-
Difficulty Level:Really Easy
-
Total Repair Time:30 - 60 mins
2 of 2 people
found this instruction helpful.
Was this instruction helpful to you?
Thank you for voting!
Door would pop open. I cleaned gasket made sure nothing in the way of door. Gasket was cracked top and bottom it worked better but the seal was not good.
Did just like the video showed took doors off daughter helped take off doors so easy put door on blanket. My daughter 38 went to town putting it on just watch the corners so easy two days after installation the door seals great. You can do this.
Parts Used:
-
Roy from KAUFMAN, TX
-
Difficulty Level:Really Easy
-
Total Repair Time:30 - 60 mins
-
Tools:Nutdriver
2 of 2 people
found this instruction helpful.
Was this instruction helpful to you?
Thank you for voting!
Overload was open
New part was similar, except contact blade was for a full 1/4", my model utilizes 1/8". So I cut the blade in half with a hacksaw, filed off the rough edges and reassemblied the connector; attached it to the compressor
Now being a retired electronic engineer; who's great idea was it to hide a klixon inside the connector?
Now being a retired electronic engineer; who's great idea was it to hide a klixon inside the connector?
Parts Used:

-
richard from galena, KS
-
Difficulty Level:A Bit Difficult
-
Total Repair Time:30 - 60 mins
-
Tools:Screw drivers
4 of 8 people
found this instruction helpful.
Was this instruction helpful to you?
Thank you for voting!
TOO COLD FREEZER, TOO WARM REFRIGERATOR, EVAP FAN FROZEN SOLID
I just followed the directions on the video of my specific model. Make a note of where to locate that video of your model, as there are many other videos of other models that can have different parts located in different areas and it can be time consuming finding the exact video you want again.
Also note that you must make mental or written notes on exactly what direction any parts you remove are facing, this can save huge amounts of time when reassembling.
I was worried that I might need other parts, but decided to do one part replacement at a time since this unit is a spare and no urgency to get it back working again. I found that the evaporator fan was the only thing needed! The fridge works like new again!
Also note that you must make mental or written notes on exactly what direction any parts you remove are facing, this can save huge amounts of time when reassembling.
I was worried that I might need other parts, but decided to do one part replacement at a time since this unit is a spare and no urgency to get it back working again. I found that the evaporator fan was the only thing needed! The fridge works like new again!
Parts Used:

-
William from GRANTS PASS, OR
-
Difficulty Level:Easy
-
Total Repair Time:1- 2 hours
-
Tools:Nutdriver, Pliers
2 of 2 people
found this instruction helpful.
Was this instruction helpful to you?
Thank you for voting!
Ice buildup in freezer causing leaking water into fridge section
In my case the defrost thermostat was not the problem. Not worth going through the hassle of checking the thermostat as I would have had to cut it out and test it in another freezer (while the food that was in the freezer was being stored elsewhere). I just ended up buying it and replacing it. So, like I said the defrost thermostat was NOT the issue. I ended up getting a drain tube heater strap, and have been keeping my eye on the fridge. It hasn't been long enough to say the strap fixed the problem, but all indications are pointing to that being the case.
Parts Used:

-
Diane from Brighton, MI
-
Difficulty Level:Very Easy
-
Total Repair Time:30 - 60 mins
-
Tools:Nutdriver, Pliers
2 of 2 people
found this instruction helpful.
Was this instruction helpful to you?
Thank you for voting!
The freezer worked fine but the refrigerator wasn’t getting cold.
I removed the flat panel inside freezer & fan blades not turning. I removed 2 1/4” screws, unplugged wires took fan motor out & put that fan blade on new fan motor. Plugged wires into new motor replaced 2 bolts, reinstalled flat panel plugged refrigerator in & reset temperature controls. The next day checked temperature and was all done.
Parts Used:
-
Ray from Wiggins, MS
-
Difficulty Level:Really Easy
-
Total Repair Time:30 - 60 mins
-
Tools:Nutdriver, Screw drivers
2 of 2 people
found this instruction helpful.
Was this instruction helpful to you?
Thank you for voting!
OLDER Ice Maker on the fritz
Grat help on the phone. We saw repair on YouTube. my wife and I worked it together. It was child's play!! It went beautifully. we were able to "chill out" with ice aplenty!!Thanks...eric
Parts Used:
-
Eric S from Boca Raton, FL
-
Difficulty Level:Really Easy
-
Total Repair Time:15 - 30 mins
-
Tools:Nutdriver, Wrench set
6 of 14 people
found this instruction helpful.
Was this instruction helpful to you?
Thank you for voting!
My crisper cover frame broke
It was very easy just took out the old broken crisper cover frame out and put in the new one. Simple as that.
Parts Used:
-
Linda from ROCK ISLAND, IL
-
Difficulty Level:Very Easy
-
Total Repair Time:Less than 15 mins
2 of 2 people
found this instruction helpful.
Was this instruction helpful to you?
Thank you for voting!
Faulty light socket
-
Larry from HOUSTON, TX
-
Difficulty Level:Very Easy
-
Total Repair Time:15 - 30 mins
-
Tools:Screw drivers
3 of 5 people
found this instruction helpful.
Was this instruction helpful to you?
Thank you for voting!