















GLGF376DBA Frigidaire Range - Instructions
Keep searches simple. Use keywords, e.g. "leaking", "pump", "broken" or "fit".
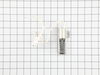
Oven would not light
Working on an old oven is difficult. Please expect the unexpected. The years of heating and cooling play havoc with oven parts. The screws holding the Flat Style Oven Ignitor become stripped. It took extra time to remove them. I had to go to the hardware store to buy replacement screws. Once I removed the old parts and had replacement screws the job was very easy.
Parts Used:
-
Ronald from LONG BRANCH, NJ
-
Difficulty Level:Easy
-
Total Repair Time:More than 2 hours
-
Tools:Nutdriver, Screw drivers, Socket set
6 of 7 people
found this instruction helpful.
Was this instruction helpful to you?
Thank you for voting!
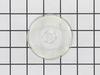
broken lens over oven light
Your service was OUTSTANDING...Ordered one afternoon, and before lunch time the next day, the delivery man rang my door bell...Thanks a bunch for you excellent service.....
Parts Used:
-
Leslie from Warsaw, VA
-
Difficulty Level:Really Easy
-
Total Repair Time:Less than 15 mins
11 of 22 people
found this instruction helpful.
Was this instruction helpful to you?
Thank you for voting!
Refrigerator Light bulb went out
I replaced the bulb using my hands to twist the bulb in the socket located at the top of the refrigerator.
Parts Used:

-
ANGELA from MEBANE, NC
-
Difficulty Level:Very Easy
-
Total Repair Time:Less than 15 mins
7 of 10 people
found this instruction helpful.
Was this instruction helpful to you?
Thank you for voting!
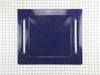
burnt in aluminum foil...unable to remove
took the two screws out by hand, slipped out the ruined panel, slid the new one in place, replaced the two screws...simple as that
Parts Used:
-
Michael from Lamoni, IA
-
Difficulty Level:Really Easy
-
Total Repair Time:Less than 15 mins
5 of 6 people
found this instruction helpful.
Was this instruction helpful to you?
Thank you for voting!
Rusted leveling foot
I couldn't unscrew the leveling foot because it was rusted and corroded. The bracket holding it was easy to remove so I took the bracket with the corroded foot off and replaced it with the new foot and bracket. Very simple. I made sure I oiled it so it wouldn't rust again.
Parts Used:

-
Melinda from Three Rivers, MA
-
Difficulty Level:Really Easy
-
Total Repair Time:Less than 15 mins
-
Tools:Pliers, Screw drivers, Socket set, Wrench (Adjustable)
6 of 9 people
found this instruction helpful.
Was this instruction helpful to you?
Thank you for voting!
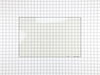
Broken ; oven door inner glass
Watched the repair video on your web site. Used the video as a step by step guide in the actual repair.
Parts Used:
-
Garland Futrell from CHESAPEAKE, VA
-
Difficulty Level:Very Easy
-
Total Repair Time:1- 2 hours
-
Tools:Screw drivers, Socket set
5 of 6 people
found this instruction helpful.
Was this instruction helpful to you?
Thank you for voting!
gas oven won't light
get liquid wrench, remove oven door(2 screws) remove oven bottom(2 screws) follow directions included with part. unplug or shut off electricity at breaker panel, Have a good light source.
Parts Used:
-
James from GRASS VALLEY, CA
-
Difficulty Level:Easy
-
Total Repair Time:30 - 60 mins
-
Tools:Nutdriver, Screw drivers
5 of 6 people
found this instruction helpful.
Was this instruction helpful to you?
Thank you for voting!
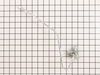
The bolts holding the readburner were rusted and broke
The range top had to be taken off along with the front panel to get access to the place the burner pipe connects. It took more time to unassemble and assemble the range than repacing the burner. The only issue was that the burner was sent without the bolts that will hold it in place so I had to go to local hardware store to get appropriate bolts.
Parts Used:
-
Neeru from Princeton, NJ
-
Difficulty Level:A Bit Difficult
-
Total Repair Time:30 - 60 mins
-
Tools:Nutdriver, Screw drivers, Wrench set
7 of 12 people
found this instruction helpful.
Was this instruction helpful to you?
Thank you for voting!
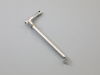
Replaced Bake Burner Tube on Frigidaire Gas Range Model FGGF3058RFC
The installation of the bake burner tube went well. I followed the instructions within the Video as it pertains to replacing the Bake igniter. That video also describes the removal and replacement of the bake burner tube. The original screws that mounted the igniter to the burner tube bracket were damaged. I replaced them with 18-8 Stainless Steel Serrated-Flange Hex Head Screws, 8-32 Thread Size, 3/8" long. As noted in the video, the oven bottom panel is removed using a flat head screwdriver. For all other screws I used a 1/4" socket and ratchet. A Nut Driver would have also worked just as well. On initial start-up after the repair there was a minor light odor from the flame coming into contact with the new metal burner tube that dissipated within a few moments. In all everything went very well.
Parts Used:
-
william from CLINTON TWP, MI
-
Difficulty Level:Easy
-
Total Repair Time:1- 2 hours
-
Tools:Screw drivers, Socket set
4 of 4 people
found this instruction helpful.
Was this instruction helpful to you?
Thank you for voting!
While removing burned out light bulb, the glass cover fell to the floor of the oven and broke!!
Husband very ill in bed. It's up to me!! Got a new bulb at HomeDepot and figured out how to get that wire 'thing' back in and the new glass cover installed. I DID IT!! WOW! My husband has always done these jobs around the house.......but now it's up to me.......and I'm not so dumb after all! I DID IT!! Now everyone who comes in the house.....I show them what I DID!! :-)
Parts Used:
-
Phyllis from GAINESVILLE, GA
-
Difficulty Level:Easy
-
Total Repair Time:Less than 15 mins
5 of 7 people
found this instruction helpful.
Was this instruction helpful to you?
Thank you for voting!
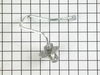
The wire for the electrode lighter broke off when I plied the top off to clean underneath (don’t take the top off unless you unbolt the burners first)
Turn off gas,unplug,unbolt the burners(you have to do this to keep from bending and or kinking over the gas lines.Luck kept me from bending the lines out of whack.)All I needed was the electrode but I couldn’t find it available separately.I had to buy the whole front burner.Anyway remove the clip from the new part slide the electrode out.Tilt the top of the range up take the clip off of the old electrode slide it out put the new one in install clip.Plug it in,rebolt all the burners in.Careful not to bend the gas lines.put the top down turn on the gas,plug it in and light.
Parts Used:
-
paul from STREATOR, IL
-
Difficulty Level:Really Easy
-
Total Repair Time:Less than 15 mins
-
Tools:Nutdriver
4 of 4 people
found this instruction helpful.
Was this instruction helpful to you?
Thank you for voting!
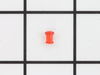
Lenses wore down and broke off making the actual indicator lights fall down behind the control panel since the lights connect to the lens.
Pulled stove out and unplugged it.
Used a Phillips screwdriver to take the back cover off of the control panel.
Each of the 7 lights connects to the red Indicator Light Lens via a slide clamp which is attached to the front of the light assembly. All you have to do is slide the lens into the hole from the outside of the control panel. Then with your other hand, pust the light assembly into the back of the lens and slide it to lock it in place. Repeat with the others.
Replace back cover.
Plug stove back in and slide back into place.
There are you tube videos out there to help you.
Used a Phillips screwdriver to take the back cover off of the control panel.
Each of the 7 lights connects to the red Indicator Light Lens via a slide clamp which is attached to the front of the light assembly. All you have to do is slide the lens into the hole from the outside of the control panel. Then with your other hand, pust the light assembly into the back of the lens and slide it to lock it in place. Repeat with the others.
Replace back cover.
Plug stove back in and slide back into place.
There are you tube videos out there to help you.
Parts Used:
-
Charles from OMAHA, NE
-
Difficulty Level:Really Easy
-
Total Repair Time:15 - 30 mins
-
Tools:Screw drivers
4 of 4 people
found this instruction helpful.
Was this instruction helpful to you?
Thank you for voting!
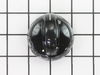
Lost the metal part inside snob and it was loose.
Simple. Removed the old ones and pushed the new knobs on. Took about 2 seconds.
Parts Used:
-
Katherine from Reading, PA
-
Difficulty Level:Really Easy
-
Total Repair Time:Less than 15 mins
5 of 7 people
found this instruction helpful.
Was this instruction helpful to you?
Thank you for voting!
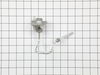
broken line
-
Ronald from Russellville, KY
-
Difficulty Level:Really Easy
-
Total Repair Time:30 - 60 mins
-
Tools:Nutdriver, Wrench (Adjustable)
5 of 7 people
found this instruction helpful.
Was this instruction helpful to you?
Thank you for voting!
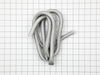
The seal around the oven door had frayed on the end and come loose.
We carefully pulled the old seal out of the door ( staples hold it in place).Then took the replacement and laid it around the door. Starting at one side we adjusted the seal and pushed the staples into place. Making sure we folded the ends, we used a spoon to push them into the slots.
Parts Used:
-
Connie from CANYON LAKE, TX
-
Difficulty Level:Really Easy
-
Total Repair Time:Less than 15 mins
4 of 4 people
found this instruction helpful.
Was this instruction helpful to you?
Thank you for voting!