















GFS185 Refrigerator - Instructions
Keep searches simple. Use keywords, e.g. "leaking", "pump", "broken" or "fit".
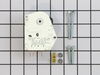
How to get timer out of defrost cycle?
Talked to local appliance repair tech, who explained how to manually turn timer with a screw driver and listen to the switch go from on to off.
Parts Used:
-
David from Virginia Beach, VA
-
Difficulty Level:A Bit Difficult
-
Total Repair Time:15 - 30 mins
-
Tools:Socket set
Was this instruction helpful to you?
Thank you for voting!
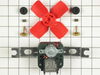
Repalce evaporator fan
The evaporator fan is located in the freezer behind the back wall. If you have the ice maker remove it first then remove the screws on the top of the panel. You will notice the side brackets for the top shelf will make it hard to remve the panal but by slitly binding the center the panal came right out. The fan is held in a bracke tha comes right out. The wire unplu right from the fan so do not try to unplg the seal plug to the left side. Swap the fan with the new one useing the new rubber monts re-connect the wires and reasymble. Put the bottom of the back panal in first then work each side in past the shelf bracket binding the center slightly.
Parts Used:
-
William from Ledyard, CT
-
Difficulty Level:Easy
-
Total Repair Time:15 - 30 mins
-
Tools:Nutdriver, Screw drivers
Was this instruction helpful to you?
Thank you for voting!
no problems at at all
removed rear wall panel took off old fan motor disconnected motor. Installed new grommets re-installed motor inserted new fan. Didn't have to trim fan re-connected wires and rear panel and reconnected power. no problems...
Parts Used:
-
Eliseo from Pleasanton, TX
-
Difficulty Level:Really Easy
-
Total Repair Time:15 - 30 mins
-
Tools:Nutdriver, Pliers, Screw drivers
Was this instruction helpful to you?
Thank you for voting!
rReally Noisy Fan
1. Unplug Refrigerator 2. Remove inside back freezer panel. (4 Screws) 3. Remove Duct Cover (3 Screws). 4. Cut electrical connections to fan. 5. Remove Old Fan motor (2 hex screws. 6. Install ground wire (was not one there previously). 7. Put slide-on electrical connectors on remaining 2 motor wires. (Were not any on original unit.) 8. Replace Fan Motor (Don't forget the rubber vibration pads) 9. Reconnect electrical wires. 10. Press on plastic fan blade. 11. Plug in refrigerator to test install. It works. 12 Unplug refrigerator and replace ducting and back panel to freezer. Plug it back in. Voila, Quiet again.
Parts Used:
-
Robert from Sierra Vista, AZ
-
Difficulty Level:Easy
-
Total Repair Time:15 - 30 mins
-
Tools:Nutdriver, Screw drivers
Was this instruction helpful to you?
Thank you for voting!
Evaporator motor squeal.
After finding an almost obsolete part( thanks PartSelect!) the installation was rather easy. Remove the back panel of the freezer and vent with a screwdriver and a nut driver. Disconnect the three wires, green, white and red.Remove motor from mounting and replace with new motor. I had to make a slight adjustment to the ground wire on the new motor that required adjusting the position of the contact-no big deal. The motor fit perfectly. Popped fan on and assembled. 20 minutes max.
Parts Used:
-
Steven from Hilliard, OH
-
Difficulty Level:Easy
-
Total Repair Time:15 - 30 mins
-
Tools:Nutdriver, Screw drivers
Was this instruction helpful to you?
Thank you for voting!
Both the freezer and bottom of refrig too hot
Was very simple once I found out where the defrost timer was located. I had a friend walking me through trying to find the location on the phone. Not all models have them in the same place. Once the part was located all I had to do was remove the cover, unplug the old one and plug the new one in just the way the old one came off. The black wire was easy to locate on the old and just matched it up. Put the cover back on and plugged it in. It was no time till I started feeling it cool. Checked both top and bottom with thermomater and it was where it should be within 12 hours. I am happy and using it again. Was almost ready to throw it out. Did not know it was so cheap to fix one. Nothing anyone can't handle. If this woman can do it anyone can.
Parts Used:
-
Marcia from Kansas, OK
-
Difficulty Level:Easy
-
Total Repair Time:15 - 30 mins
-
Tools:Nutdriver, Screw drivers
Was this instruction helpful to you?
Thank you for voting!
See below
The defrost timer that I ordered form you did the trick. My fridge was
running all the time and the fridge temp was 55 but the freezer was 10
below. The instructions did not say how to test the old one to compare with
the new on. However in the Readers Digest Home Repair book it did and the
test proved that it was defective. Your article said that with the system I
had, 65% on the time it was the timer. I ordered it and thank you it works
just fine. I do have another problem, maybe you can help. The fridge runs
for 6 minuets and stays off for 10 minuets. The temp in the freezer is 0
and the fridge is 35-40 on the warmest settings, but all is well.
Thank you
running all the time and the fridge temp was 55 but the freezer was 10
below. The instructions did not say how to test the old one to compare with
the new on. However in the Readers Digest Home Repair book it did and the
test proved that it was defective. Your article said that with the system I
had, 65% on the time it was the timer. I ordered it and thank you it works
just fine. I do have another problem, maybe you can help. The fridge runs
for 6 minuets and stays off for 10 minuets. The temp in the freezer is 0
and the fridge is 35-40 on the warmest settings, but all is well.
Thank you
Parts Used:
-
Patricia from Hobe Sound, FL
-
Difficulty Level:Really Easy
-
Total Repair Time:15 - 30 mins
-
Tools:Nutdriver, Screw drivers
Was this instruction helpful to you?
Thank you for voting!