















GDT665SBN2TS General Electric Dishwasher - Instructions
Keep searches simple. Use keywords, e.g. "leaking", "pump", "broken" or "fit".
Dishwasher would quit after about 3-4 minutes.
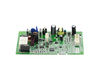
Decided it could be 1 of 3 things. Fuse on main circuit board that controls hot water. Main control board or drain pump failure. Was not able to find out how to do diagnostics on this unit as there is no "cycle control" feature and this is a top of the line unit. Replaced the fuse and dishwasher failed. Replaced the circuit board and dishwasher failed the first time. Second time it went to completion and has worked properly since. You can go on line and find videos on removing the circuit board for GE dishwashers. This can be done without pulling the dishwasher out. Remove the lower black dust panel and insulation. Remove cover to electrical box - 1 screw and remove. Remove 2 to 4 screw on a sheet metal bracket that holds the circuit board. Notice where 2 metal hangers are located if you remove 4 screws on the left and right side of machine as they drop out. Remove black corded door sensor under circuit board. Work the sheet metal back and forth to remove from dish washer so that circuit board is exposed. Remove circuit board connectors and pull out unit to install new circuit board. Some have one screw and some have only plastic retainers. Re-install. I did not need the drain pump and the circuit board comes with a control board fuse. Washer was only 14 months old and 2 months out of warranty.
Parts Used:
-
Gary from ARLINGTON, WA
-
Difficulty Level:Very Easy
-
Total Repair Time:30 - 60 mins
-
Tools:Screw drivers, Socket set
22 of 22 people
found this instruction helpful.
Was this instruction helpful to you?
Thank you for voting!
Dishwasher would not fill with water and would shut off
I found it online! There were step by step instructions that were easy to understand. I have never had to do anything like this in my life, only recently had to start doing everything around the house myself due to husband's illness.
The repairman came out, charged me $100 to determine what the dishwasher needed & left me with the part number. He was going to charge me $389 to install the part and they were over charging for the part. The repairman suggested I just get a new dishwasher.
I ordered the part from the website at 1/2 the price that the other place charges and found it on line. With the step by step instructions and the online page, I successfully installed it MYSELF. Saved me a ton of $$.
I LOVE the website
Thank You!!!!
The repairman came out, charged me $100 to determine what the dishwasher needed & left me with the part number. He was going to charge me $389 to install the part and they were over charging for the part. The repairman suggested I just get a new dishwasher.
I ordered the part from the website at 1/2 the price that the other place charges and found it on line. With the step by step instructions and the online page, I successfully installed it MYSELF. Saved me a ton of $$.
I LOVE the website
Thank You!!!!
Parts Used:
-
Linda from MYRTLE BEACH, SC
-
Difficulty Level:Easy
-
Total Repair Time:More than 2 hours
-
Tools:Nutdriver, Pliers, Screw drivers, Wrench (Adjustable)
18 of 21 people
found this instruction helpful.
Was this instruction helpful to you?
Thank you for voting!
Dishwasher leaking from the bottom of the door.
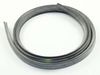
Process of elimination and a visit to my local repair store told me it was wise to try the tub gasket, and according to partselect.com, it solved the problem a majority of the time. My local repair dealer agreed: Try it. They agreed because for them to replace a lower door gasket AND the $10 tub gasket... if they came out, the service call and parts would equal half the cost to replace the whole dishwasher. So I bought a tub gasket from partselect.com and replaced the old one. It worked, it was easy, so if your same make & model is leaking? Try it first. That's my advice.
Parts Used:
-
Marty from TRAVERSE CITY, MI
-
Difficulty Level:Easy
-
Total Repair Time:Less than 15 mins
12 of 21 people
found this instruction helpful.
Was this instruction helpful to you?
Thank you for voting!
Original Silverware Basket Broken
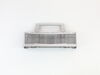
Removed original silverware basket from dishwasher rack. Replaced it with new silverware basket. Placed original silverware basket in recycle bin (plastic content). So easy, even my 24 year old son could do it!
Parts Used:
-
Craig from Cedar Rapids, IA
-
Difficulty Level:Really Easy
-
Total Repair Time:Less than 15 mins
10 of 15 people
found this instruction helpful.
Was this instruction helpful to you?
Thank you for voting!
Water leaking from bottom of Dishwasher
Replaced old gasket with new one. More difficult than expected, because new gasket was much stiffer than old one. Also, the yellow centering spot on gasket (to line up with top latch) was nearly impossible to see. Unfortunately, this did not solve the problem for me, so money was wasted. Bought new dishwasher.
Parts Used:
-
G from GLEN COVE, NY
-
Difficulty Level:A Bit Difficult
-
Total Repair Time:15 - 30 mins
8 of 11 people
found this instruction helpful.
Was this instruction helpful to you?
Thank you for voting!
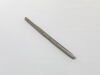
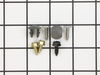
Old Trim Tub Pieces were bent from an improper installation
I have them to the plumber who was reinstalling a poorly installed dishwasher. Parts worked perfectly
Parts Used:
-
Mark from BRUCE TWP, MI
-
Difficulty Level:Really Easy
-
Total Repair Time:30 - 60 mins
6 of 6 people
found this instruction helpful.
Was this instruction helpful to you?
Thank you for voting!
Bad control board caused dishwasher to stop before finishing cycle.
Pretty easy repair for this model dishwasher…
1. Turn breaker for dishwasher off.
2. Remove front lower kickplate.
3. Remove small wire connector from dishwasher door to control board connector on lower right side.
4. remove one screw to remove power wiring junction box cover on lower right side.
5. Remove wire nuts securing dishwasher power wires to incoming power leads.
6. Remove 2 screws holding junction box to dishwasher frame and move out of the way of the plastic control board shroud.
7. Remove screws holding control board shroud and lower control board.
8. Disconnect 3 electrical connectors from board.
9. Remove screw holding control board to shroud.
10. Install new control board into shroud in same orientation, reinstall electrical connectors, reinstall board/shroud assembly, reinstall junction box, reconnect power wires with wire nuts and electrical tape as required, install junction box cover, reconnect door connector to board, reinstall kickplate, turn circuit breaker back on.
1. Turn breaker for dishwasher off.
2. Remove front lower kickplate.
3. Remove small wire connector from dishwasher door to control board connector on lower right side.
4. remove one screw to remove power wiring junction box cover on lower right side.
5. Remove wire nuts securing dishwasher power wires to incoming power leads.
6. Remove 2 screws holding junction box to dishwasher frame and move out of the way of the plastic control board shroud.
7. Remove screws holding control board shroud and lower control board.
8. Disconnect 3 electrical connectors from board.
9. Remove screw holding control board to shroud.
10. Install new control board into shroud in same orientation, reinstall electrical connectors, reinstall board/shroud assembly, reinstall junction box, reconnect power wires with wire nuts and electrical tape as required, install junction box cover, reconnect door connector to board, reinstall kickplate, turn circuit breaker back on.
Parts Used:
-
Travis from NEW MARKET, MD
-
Difficulty Level:Easy
-
Total Repair Time:15 - 30 mins
-
Tools:Nutdriver
5 of 5 people
found this instruction helpful.
Was this instruction helpful to you?
Thank you for voting!
leaking from somewhere around tub
the actual gasket tub seal was easy, 10 minutes. The trim tub gaskets were a pain because I had to uninstall the dishwasher (not plumbing or electrical) then pull it out from the cabinet, remove old trim and re-install. Re-leveled dishwasher, screwed into side of cabinets but it still leaks. Can't figure out where but after replacing all the trim and gaskets its very frustrating.
Parts Used:
-
jeff from FORT COLLINS, CO
-
Difficulty Level:A Bit Difficult
-
Total Repair Time:1- 2 hours
-
Tools:Pliers, Screw drivers, Wrench (Adjustable)
4 of 5 people
found this instruction helpful.
Was this instruction helpful to you?
Thank you for voting!
Old silverware basket wore through and melamine utensils fell through and stuck to heating element which cost me $100 for repairman to remove
-
Diana from NAPLES, FL
-
Difficulty Level:Very Easy
-
Total Repair Time:Less than 15 mins
3 of 4 people
found this instruction helpful.
Was this instruction helpful to you?
Thank you for voting!
Dishwasher tub was leaking
Simply removed old gasket by hand, lined up center of new gasket (white dot was printed on the center of new gasket) with the tub latch and pressed new gasket into place. We have used the dishwasher about a dozen times since and hasn't leaked a drop.
Parts Used:
-
Philip from TOLLAND, CT
-
Difficulty Level:Very Easy
-
Total Repair Time:Less than 15 mins
2 of 2 people
found this instruction helpful.
Was this instruction helpful to you?
Thank you for voting!
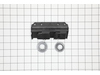
roller wheel was melted.
I removed the old roller wheels and the new roller wheels snapped together and the simple instructions made the repair quick and simple..
Parts Used:
-
Julian T from Dalton, GA
-
Difficulty Level:Really Easy
-
Total Repair Time:30 - 60 mins
2 of 2 people
found this instruction helpful.
Was this instruction helpful to you?
Thank you for voting!
Dishwasher door was leaking at bottom.
When new gasket arrived almost two weeks after it was sent out from Green Bay, I took out old gasket, marking which side was in and which out.
Then, with hands, fit new gasket in place making sure it was centered.
No leaking; it worked.
Thanks.
Then, with hands, fit new gasket in place making sure it was centered.
No leaking; it worked.
Thanks.
Parts Used:
-
Neil from NEW YORK, NY
-
Difficulty Level:Easy
-
Total Repair Time:15 - 30 mins
2 of 2 people
found this instruction helpful.
Was this instruction helpful to you?
Thank you for voting!
Replace the middle flatware basket
So easy, even I was able to do it. Slide tabs back on defective basket and remove both sides, then slide the tabs onto new basket and place in dishwasher. All Done!
Parts Used:
-
Marc from Brambleton, VA
-
Difficulty Level:Really Easy
-
Total Repair Time:30 - 60 mins
1 person
found this instruction helpful.
Was this instruction helpful to you?
Thank you for voting!
Holes in old dishwasher basket
The replacement dishwasher basket easily fit in my dishwasher. Easy to order. Quick delivery. Highly recommended.
Parts Used:
-
James from FAIRFIELD, CT
-
Difficulty Level:Very Easy
-
Total Repair Time:Less than 15 mins
1 person
found this instruction helpful.
Was this instruction helpful to you?
Thank you for voting!
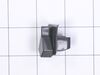
Dishwasher would not know door was closed
Parts diagram shows Striker can be popped out with screwdriver. Not true. It has a screw bolting it internally. Impossible to get to unless you disassemble the entire door. We took a power drill and small drill bit and bore it out like a cavity in a tooth. Needle nose pliers to extract the screw. Pretend your a dentist. Fixed it in 5 minutes. Replacement fit tight. A+
Parts Used:
-
Lesa from BETHALTO, IL
-
Difficulty Level:Very Difficult
-
Total Repair Time:30 - 60 mins
-
Tools:Pliers
1 person
found this instruction helpful.
Was this instruction helpful to you?
Thank you for voting!