















GDRC0KBXARBB General Electric Refrigerator - Instructions
Keep searches simple. Use keywords, e.g. "leaking", "pump", "broken" or "fit".
Change bulb

-
Louis from LEAGUE CITY, TX
-
Difficulty Level:Really Easy
-
Total Repair Time:30 - 60 mins
-
Tools:Nutdriver
3 of 8 people
found this instruction helpful.
Was this instruction helpful to you?
Thank you for voting!
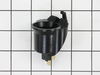
Short in the light socket.
Un Plugged the frig. Unlocked the socket by pressing down on the latch. Pulled the socket out ensuring I had enough slack. Unplugged the old socket installed the new. Plugged the frig back in. Tested the switch . Very easy-to-use.
Parts Used:
-
ED from ENON, OH
-
Difficulty Level:Very Easy
-
Total Repair Time:Less than 15 mins
1 of 2 people
found this instruction helpful.
Was this instruction helpful to you?
Thank you for voting!
Light burnt out.
Turned the wire protector to the side. Turned out the old bulb and replaced it with the new. Turned the wire protector back in place and I'm like new.
Parts Used:
-
Roscoe G from ROCHESTER, NY
-
Difficulty Level:Very Easy
-
Total Repair Time:Less than 15 mins
2 of 6 people
found this instruction helpful.
Was this instruction helpful to you?
Thank you for voting!
socket had melted
pluged the wire harness into the new socket from the back and snaped the socket in place.
Parts Used:
-
Chris from Charlotte, NC
-
Difficulty Level:Really Easy
-
Total Repair Time:Less than 15 mins
1 of 3 people
found this instruction helpful.
Was this instruction helpful to you?
Thank you for voting!
Light socket missing in refrigerator
Frig parts had been scavenged in an apartment complex. Restoring socket was only a matter of plugging in two spade contacts and clipping in socket.
Parts Used:
-
Wayne from Issaquah, WA
-
Difficulty Level:Really Easy
-
Total Repair Time:Less than 15 mins
1 of 4 people
found this instruction helpful.
Was this instruction helpful to you?
Thank you for voting!
broken slide drawer track
Took out shelf, unscrewed old track, screwed on new track. Only thing is not a standard flat or Phillips screw head so if you don't have a star head bit, you are out of luck.
Parts Used:
-
TREVOR from KENT, WA
-
Difficulty Level:Really Easy
-
Total Repair Time:Less than 15 mins
-
Tools:Wrench set
Was this instruction helpful to you?
Thank you for voting!
The plastic piece that holds the screw in on the pan of the refrigerator had broken
I took the pan out, replaced the bar with the new part - slide pan RH - and I was back in business. It couldn't have been easier.
Parts Used:
-
Kathleen from Burke, VA
-
Difficulty Level:Really Easy
-
Total Repair Time:Less than 15 mins
-
Tools:Screw drivers
Was this instruction helpful to you?
Thank you for voting!
light would not stay on
First I flipped breaker to off position for refigerator, Pulled down on socket and broke it free. Then took needle nose piars to pull wire and plug out from hole, so I could conect to new light socket then snaped it in place . Hardest part was getting wire and plug out of hole.
Parts Used:
-
Kenneth from Leavenworth, KS
-
Difficulty Level:Easy
-
Total Repair Time:Less than 15 mins
Was this instruction helpful to you?
Thank you for voting!
Guide rail cracked
My snack tray guide rail cracked and this was the easiest repair I've ever made.
Parts Used:
-
James from Brooklyn, NY
-
Difficulty Level:Easy
-
Total Repair Time:Less than 15 mins
-
Tools:Screw drivers
Was this instruction helpful to you?
Thank you for voting!
shelf brackets holding meat/cheese drawer cracked.
I unscrewed two brackets on each side (Had to buy the correct little screw driver) and screwed in the new ones.Easy!
Parts Used:

-
ELIZABETH from BOULDER, CO
-
Difficulty Level:Really Easy
-
Total Repair Time:Less than 15 mins
-
Tools:Screw drivers
Was this instruction helpful to you?
Thank you for voting!
Left Slide Pan Broke Off, Needed To Replace It
Remove entire shelf from refrigerator and removed broke, set the replacement part in place, screwed it in and it worked perfectly, done infive minutes. Took me longer to take out the self that to do the replacement.
Parts Used:
-
JULIA from WARWICK, NY
-
Difficulty Level:Really Easy
-
Total Repair Time:Less than 15 mins
-
Tools:Nutdriver, Socket set
Was this instruction helpful to you?
Thank you for voting!
Slide track on right side of chill tray, where it was held together, on the metal frame, the screw cracked the plastic.
Went to Sears, where I bought the Fridge, they could not locate the part I needed, so I went on line, and found partselect.com, entered the proper information, found the part I needed fast, ordered the part, received it in two days time, I already had the old part off, so it took less than ten minutes to replace it with the new part, works great, the people at partselect.com were great, an if needed, I will gladly order from them again.
Parts Used:
-
Richard from Jamestown, ND
-
Difficulty Level:Really Easy
-
Total Repair Time:Less than 15 mins
-
Tools:Screw drivers
Was this instruction helpful to you?
Thank you for voting!
needed new light socket
-
Charles from Williamsburg, VA
-
Difficulty Level:Really Easy
-
Total Repair Time:Less than 15 mins
Was this instruction helpful to you?
Thank you for voting!
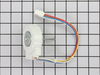
Refrigerator not cold enough
The repair is a snap, you can watch the video and it will put you on the right path. My story is more about the service that Part Select gave me. I used a small box fan on low as a temporary fix. My model number was worn off from the box wine we store in that particular place. So I ordered the part based on looks, well it was wrong. Called Part Select and we talked, the nice lady on the other end said OH it must be this fan motor. Send us back that one, and I'll get this out too you. I'll credit your account for $7.99, and it cost me $8.99 to ship back the wrong part. Wow, the next day I received the new motor. They sent it overnight! I thought it would be 5-6 days! Unbelievable. I will use this company for any, and all my repairs.
Parts Used:
-
Kevin from Ramona, CA
-
Difficulty Level:Really Easy
-
Total Repair Time:15 - 30 mins
-
Tools:Nutdriver, Screw drivers
Was this instruction helpful to you?
Thank you for voting!
compressor motor wouldn't start, so no refrigeration
My brother-in-law is a 15 year refrigeration technician who I called and described the problem to. He told me to put an "amp clamp" on the line side of the wires (black) that go to the starting controls on the side of the compressor. The motor has a label that has a number on it (LRA) that he used to determine the max amps it would pull. In this case, if the motor pulled 10 amps, then the motor was bad and I'd have to buy a new refrigerator. It was pulling less then 9 amps so he thought to buy a new overload, since the capacitor checked out (measured by multi-meter). As soon as the part came, I removed the back panel (4 screws removed by nut driver), removed the clip that holds the overload/capacitor assembly, detached the two wires from it, and removed the capacitor from the overload. I swapped in the new overload and repeated the above process in reverse. The only difficulty was that the new part was different in that the plug-in locations for the two wires were in different locations, and not marked. I had to disassemble the old part to figure out how it worked so I could deduce how the new one plugged in. Once that was solved, it was a quick fix. This was not a repair that just anyone could do; it required someone with a lot of experience to help me, and I am an engineer.
Parts Used:

-
William from Pasco, WA
-
Difficulty Level:A Bit Difficult
-
Total Repair Time:15 - 30 mins
-
Tools:Nutdriver, Pliers
Was this instruction helpful to you?
Thank you for voting!