















GDP670SGV0WW General Electric Dishwasher - Instructions
Keep searches simple. Use keywords, e.g. "leaking", "pump", "broken" or "fit".
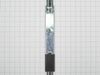
Guide Rail for Rack Broke
I determined the guide rail on one side had broke when the white plastic bearings fell out of their track. I decided to replace both sides at the same time, so I ordered 2. They arrived quickly and I installed them and placed the middle rack back into the dishwasher. Went together fairly easily. I took pictures before removing the guides from the rack, so I would remember how to put the new ones back one when they arrived. Very happy with this DIY repair that easily would have taken much longer and would have been way more expensive! Thank you!
Parts Used:
-
Cody from Denver, CO
-
Difficulty Level:Easy
-
Total Repair Time:30 - 60 mins
-
Tools:Nutdriver, Screw drivers
2 of 2 people
found this instruction helpful.
Was this instruction helpful to you?
Thank you for voting!
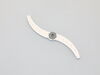
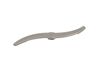
All 3 spray arms were stoped up.
Replaced all 3 spray arms in less than 10 minutes.The top one came in two pieces,the mounting bracket and the arm.Snap the bracket on the dishwasher first , then attach the arm to the bracket.
Parts Used:
-
Kenneth from SEBRING, FL
-
Difficulty Level:Very Easy
-
Total Repair Time:Less than 15 mins
-
Tools:Screw drivers
3 of 5 people
found this instruction helpful.
Was this instruction helpful to you?
Thank you for voting!
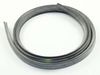
Dishwasher tub was leaking
Simply removed old gasket by hand, lined up center of new gasket (white dot was printed on the center of new gasket) with the tub latch and pressed new gasket into place. We have used the dishwasher about a dozen times since and hasn't leaked a drop.
Parts Used:
-
Philip from TOLLAND, CT
-
Difficulty Level:Very Easy
-
Total Repair Time:Less than 15 mins
2 of 2 people
found this instruction helpful.
Was this instruction helpful to you?
Thank you for voting!
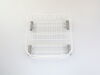
The lower dishwasher rack was rusting out. The rubber/epoxy coating was coming off causing rack to rust out.
-
Chris from LAS VEGAS, NV
-
Difficulty Level:Very Easy
-
Total Repair Time:Less than 15 mins
2 of 2 people
found this instruction helpful.
Was this instruction helpful to you?
Thank you for voting!
Dish rack prongs rusted and broke off
It wasnt exactly the right lower dish rack to hold silverware holder. Instead of the trouble of sending it back we will use it. Silverware holder takes up some of the space for other dishes.
Parts Used:
-
David from Hooksett, NH
-
Difficulty Level:Really Easy
-
Total Repair Time:Less than 15 mins
2 of 2 people
found this instruction helpful.
Was this instruction helpful to you?
Thank you for voting!
Holes in old dishwasher basket
The replacement dishwasher basket easily fit in my dishwasher. Easy to order. Quick delivery. Highly recommended.
Parts Used:
-
James from FAIRFIELD, CT
-
Difficulty Level:Very Easy
-
Total Repair Time:Less than 15 mins
1 person
found this instruction helpful.
Was this instruction helpful to you?
Thank you for voting!
Rusty bottom dishwasher basket
-
Robert from BYRON CENTER, MI
-
Difficulty Level:Very Easy
-
Total Repair Time:Less than 15 mins
1 person
found this instruction helpful.
Was this instruction helpful to you?
Thank you for voting!
The original rack was deteriorated and staining dishes.
-
john from FT WASHINGTON, MD
-
Difficulty Level:Very Easy
-
Total Repair Time:Less than 15 mins
1 person
found this instruction helpful.
Was this instruction helpful to you?
Thank you for voting!
as better as it gets
the part is OEM and fits like a glove. No worries. There is a minor variation in design and is not like for like design but fits exactly per specs and works. I have been looking for this part for years now. Thank you for PS for maintaining the inventory.
Parts Used:
-
Praveen from Monroe Township, NJ
-
Difficulty Level:Really Easy
-
Total Repair Time:Less than 15 mins
1 person
found this instruction helpful.
Was this instruction helpful to you?
Thank you for voting!
Rusty Lower Rack
-
Susan from MASON, OH
-
Difficulty Level:Very Easy
-
Total Repair Time:Less than 15 mins
1 person
found this instruction helpful.
Was this instruction helpful to you?
Thank you for voting!
Right part wrong description
I had to replace a docking port. Parts Select had the part, labeled as stainless, just as this survey indicates. Well folks, the part I received is 100% plastic. It it the correct part, just not stainless. Should it have been stainless due to a faulty plastic design? I don’t know.
I used Parts Select for the simple directions for installation. I was eventually linked to a YouTube video for a completely different docking port. Does my part slip on? Does it press in? I don’t know.
Needless to say, this has been a cheap but frustrating ordeal that is not yet over. Thanks for having the stainless, but really plastic, part and for having directions for some other part available.
I used Parts Select for the simple directions for installation. I was eventually linked to a YouTube video for a completely different docking port. Does my part slip on? Does it press in? I don’t know.
Needless to say, this has been a cheap but frustrating ordeal that is not yet over. Thanks for having the stainless, but really plastic, part and for having directions for some other part available.
Parts Used:

-
Al from HILTON HEAD, SC
-
Difficulty Level:Very Difficult
-
Total Repair Time:More than 2 hours
1 person
found this instruction helpful.
Was this instruction helpful to you?
Thank you for voting!
Lower try rusting out
Part was incorrect Compare that to GE site saying number on both ports to different parts try to return was half the course of what I paid ridiculous So apparently I'm stuck with it Check GE site you'll see the port is different from what your sound but the numbers are exactly the same No clips to support the utensil tray
Parts Used:
-
Ronald from cherry hill, NJ
-
Difficulty Level:Really Easy
-
Total Repair Time:30 - 60 mins
1 person
found this instruction helpful.
Was this instruction helpful to you?
Thank you for voting!
Replace the middle flatware basket
So easy, even I was able to do it. Slide tabs back on defective basket and remove both sides, then slide the tabs onto new basket and place in dishwasher. All Done!
Parts Used:
-
Marc from Brambleton, VA
-
Difficulty Level:Really Easy
-
Total Repair Time:30 - 60 mins
1 person
found this instruction helpful.
Was this instruction helpful to you?
Thank you for voting!
No lights showing on control panel
The Control panel wire harness got caught in the door hinge, got pinched and the Red wire got severed, I cut through the black protective mesh and reconnected the red wire, to prevent the wires from being damaged again I moved the wire harness over more to the left and secured it with tape.
Parts Used:

-
Gerald from PUEBLO WEST, CO
-
Difficulty Level:Easy
-
Total Repair Time:30 - 60 mins
-
Tools:Pliers, Screw drivers
1 of 2 people
found this instruction helpful.
Was this instruction helpful to you?
Thank you for voting!
Missing silverware basket
-
Thomas from Lancaster, CA
-
Difficulty Level:Really Easy
-
Total Repair Time:Less than 15 mins
1 of 2 people
found this instruction helpful.
Was this instruction helpful to you?
Thank you for voting!