















GCG21YESAFWW General Electric Refrigerator - Instructions
Keep searches simple. Use keywords, e.g. "leaking", "pump", "broken" or "fit".
The tempeture for both the freezer and the fridge would be all over the place
Troubleshot the tempeture sensors and the resistance was alot lower than the specs called for had to replace the evap fan being 1 of the sensors is connected to the evap fan . Start by removing all the food from the.freezer and bottom section of the fridge . Remove all the shelves and bins in freezer and shelf and drawers.on the lower section of the fridge .remove the ice bin , and the ice.machine remove the light shroud, and.bulbs, push tabs on the light sockets and pull the sockets from the housing.. and then push the sockets through the holes of housing remove all the screws from the rear wall from top to bottom upon removal of the section just under the ice.machine and behind the light socket you.will find the evap fan and it's bracket remove the 2 screws and pull straight up on the fan blade be carefully to not break its best to pull from the center of fan blade .remove the clip and thermistor that's connected to top of the evap coil. While your there remove the defrost thermostat to do this the clamp that holds it to the coil is a split clamp and you gently push on the clamp upper section and pull the lower section and it will seperate enough for you to remove the thermostat the other thermistors are in the fridge section 2 are on the divider wall behind the plastic oval plastic.housings one just above the the middle.of fridge the other is.lower section. And finally 1 more is at the very bottom of fridge last drawer on right hand side to.remove this you need to remove the light cover. Remove the plastic half round plastic deflector and the foam behind it remove the water reservoir screws and open the freezer at the bottom center wall at the back is a round plastic damper cover with a Phillip screw remove that ,on fridge side remove the 4 screws that hold the lower damper housing to the bottom of fridge gently and slowly work your way around the center seam and aeperate the upper cover of damper housing and expose the thermistor and replace. Note on all the thermistors just cut off enough to splice in replacement I personally used water tight heat shrink soldered type butts work great
Parts Used:
-
Joseph from CANOGA PARK, CA
-
Difficulty Level:Easy
-
Total Repair Time:30 - 60 mins
-
Tools:Nutdriver, Screw drivers
9 of 10 people
found this instruction helpful.
Was this instruction helpful to you?
Thank you for voting!
Icemaker flap not closing, frosting up
Watched video, however could not get outer casing off. Under the panel are three small holes, pushed up with an Allen key, used a small screwdriver to wedge out, came out easily, followed instructions from video on removing and replacing solenoid
Parts Used:
-
Graeme from Sarasota, FL
-
Difficulty Level:Easy
-
Total Repair Time:15 - 30 mins
-
Tools:Screw drivers
9 of 11 people
found this instruction helpful.
Was this instruction helpful to you?
Thank you for voting!
Fresh food section lights were all out, but the bulbs tested good elsewhere.
I popped the switch out using the blade of a small screwdriver and noticed that it connected with two wires via a slide on connector for each one. I noted the info on the old switch to identify which wire went to which terminal. I held each wire with a pair of pliers while I pulled the wire connector off the terminal on the old switch. I connected the two wires to the correct terminals on the new swith, and popped the switch back into the door frame. Easy, easy, easy and saved the $40 service call + parts cost!
Parts Used:
-
EDWARD from INDIAN WELLS, CA
-
Difficulty Level:Really Easy
-
Total Repair Time:Less than 15 mins
-
Tools:Pliers, Screw drivers
8 of 8 people
found this instruction helpful.
Was this instruction helpful to you?
Thank you for voting!
Fridge not cold
On this fridge, you MUST take out the ice maker. First took out the shelves. Then take out the ice maker. This is done by taking out the four screws on the side that hold the assembly containing the bulb. Then there is one screw that holds that assembly to the icemaker. Do not take out any other screws, this is a mistake I made that cost me a few more hours figuring out how to get the other parts to mount correctly to the assembly containing the bulb. The icemaker should lift right out once the white plus is unplugged from the assembly that holds the light. Then took out the shelf brackets and finally could remove rear panel. Found it all iced up as others have. Took 1.5 hours to manually defrost while using sponges to sop up all the water that would run into the drain if you let it. Was about a gallon of water so using sponges worked well. Heater was open when checked with a meter, but you could tell it was blown by the way it looked. All cloudy. Put things back in reverse order. Had an issue with the icemaker shooting water out and missing the icemaker. Eventually was able to align better. This fridge had also just stopped dispensing water. I think the lines may have been frozen in the back, because one day after defrosting manually, the water dispenser started working again Overall this took about 4 hours. But a few days later, the water dispenser again stopped working. Not sure about that one. I have a valve already that I will try for this issue but somehow I don't think its the valve.
Parts Used:
-
Christopher from Perkasie, PA
-
Difficulty Level:A Bit Difficult
-
Total Repair Time:More than 2 hours
-
Tools:Nutdriver, Pliers, Screw drivers, Socket set, Wrench set
9 of 11 people
found this instruction helpful.
Was this instruction helpful to you?
Thank you for voting!
Ice buildup. The Ice Machine was frosting over. Ice (due to frosting) would block the drop chute.
Unfortunately, the replacement part didn't come with instructions. The repair, nevertheless, was fairly straightforward. After removing the plastic parts that guide the ice through the door (by removing a few screws that attach the parts to the inside of the door), I was able to slip my hand into the ice maker dispenser and remove the old part. The part clips on. It is a tight fit through the funnel (from the outside of the freezer), however, and requires that the gasket first be "flipped" open wherein it unfolds 180 degrees. Doing this will make it easier to clip the new gasket onto the assembly.
Parts Used:
-
Tim from The Woodlands, TX
-
Difficulty Level:Really Easy
-
Total Repair Time:15 - 30 mins
-
Tools:Screw drivers
9 of 12 people
found this instruction helpful.
Was this instruction helpful to you?
Thank you for voting!
Ice maker door not opening
Removed panel from front of freezer door by pushing up on three spring loaded screws located in the opening where the ice door opens and closes. they are about 1 inch apart on the bottom of the opening. Push up to free ice maker panel. Remove three screws from solenoid, located at the top right. Remove wire, replace with new and that is it. Fixed the problem!! Our ice maker hadn't worked for months. Be careful if you remove the round ice maker door to clean. There is a spring that located on the left side of sprocket. The spring fell off and took me a while to figure where it came from. Recieved package in three days and the job took minutes. Works great! Very easy to complete.
Parts Used:
-
scott from lake orion, MI
-
Difficulty Level:Really Easy
-
Total Repair Time:Less than 15 mins
-
Tools:Nutdriver, Screw drivers
8 of 10 people
found this instruction helpful.
Was this instruction helpful to you?
Thank you for voting!
The eavporator coils were completely frozen which prevented fridge-freezer air circulation
1. Removed all food, shelves, and ice bin from freezer compartment.
2. Removed freezer light hood and unscrewed freezer bulb.
3. Removed rear evaporator cover panel (2 Phillip’s screws, 2 hex screws).
4. Melted ice on coils with hair blow dryer (needed bath towels to collected water).
5. Removed old defrost heater (2 Phillips screws, 2 plug-ins).
6. New heater connected without any adjustments.
7. Replaced evaporator cover ice bin, shelves and food.
2. Removed freezer light hood and unscrewed freezer bulb.
3. Removed rear evaporator cover panel (2 Phillip’s screws, 2 hex screws).
4. Melted ice on coils with hair blow dryer (needed bath towels to collected water).
5. Removed old defrost heater (2 Phillips screws, 2 plug-ins).
6. New heater connected without any adjustments.
7. Replaced evaporator cover ice bin, shelves and food.
Parts Used:
-
chris from GROVE CITY, OH
-
Difficulty Level:Really Easy
-
Total Repair Time:15 - 30 mins
-
Tools:Screw drivers, Socket set
7 of 7 people
found this instruction helpful.
Was this instruction helpful to you?
Thank you for voting!
frezer door light switch broke (I have 2 boys :)
The repaire guy came in tooke it out and told me it is goin to coast $20 for the part and $50 for the labor..... So I looked, It was soooo eeezzz ALL you have to do is get the switch out( with help of my butter knife :) it plugs in to a little outlet on the wire (on the botom side) so take out the old one and plug in the new one wich I got for $8 + $6 shipping = $15 THANK YOU PART SELECT for saving me $55 Im a 36 y/o stayathome mom and Ihave never don this before, Im very proud of my self. well... it was very easy!
Parts Used:
-
inessa from manalapan, NJ
-
Difficulty Level:Really Easy
-
Total Repair Time:Less than 15 mins
9 of 14 people
found this instruction helpful.
Was this instruction helpful to you?
Thank you for voting!
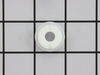
Groove for retainer clip on auger nut was broken out.
After removing three screws on the ice bucket, it basicly came apart by itself. I needed to use pliers to remove the old nut because it had over tightened itself onto the shaft. Be careful here - it is a left hand nut - not a normal right hand nut! Reassembly was a snap putting the parts back together in reverse order. Unit has been working great since the repair.
Parts Used:
-
William from Nazareth, PA
-
Difficulty Level:Easy
-
Total Repair Time:15 - 30 mins
-
Tools:Pliers, Screw drivers
13 of 26 people
found this instruction helpful.
Was this instruction helpful to you?
Thank you for voting!
coil would freeze up about every 2-3 weeks
took back panel off in freezer.unpluged unit then cut wire to sensor tie in new one wire nut them up and taped.on the heater strip took off two screws and unpluged two wires put the new in same way as taking old one off.I am pleased that the parts from part select came as fast as they did I would for sure buy from them again and prices were very fair.Thank you very much for your service.
Parts Used:
-
josephine from rochester, NY
-
Difficulty Level:Easy
-
Total Repair Time:15 - 30 mins
-
Tools:Nutdriver, Screw drivers
7 of 8 people
found this instruction helpful.
Was this instruction helpful to you?
Thank you for voting!
Evaporate coils freezing up-refrigerator/freezer warm
Level of difficulty, as far a mechanical skill goes is relatively easy; however, everything in the interior of the freezer (including icemaker) must be removed to get to the defrost thermostat. The defrost heater only needs the racks and back panel removed. It probably took about 45 minutes with a heat gun to melt the ice off of the coils so that I could work on it-need lots of towels/rags to pick up the water.
Parts Used:
-
JAMES from HENDERSON, CO
-
Difficulty Level:A Bit Difficult
-
Total Repair Time:1- 2 hours
-
Tools:Nutdriver, Screw drivers, Wrench set
7 of 8 people
found this instruction helpful.
Was this instruction helpful to you?
Thank you for voting!
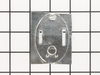
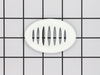
Refrigerator side freezing food
Replaced both temp sensors worked good for 2 days then began freezing food. Looked into it further on line. Found small motorized door broken that controls the cold air from the freezer
Parts Used:
-
M &M Aviation from ESCANABA, MI
-
Difficulty Level:Easy
-
Total Repair Time:15 - 30 mins
-
Tools:Screw drivers
7 of 8 people
found this instruction helpful.
Was this instruction helpful to you?
Thank you for voting!
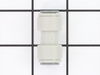
Water line was broken at the bottom of the freezer door.
There is no access to the inside of the door to replace the water line. I was able to insert a 1/4" drip line barbed connector into the old line at the base of the door and then connect that to a piece of the plastic tubing which I then connected back to the original water supply tubing with the 5/16" union. It took three attempts to get the tubing through the bottom hinge without a crimp in it. It's best to have a second person to hold the door while you "fish" the tubing through the hinge.
Parts Used:
-
Eugene from Palm Springs, CA
-
Difficulty Level:Difficult
-
Total Repair Time:1- 2 hours
-
Tools:Nutdriver, Screw drivers
8 of 12 people
found this instruction helpful.
Was this instruction helpful to you?
Thank you for voting!
The door when opened had swung back and made contact with the hinge. Over time it had bent the hinge upward so the pin was coming out of the door and it was not closing (sealing) properly.
I removed the screws out of the hinge while my wife put pressure on the door to hold it in place. I removed the hinge, replaced it with a new one, and screwed it back in place. Took just a couple of minutes. Easy and fast. The refrigerator was not leveled properly and that was why the door had swung back so fast, with enough force to eventually bend the hinge. I contacted geappliances.custhelp.com and used the chat option to speak to someone about how to lower the back wheels. They were extremely helpful in walking me through it. Now the refrigerator is leveled, and the door, when opened, will not swing back and contact the hinge. My overall experience in fixing this problem, from locating and ordering the correct part, to installing it, and then fixing the problem that led to the hinge being damaged in the first place, was outstanding.
Parts Used:

-
Bill from Pinehurst, NC
-
Difficulty Level:Really Easy
-
Total Repair Time:Less than 15 mins
-
Tools:Socket set
6 of 6 people
found this instruction helpful.
Was this instruction helpful to you?
Thank you for voting!
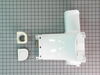
GE Profile Arctica food locker was below freezing
The trouble shooting information on the web site indicated that the damper door within the climate control unit may be broken. This was easily confirmed and the replacement of the climate control unit immediately returned the food locker temperatures to the digital electronic thermostat settings. The part has an improved ventilation gasket interface between the food locker and freezer. The unit works perfectly again, and the food locker temperature is exactly what the thermostat setting is.
Parts Used:
-
Frederick K from Kingston, TN
-
Difficulty Level:Easy
-
Total Repair Time:30 - 60 mins
-
Tools:Screw drivers
7 of 9 people
found this instruction helpful.
Was this instruction helpful to you?
Thank you for voting!