


FH6G1BAPK21 LG Washer - Overview
Models starting with FH6G1BAPK21
Click on the best match to narrow your results.
Keep searches simple, eg. "belt" or "pump".

Water Inlet Valve - Hot
PartSelect #: PS3527427
Manufacturer #: 5220FR2006H
The hot water inlet valve on your washing machine controls the water flow into the washer. This inlet valve has a standard hose fitting inlet and one water outlet. The water inlet valve opens to allow...
$35.80
In Stock

Drain Hose Cap
PartSelect #: PS3525750
Manufacturer #: 5006ER3009A
This drain hose plug, also known as a hose cap, is a genuine OEM part for your washing machine. This plug caps the drain hose from the pump housing, and helps prevent leaks from your washer. Before be...
No Longer Available


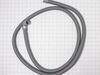
Drain Hose
PartSelect #: PS3527285
Manufacturer #: 5214FR3188G
This drain hose is a genuine OEM replacement part that is specially made for LG washing machines. It is a flexible rubber pipe designed to remove wastewater from the washer. When the washing machine g...
$41.07
In Stock

Heater Assembly
PartSelect #: PS3532212
Manufacturer #: AEG33121501
This heating element assembly warms water during wash cycles to improve cleaning performance. It's designed to deliver steady, consistent heat so your laundry comes out fresh and thoroughly cleaned.
$125.62
Special Order


Inlet Hose - Cold
PartSelect #: PS3635975
Manufacturer #: 5215FD3715V
Also known as the water supply hose.
$48.45
Special Order

Common Symptoms of models starting with FH6G1BAPK21
[Viewing 4 of 4]Leaking
Fixed by
these parts
these parts


Show All
Water Filling Issues
Fixed by
these parts
these parts
Show All
No hot or cold water
Fixed by
these parts
these parts
Show All
Will not drain
Fixed by
these parts
these parts
Show All

Keep searches simple. Use keywords, e.g. "leaking", "pump", "broken" or "fit".
Water was filling continues even the machine was unplugged
I did repaired while looking at video at your site .thanks to your team ..
Parts Used:
-
Sanjay from HOLTSVILLE, NY
-
Difficulty Level:Really Easy
-
Total Repair Time:Less than 15 mins
-
Tools:Pliers, Screw drivers, Wrench (Adjustable)
20 of 24 people
found this instruction helpful.
Was this instruction helpful to you?
Thank you for voting!
Water leaking on the floor under the washer.
Unplug the washer! Turn off the HOT water valve. Remove the hot water hose at the connection on the back of the washer. Remove the two Phillips head screws holding the top of the washer. Slide the lid toward the rear until you feel it disengage, then lift it off, setting it aside.
Unplug the electrical connector on top of the hot wat ... Read more er valve (just pulls off).using pliers compress the hose clamp, slide it away from the hot water valve and pull the hose off the valve fitting(it will have some water remaining so lift it up and secure it to the brace above the hoses).
Remove the two phillips head screws that hold the valve in place. Pull the valve toward the front of the washer to remove it and compare it to the new valve.
To install the new valve, reverse all steps insuring tight water hose clamp and electrical connection. Install hot water hose, plug it in and turn on water. Test run and check for leaks. Unplug it and reinstall top.
Read less
Parts Used:
-
Danny from OAK HILLS, CA
-
Difficulty Level:Really Easy
-
Total Repair Time:30 - 60 mins
-
Tools:Pliers, Screw drivers
9 of 9 people
found this instruction helpful.
Was this instruction helpful to you?
Thank you for voting!
w/d repeatedly fills with water during warm or hot loads
E. Z. hardest part (which isn't hard) was moving the appliance to reach the back, then putting the appliance back into place. the actual repair (swapping out valve) took less time than that to do.
Parts Used:
-
kevin from WASHINGTON, DC
-
Difficulty Level:Very Easy
-
Total Repair Time:Less than 15 mins
-
Tools:Screw drivers
5 of 5 people
found this instruction helpful.
Was this instruction helpful to you?
Thank you for voting!