















FGP337KW1 Roper Range - Instructions
Keep searches simple. Use keywords, e.g. "leaking", "pump", "broken" or "fit".
Tine clip installation
Slide the teethed washers on with gloved hand, so you don't break the glass with a tool. Get them down as close as possible and then screw the peice back into place on the oven door.
Parts Used:
-
Dawn from Monee, IL
-
Difficulty Level:Really Easy
-
Total Repair Time:15 - 30 mins
-
Tools:Screw drivers
Was this instruction helpful to you?
Thank you for voting!
Igniter Glows but gas never comes to ignite.
Since the broiler worked fine, I took the igniter from the broiler (exact same) and moved it to the bottom and sure enough oven ignited fine. I did this to isolate the problem, because it could have been either the igniter or the valve. I put the broiler igniter back on top when I got the new part, because it is used only 5% of the time. Be aware that you may need to rummage for some machine screws because the factory screws stripped when I removed them. The oven must have annealed them.
Parts Used:

-
Paul from State College, PA
-
Difficulty Level:Really Easy
-
Total Repair Time:15 - 30 mins
-
Tools:Nutdriver
Was this instruction helpful to you?
Thank you for voting!
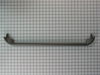
When the screws are taken out and handle is pulled off, glass plate slips.
Glass plate could fall to the floor and break. Need two people to change the handle - one to take it off/screw it back on and one to hold the glass in place to make sure it doesn't fall.
Parts Used:
-
Nancy from Pasadena, TX
-
Difficulty Level:Really Easy
-
Total Repair Time:15 - 30 mins
-
Tools:Screw drivers
Was this instruction helpful to you?
Thank you for voting!
Igniter was Out--Oven wouldn't heat
We ordered our part from PartSelect.com, of course, using their diagnostic tool(s). We received it very rapidly after ordering (a day or two). It involved taking two screws out of the bottom plate of the oven. There were two screws in the diverter (?), but they weren't attached to anything. I had my son, who is young, strong, and small get behind the oven to locate where the igniter plugged in. He detached it and I unscrewed the nuts holding it in place. One of them was in pretty crooked and made it a little difficult. But I pulled it out. I put the new one in place, my son plugged it in, and I replaced the two nuts, securing the new one in place. I replaced all the parts and their screws while the wife cleaned the gunk from behind where the stove sits. We did perform a quick test prior to re-assembly and it looked good. Re-attached everything, put it back in place and it's working like a dream. Just in time for Fall baked goods...
Parts Used:
-
Bryan G from Cowley, WY
-
Difficulty Level:Easy
-
Total Repair Time:15 - 30 mins
-
Tools:Nutdriver, Screw drivers
Was this instruction helpful to you?
Thank you for voting!