















FGHT1848PF3 Frigidaire Refrigerator - Instructions
Keep searches simple. Use keywords, e.g. "leaking", "pump", "broken" or "fit".
Fridge started making a loud racket. Condenser Fan Blade then disintegrated to dust and pieces. The plastic had degraded significantly.
The repair itself total time was quick and easy. Since the original fan blade blew apart, it was only a matter of putting the new one on in it's place. This can be done by feeding the blade between the cowling and Condenser coil and applying pressure to get it on the shaft.
If your fan is still on the shaft, simply push it off and extract it the same way. Then place the new one on the shaft.
In my case, since the part would take a couple days to get, and I had food both in the fridge and the freezer, I removed and unplugged the Condenser Fan Motor and the cowling frame and temporarily spliced a small fan I had into the line for the condenser motor. This kept the fridge working long enough to get the replacement part.
Side note. Direction of airflow is towards the Compressor, and draws air across the Condenser coils.
Hope this helps someone. :)
If your fan is still on the shaft, simply push it off and extract it the same way. Then place the new one on the shaft.
In my case, since the part would take a couple days to get, and I had food both in the fridge and the freezer, I removed and unplugged the Condenser Fan Motor and the cowling frame and temporarily spliced a small fan I had into the line for the condenser motor. This kept the fridge working long enough to get the replacement part.
Side note. Direction of airflow is towards the Compressor, and draws air across the Condenser coils.
Hope this helps someone. :)
Parts Used:

-
Jack from WALLING, TN
-
Difficulty Level:Really Easy
-
Total Repair Time:15 - 30 mins
-
Tools:Nutdriver, Socket set
4 of 7 people
found this instruction helpful.
Was this instruction helpful to you?
Thank you for voting!
The Refrigerator was not cooling properly. At 40-45 degrees milk spoiled
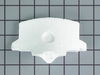
My upper and bottom air diffuser was missing.
Purchased both air diffuser and placed it.
Purchased both air diffuser and placed it.
Parts Used:
-
Marcos from E STROUDSBURG, PA
-
Difficulty Level:Really Easy
-
Total Repair Time:15 - 30 mins
-
Tools:Socket set
2 of 2 people
found this instruction helpful.
Was this instruction helpful to you?
Thank you for voting!
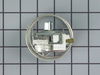
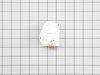
Freezer no freezing the food
Disconnect the power. To install the Defrost timer which is located inside the console at the top of the fridge I followed a YouTube video. It is very easy. Keep in mind that the Defrost timer comes settled in defrost mode so the compressor will not start after the power is reconnected.There is a hole in the console just behind the Defrost timer where you engaged it with a flat driver and rotate the clock until the compresor start. Now the compressor works for 6 hours and stop for 20 minutes for the defrosting cicle. The freezer now is freezing the meat!!
Parts Used:
-
Orlando from FT LAUDERDALE, FL
-
Difficulty Level:Easy
-
Total Repair Time:30 - 60 mins
-
Tools:Nutdriver, Pliers, Screw drivers
2 of 2 people
found this instruction helpful.
Was this instruction helpful to you?
Thank you for voting!
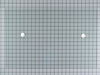
Crisper glass shelf installed
Just like the video , just pull out the crisper drawers and slide the new one in. I also made sue that I had a quilt on the floor in case I dropped the glass shelf. Also if you are not sure of the model number you can try calling the store where you bought the appliance at which I had to do. I bought it at Conns and they just needed the phone number I used when I bought it.
Parts Used:
-
CAROLYN from SAN ANTONIO, TX
-
Difficulty Level:Very Easy
-
Total Repair Time:Less than 15 mins
2 of 2 people
found this instruction helpful.
Was this instruction helpful to you?
Thank you for voting!
One blade broke from condenser fan
The part i recieved, from parts select was a larger in circumfrence (<1/4) than the original. However i was not aware of this until after i treid to repair it.
I removed the broken fan from the condenser. This was very sipmle.
When i pluged the refridgerator back in to the outlet the fan tried to start up but soon began to make aloud noise, due to there not being enough clerance.
I removed the broken fan from the condenser. This was very sipmle.
When i pluged the refridgerator back in to the outlet the fan tried to start up but soon began to make aloud noise, due to there not being enough clerance.
Parts Used:
-
Chris from Lockport, NY
-
Difficulty Level:Really Easy
-
Total Repair Time:Less than 15 mins
12 of 32 people
found this instruction helpful.
Was this instruction helpful to you?
Thank you for voting!
Cracked shelf
-
Leonard from WARRINGTON, PA
-
Difficulty Level:Really Easy
-
Total Repair Time:Less than 15 mins
2 of 2 people
found this instruction helpful.
Was this instruction helpful to you?
Thank you for voting!
Scratch on stainless frig door.
Can't supply any info that would be helpful. Ordered a " badge" that covered 100% of the scratch and stuck it on. Scratch now covered and problem solved. Thanks for asking.
Parts Used:
-
BETTY from SHINGLETOWN, CA
-
Difficulty Level:Really Easy
-
Total Repair Time:30 - 60 mins
2 of 2 people
found this instruction helpful.
Was this instruction helpful to you?
Thank you for voting!
The light in freezer side of upright side by side went out.
I emptied freezer side of unit, turned unit off, rolled unit away from wall, unplugged unit, turned ice maker water supply off, and took out the ice maker. I then took out old light and replaced it with new light. I then plugged in the unit, turned on the water supply, rolled the unit back in place, placed the ice maker back in the unit and turned the unit back on.
After two hours I placed the frozen items back in the freezer.
After two hours I placed the frozen items back in the freezer.
Parts Used:
-
Douglas from RAEFORD, NC
-
Difficulty Level:Very Easy
-
Total Repair Time:Less than 15 mins
4 of 8 people
found this instruction helpful.
Was this instruction helpful to you?
Thank you for voting!
Lost the temperature control know
The knob came in the plastic package. It was the correct part. I opened the package and placed the knob on the prongs. Now it works fine.
Thanks
John S.
Thanks
John S.
Parts Used:
-
John from Pilesgrove, NJ
-
Difficulty Level:Really Easy
-
Total Repair Time:Less than 15 mins
3 of 5 people
found this instruction helpful.
Was this instruction helpful to you?
Thank you for voting!
You have sent the wrong part for the THIRD time. You have sent aaccess cover that is TWO INCHES too short. It does not cover the opening, and you will not answer your phones.
There is no way to complete the repair with the wrong part, You have had my order since June 22nd, 2020 and the incorrect part arrived October 27th, 2020. You charged $7.79 plus $1.06 tax and $9.95 shipping. Please refund the entire amount including the shipping, since I did not ask you to ship the incorrect amount.
Parts Used:
-
Jane from EAST JORDAN, MI
-
Difficulty Level:Very Difficult
-
Total Repair Time:More than 2 hours
-
Tools:Nutdriver
2 of 3 people
found this instruction helpful.
Was this instruction helpful to you?
Thank you for voting!
Broke glass on crisper
-
Carlene from DOERUN, GA
-
Difficulty Level:Very Easy
-
Total Repair Time:Less than 15 mins
2 of 3 people
found this instruction helpful.
Was this instruction helpful to you?
Thank you for voting!
old refrigerator door shelf broke
-
Rod from Rio Rancho, NM
-
Difficulty Level:Really Easy
-
Total Repair Time:Less than 15 mins
2 of 3 people
found this instruction helpful.
Was this instruction helpful to you?
Thank you for voting!
The refrigerator light would not work ...even after replacing the bulb.
I used a flat head screwdriver to pry open the front of the socket as I pushed the socket toward the freezer side. I unplugged the two wires connected to the socket then re-connected the two wires to the new socket and popped the new socket back in. I then put a new light bulb in and we had light again in the fridge.
Parts Used:
-
TIM from WOODBURY, TN
-
Difficulty Level:Really Easy
-
Total Repair Time:Less than 15 mins
-
Tools:Screw drivers
2 of 4 people
found this instruction helpful.
Was this instruction helpful to you?
Thank you for voting!
Broken shelf
-
NICHOLAS from LIVERPOOL, NY
-
Difficulty Level:Very Easy
-
Total Repair Time:Less than 15 mins
2 of 4 people
found this instruction helpful.
Was this instruction helpful to you?
Thank you for voting!
The original plastic deli drawer frame part broke.
1) Remove deli drawer from the deli cover frame by pulling straight out.
2) Carefully remove broken deli cover frame and glass shelf from the refrigerator. The glass shelf just lays in the frame.
3) Separate the glass shelf from broken frame. No tools required.
4) Carefully wash glass shelf and set aside.
5) Install new deli cover frame at your favorite shelf height.
6) Carefully install glass shelf. Note that the glass shelf fits under a lip in the deli cover frame at the front.
7) Install deli drawer.
2) Carefully remove broken deli cover frame and glass shelf from the refrigerator. The glass shelf just lays in the frame.
3) Separate the glass shelf from broken frame. No tools required.
4) Carefully wash glass shelf and set aside.
5) Install new deli cover frame at your favorite shelf height.
6) Carefully install glass shelf. Note that the glass shelf fits under a lip in the deli cover frame at the front.
7) Install deli drawer.
Parts Used:
-
Steven from ELKHART LAKE, WI
-
Difficulty Level:Very Easy
-
Total Repair Time:Less than 15 mins
1 person
found this instruction helpful.
Was this instruction helpful to you?
Thank you for voting!