















FFH1767GWZ Frigidaire Freezer - Instructions
Keep searches simple. Use keywords, e.g. "leaking", "pump", "broken" or "fit".
I had a broken fan blade due to ice build up from a leaking ice maker.
1. I took out one screw on the ice maker and loosened the other two screws and unplugged and removed the ice maker.
2. Next I took out 2 screws from the bottom of the auger drive box and unplugged the wiring harness and removed the box. The wiring harness was a little tricky. The lock on the plug pushes in to unlock even though it looks like it pulls out,.
3.next you must remove 2 screws from the left side bracket that holds the auger box and remove the bracket.
4.Now take out 8 screws that hold the back panel in place and remove the back panel.
5. now your looking at the evaporator fan blade and motor. The simple way to replace the fan blade is to unplug the motor and remove it from the freezer. It just sits in with nothing holding it. The fan requires a little pressure but should pull right off. Install new fan blade and put everything back in the same order it was removed.
2. Next I took out 2 screws from the bottom of the auger drive box and unplugged the wiring harness and removed the box. The wiring harness was a little tricky. The lock on the plug pushes in to unlock even though it looks like it pulls out,.
3.next you must remove 2 screws from the left side bracket that holds the auger box and remove the bracket.
4.Now take out 8 screws that hold the back panel in place and remove the back panel.
5. now your looking at the evaporator fan blade and motor. The simple way to replace the fan blade is to unplug the motor and remove it from the freezer. It just sits in with nothing holding it. The fan requires a little pressure but should pull right off. Install new fan blade and put everything back in the same order it was removed.
Parts Used:

-
gary from ARANSAS PASS, TX
-
Difficulty Level:Easy
-
Total Repair Time:30 - 60 mins
-
Tools:Nutdriver
5 of 7 people
found this instruction helpful.
Was this instruction helpful to you?
Thank you for voting!
Broken door handle
-
Russell from BAYVILLE, NJ
-
Difficulty Level:Very Easy
-
Total Repair Time:Less than 15 mins
-
Tools:Screw drivers
4 of 4 people
found this instruction helpful.
Was this instruction helpful to you?
Thank you for voting!
Handle broke off when opening freezer
It was almost too easy. All I had to do was screw 4 screws into the handle, put the caps on to hide the screws and I was done. And I saved money by ordering from Frigidaire vs my local appliance store where I actually purchased the freezer.
Parts Used:
-
Connie from Grass Valley, CA
-
Difficulty Level:Really Easy
-
Total Repair Time:Less than 15 mins
-
Tools:Screw drivers
4 of 5 people
found this instruction helpful.
Was this instruction helpful to you?
Thank you for voting!
The handle broke off at the bottom
I removed the top and bottom plastic bits that hide the screws. Then I removed the screws and put the new handle on with the same sheet-metal screws. No problems encountered.
Parts Used:
-
Theodore from Vancouver, WA
-
Difficulty Level:Really Easy
-
Total Repair Time:Less than 15 mins
-
Tools:Screw drivers
4 of 5 people
found this instruction helpful.
Was this instruction helpful to you?
Thank you for voting!
Freezer wouldn't shut off and wouldn't reach cold enough temperature.
Removed existing part, tested it, found it to be defective. OrderEd a new one and replaced the existing one.
Parts Used:
-
Tunis from NOLANVILLE, TX
-
Difficulty Level:Easy
-
Total Repair Time:15 - 30 mins
-
Tools:Screw drivers
3 of 3 people
found this instruction helpful.
Was this instruction helpful to you?
Thank you for voting!
freezer would frost up and not get cold enough to keep frozen.
Removed shelves ,removed panel on interior back wall with Philips screwdriver ,unplugged wire terminals slid thermostat off coil ,then reversed process to complete installation.
Parts Used:
-
Richard from SLIDELL, LA
-
Difficulty Level:Very Easy
-
Total Repair Time:15 - 30 mins
-
Tools:Screw drivers
3 of 3 people
found this instruction helpful.
Was this instruction helpful to you?
Thank you for voting!
freezer not cooling
after checking defrost sensor and heater which checked out to be good replaced control board took about 10 minutes freezer working fine
Parts Used:
-
Rych from HOPKINS, SC
-
Difficulty Level:Really Easy
-
Total Repair Time:Less than 15 mins
-
Tools:Screw drivers
3 of 3 people
found this instruction helpful.
Was this instruction helpful to you?
Thank you for voting!
frost and ice build up/ gasket wasnt sealing properly
I did watch a repair a utube video which I asked for when ordering. Pretty much followed most of the directions but:
started in left corner an lossed all screws from left to right. took off old gasket in small sections and inserted the new gasket and semi tighten screws
proceeded down left side then right little by little as above. to get to bottom of door.
bottom corners were a little snug to get them into place. the last corner was snug but once connected. tighten screws not too tight. You dont want to strip them.
test door with piece of paper.
if paper is not a snug tug, you can adjust gasket with a hair dryer set to low.
it was easy. freezer is all set.
Partselect was great to deal with, support verified the part number was correct for my freezer and help with that video.
started in left corner an lossed all screws from left to right. took off old gasket in small sections and inserted the new gasket and semi tighten screws
proceeded down left side then right little by little as above. to get to bottom of door.
bottom corners were a little snug to get them into place. the last corner was snug but once connected. tighten screws not too tight. You dont want to strip them.
test door with piece of paper.
if paper is not a snug tug, you can adjust gasket with a hair dryer set to low.
it was easy. freezer is all set.
Partselect was great to deal with, support verified the part number was correct for my freezer and help with that video.
Parts Used:
-
Richard from Warren, MA
-
Difficulty Level:Easy
-
Total Repair Time:30 - 60 mins
-
Tools:Screw drivers
3 of 3 people
found this instruction helpful.
Was this instruction helpful to you?
Thank you for voting!
Door alarm going off indicating door ajar
This did not fix the problem. Call a repairman and he cannot come until 9/11. Food is staying frozen. Alarm sounds for awhile and then shuts off for a bit.
Parts Used:
-
CONSTANCE from NEW COLUMBIA, PA
-
Difficulty Level:Really Easy
-
Total Repair Time:30 - 60 mins
-
Tools:Screw drivers
2 of 2 people
found this instruction helpful.
Was this instruction helpful to you?
Thank you for voting!
Freeze would not re-start after temp rose above 23 degrees.
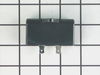
Unplugged the freezer. Located the Run Capacitor (next to the compressor). Removed the wire holding bracket, removed the Run Capacitor from the Start Relay. Installed the NEW Capacitor, re-installed the holding bracket. Plugged the unit in, looking at the display for the proper start-up sequence data. All is good - freezer operating for another 10+ yrs. NOTE: When removing the Run Capacitor, beware the COMPRESSOR could be HOT to the touch.
Parts Used:
-
Andy from GOOSE CREEK, SC
-
Difficulty Level:Really Easy
-
Total Repair Time:15 - 30 mins
-
Tools:Screw drivers
2 of 2 people
found this instruction helpful.
Was this instruction helpful to you?
Thank you for voting!
Fan motor died.
Remove shelves. Unplug unit. Unscrew back panel. Remove wire harness. Remove old fan. Insert new fan. Screw it in. Reattach wires harness. Plug unit in and make sure fan is on.
Reattach back panel. Put shelves back in.
Reattach back panel. Put shelves back in.
Parts Used:

-
Yvonne from CORP CHRISTI, TX
-
Difficulty Level:Really Easy
-
Total Repair Time:Less than 15 mins
-
Tools:Screw drivers
2 of 2 people
found this instruction helpful.
Was this instruction helpful to you?
Thank you for voting!
door handle broken at screws
-
SALLY from DICKINSON, TX
-
Difficulty Level:Really Easy
-
Total Repair Time:Less than 15 mins
-
Tools:Screw drivers
3 of 5 people
found this instruction helpful.
Was this instruction helpful to you?
Thank you for voting!
handle broke at the attachment point on the door
removed two pieces of trim.....removed four screws of old handle.....replaced with new handle....replaced screws.....replaced trim pieces
Parts Used:
-
Dylan from Celina, OH
-
Difficulty Level:Really Easy
-
Total Repair Time:Less than 15 mins
-
Tools:Screw drivers
3 of 5 people
found this instruction helpful.
Was this instruction helpful to you?
Thank you for voting!
Fridge door handle broke off, replaced it.
Very simple - removed the plates that cover the end of the handel, then removed the screws and the broken handle. There were four screws - did a top one, then a bottom one, then the other top and bottom one. Made sure they were on tight and put the covers back on. Really proud of myself!
Parts Used:
-
Julie from Salt Lake City, UT
-
Difficulty Level:Easy
-
Total Repair Time:Less than 15 mins
-
Tools:Screw drivers
4 of 9 people
found this instruction helpful.
Was this instruction helpful to you?
Thank you for voting!
Cooling coils would ice up and fridge would warm up
I removed the shelves in the freezer, took out the five 1/4" screws and lifted off the cover. It was a simple matter of using a blow drier to remove all the ice, then unplugging the two wires and unclipping the thermostat from the upper cooling tube. Then clipped the new one on and reconnecting the two wires.
Works great!!!
Works great!!!
Parts Used:
-
Richard from Tehachapi, CA
-
Difficulty Level:Really Easy
-
Total Repair Time:15 - 30 mins
-
Tools:Nutdriver
2 of 3 people
found this instruction helpful.
Was this instruction helpful to you?
Thank you for voting!