















FES364EN0 Whirlpool Range - Instructions
Keep searches simple. Use keywords, e.g. "leaking", "pump", "broken" or "fit".
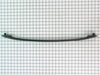
Broken oven handle
I removed the handle from the door, replaced the old one with the new one............. 1, 2, 3, just that easy. The replacement part arrived very quickly and the price could not be beat. Would I use them again...........Yes!
Parts Used:
-
CONSTANCE from LAWTON, OK
-
Difficulty Level:Really Easy
-
Total Repair Time:Less than 15 mins
-
Tools:Screw drivers
Was this instruction helpful to you?
Thank you for voting!
circuit breaker blew
I went to the source of power on the stove and noticed one of the terminals had come loose from the terminal block and had shorted out against the cover of the terminal junction. After prying the loose terminal off cover I ordered new terminal block and received it the 2nd day. I removed the old terminal block and replaced the part in about 10 minutes..Thank you Parts Select for your easy to find diagrams and quick delivery.
Parts Used:

-
Richard from Sarasota, FL
-
Difficulty Level:Easy
-
Total Repair Time:Less than 15 mins
-
Tools:Pliers, Screw drivers
Was this instruction helpful to you?
Thank you for voting!
Scews from old one didn't fit the new one.
I had to bring the new handle to the Hardware store and have them pick out screws that would work. The only problem is that I live 12 miles one way from the Hardware store. My advise is to order scews when ordering the handle.
Parts Used:
-
Raymond from Ashland, WI
-
Difficulty Level:A Bit Difficult
-
Total Repair Time:Less than 15 mins
-
Tools:Screw drivers
Was this instruction helpful to you?
Thank you for voting!
Rear drawer slide was broken.
Undid one screw. Removed the broken slide. Replaced with new slide an fastened with the existing screw. Problem solved.
Parts Used:

-
David from Mauldin, SC
-
Difficulty Level:Really Easy
-
Total Repair Time:Less than 15 mins
-
Tools:Screw drivers
Was this instruction helpful to you?
Thank you for voting!
Bottom element burnt into two pieces
Unplugged stove, opened door and removed two bolts with a phillips screwdriver. Pulled out old element and pulled off the two wire leads. Replaced with new element and reversed all steps...wallaaaaa.
Parts Used:

-
Maxwell from Springdale, AR
-
Difficulty Level:Easy
-
Total Repair Time:Less than 15 mins
-
Tools:Screw drivers
Was this instruction helpful to you?
Thank you for voting!
Bake Element burned out
I found a video on YouTube and watched it showing how to change the element - then I performed the repair based on the instructions and recommendations in the video. The video had some good recommendations and cautions that helped ensure a successful repair.
Parts Used:
-
Douglas from Elk River, MN
-
Difficulty Level:Really Easy
-
Total Repair Time:Less than 15 mins
-
Tools:Screw drivers
Was this instruction helpful to you?
Thank you for voting!
Oven Was Not Heating As It Should
Removed lower oven rack. Unplugged stove,removed 2 screws holding element in place,pulled element forward unplugged 2 wires. Reversed proc. To reinstall . Very simple. Parts were here in less than 24 hrs using standard shipping. Very good service
Parts Used:
-
larry from springville, AL
-
Difficulty Level:Really Easy
-
Total Repair Time:Less than 15 mins
-
Tools:Screw drivers
Was this instruction helpful to you?
Thank you for voting!
Chared Bake element
Unplug oven, open oven door wide,pull out racks, clean reside that old element left. I used power drill with phillips head bit,pulled out old element, and disconnected wires from clips. Connected new element to wires, and Presto.Turned bake element to 300 deg.and waited only to see it red and ready to cook.
Parts Used:
-
jon from lexington, GA
-
Difficulty Level:Really Easy
-
Total Repair Time:Less than 15 mins
-
Tools:Nutdriver, Screw drivers
Was this instruction helpful to you?
Thank you for voting!
bottom element was burned out
I was 100% happy with the whole process! The part arrived on schedule, it was exactly what I wanted! The best part of the story is I am a 77 year old lady whose husband was out of town and had never done this before. I could not have been happier with the process! Thanks again and I will use PartSelect again!!!
Parts Used:
-
Bobbye from Ethelsviolle, AL
-
Difficulty Level:Easy
-
Total Repair Time:Less than 15 mins
-
Tools:Screw drivers
Was this instruction helpful to you?
Thank you for voting!
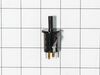
light would not turn off
Lifted burner top remover 6 screws lifted plate removed switch and installed new switch, took about 20 mins to complete job
Parts Used:
-
Ramon from miami, FL
-
Difficulty Level:Really Easy
-
Total Repair Time:Less than 15 mins
-
Tools:Screw drivers
Was this instruction helpful to you?
Thank you for voting!
Baking element needed replacing.
It was as simple as using a screwdrivers and replacing in existing slot. Thank you. It works great!
Parts Used:
-
LINDA from BOLIVAR, TN
-
Difficulty Level:Really Easy
-
Total Repair Time:Less than 15 mins
-
Tools:Screw drivers
Was this instruction helpful to you?
Thank you for voting!
Lower element burned out
Went on line to see if the repair could be done by us. Watched repair video and from there on the repair went as smooth as it possibly could.
Parts Used:
-
Sally from Fishers, IN
-
Difficulty Level:Really Easy
-
Total Repair Time:15 - 30 mins
-
Tools:Screw drivers
Was this instruction helpful to you?
Thank you for voting!
Heating element not bringing temp up to specification
-
Tim from Avon, IN
-
Difficulty Level:Easy
-
Total Repair Time:15 - 30 mins
-
Tools:Pliers, Screw drivers
Was this instruction helpful to you?
Thank you for voting!
Broiler element EXPLODED!
Yes... it exploded. Ordered the part which was delivered promptly. Installed in about 30 minutes with a helper. Just unscrew the 4 interior screws and a bunch of the screws (10 maybe?) on the back panel. Drop the back panel, remove the electrical connections from the broiler element and have your helper pull it out. Shove the new one in carefully through the insulation, attach the two electrical connections and reattach all the screws. Worked fine but smelled a bit as it burned off the new coating. About a 30 minute project.
Parts Used:

-
Beth from Draper, UT
-
Difficulty Level:Easy
-
Total Repair Time:15 - 30 mins
-
Tools:Screw drivers
Was this instruction helpful to you?
Thank you for voting!
the boiler went out
Unpluged from electric. I took two bolts out of back of oven attached to boiler. Pulled out and exposed cords the attach to boiler. Slide them off and removed old boiler. Attached cords to new boiler and slide part back in to attach the two bolts back. Plugged oven back in and worked great
Parts Used:
-
Angela from Little Hocking, OH
-
Difficulty Level:Easy
-
Total Repair Time:15 - 30 mins
-
Tools:Screw drivers
Was this instruction helpful to you?
Thank you for voting!