















ET20GKXSW00 Whirlpool Refrigerator - Instructions
Keep searches simple. Use keywords, e.g. "leaking", "pump", "broken" or "fit".
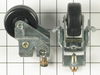
Both front wheels were severly damaged needing replacement.
I tipped the refrigerator back and my friend used an adjustable wrench to attach put the new wheel assembies on. I also used a socket wrench to get the old attacheement bolts to thread. I rolled the cleaned appliance in place and adjusted the wheels with the socket set for easy door closing. It went smoothly.
Parts Used:
-
James from Leesburg, VA
-
Difficulty Level:Easy
-
Total Repair Time:15 - 30 mins
-
Tools:Socket set, Wrench (Adjustable)
1 of 2 people
found this instruction helpful.
Was this instruction helpful to you?
Thank you for voting!
Water tubing was accidentally broken from the back of the freezer.
Removed the two screws holding the funnel in place...removed the old one and replaced it witht he new tubing...screwed screws back in and the jov was complete. It actually took longer to get it out of the sack than it did to put it together
Parts Used:
-
Lois from Thomasville, AL
-
Difficulty Level:Really Easy
-
Total Repair Time:Less than 15 mins
-
Tools:Screw drivers
1 of 2 people
found this instruction helpful.
Was this instruction helpful to you?
Thank you for voting!
cooling fan quit
Ordered new fan motor on line took out old motor and replaced with new one
Parts Used:

-
George from Belhaven, NC
-
Difficulty Level:Easy
-
Total Repair Time:30 - 60 mins
-
Tools:Nutdriver
1 of 2 people
found this instruction helpful.
Was this instruction helpful to you?
Thank you for voting!
Poor design leaves fitting vulnerable to damage. Part was broken when pushed to close to the wall.
-
Mike from Camas, WA
-
Difficulty Level:Really Easy
-
Total Repair Time:Less than 15 mins
-
Tools:Screw drivers
1 of 2 people
found this instruction helpful.
Was this instruction helpful to you?
Thank you for voting!
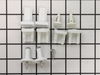
Two of the parts were broken so the shelf was laying on the drawers so neither could be used effectivly
Pulled out the stud with a wire cutter and replaced it with the exact part you shipped in the kit.
The other 2 parts just slipped on the brackets
Nice thing is now I have extra parts for the other shelf.
The other 2 parts just slipped on the brackets
Nice thing is now I have extra parts for the other shelf.
Parts Used:
-
ROD from LINCOLN, NE
-
Difficulty Level:Really Easy
-
Total Repair Time:Less than 15 mins
-
Tools:Pliers, Screw drivers
1 of 2 people
found this instruction helpful.
Was this instruction helpful to you?
Thank you for voting!
One of the door shelf end caps broke
I removed the broken end cap and then I snapped the metal shelf onto both end caps and replaced the shelf.
I really must say that dealing with PartSelect was exceptional. It took about three days for me to get the part and, prior to that, it was very easy for this sidewalk fixer to locate the correct part on their website. Thank you for your excellent service.
I really must say that dealing with PartSelect was exceptional. It took about three days for me to get the part and, prior to that, it was very easy for this sidewalk fixer to locate the correct part on their website. Thank you for your excellent service.
Parts Used:

-
Gary from Aberdeen, SD
-
Difficulty Level:Really Easy
-
Total Repair Time:Less than 15 mins
1 of 2 people
found this instruction helpful.
Was this instruction helpful to you?
Thank you for voting!
Broken shelf supports
-
Bob from Las Vegas, NV
-
Difficulty Level:Really Easy
-
Total Repair Time:Less than 15 mins
1 of 2 people
found this instruction helpful.
Was this instruction helpful to you?
Thank you for voting!
Movers broke the icemaker water fill tube shoving my refrigerator through the front door.
I unscrewed the fill tube screws from the back of the fridge, and pulled the tube out.
Then I put the new tube in, screwed the screws back in and reconnected the waterline.
Then I put the new tube in, screwed the screws back in and reconnected the waterline.
Parts Used:
-
Christopher from Valley Village, CA
-
Difficulty Level:Really Easy
-
Total Repair Time:Less than 15 mins
-
Tools:Screw drivers
1 of 2 people
found this instruction helpful.
Was this instruction helpful to you?
Thank you for voting!
Broken End cap on fridge shelf
Removed the existing broken end cap, and replaced it with the new one. Installed shelf securely back in fridge. Easiest repair I've ever done. Less than 5 minutes. I wish everything were that easy.
Parts Used:
-
Nathan from Coralville, IA
-
Difficulty Level:Really Easy
-
Total Repair Time:Less than 15 mins
1 of 2 people
found this instruction helpful.
Was this instruction helpful to you?
Thank you for voting!
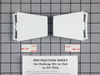
Every time we opened the fridge everything in the door shelf would fall out
This website saved my marriage. For the past two years, every time we would open the fridge everything in the door shelves would fall all over the floor. This was not only embarassing when we would have family and friends over but I really got tired of my wife yelling every time she would open up the fridge. I tried every type of glue and repairs to try and fix it, finally gave up and thought the only way I would find peace at home was to purchase a new fridge. I accidently stumbled across your website and before I knew it and about $6 later my life improved more than you can imagine. The best part was how easy it was to find the part I needed with the detailed pictures you have. The part was shipped fast and very easy to install. I will definately use partselect again. Thanks!
Parts Used:
-
Jeremy from New Berlin, WI
-
Difficulty Level:Really Easy
-
Total Repair Time:Less than 15 mins
1 of 3 people
found this instruction helpful.
Was this instruction helpful to you?
Thank you for voting!
Old tube had cracked due to being frozen....
I followed the simple steps outlines in the great video! Thanks
Parts Used:
-
Stephen from Greensboro, NC
-
Difficulty Level:Really Easy
-
Total Repair Time:Less than 15 mins
-
Tools:Nutdriver
1 of 3 people
found this instruction helpful.
Was this instruction helpful to you?
Thank you for voting!
Refrigerator would not stay cold
Removed rear cover to see non-operating fan - removed three mounting screws on the motor that were a challenge to access. Swapped fan from old motor onto new motor - one threaded nut on the motor shaft. Spliced new fan wires into fan wires of the wiring harness and mounted with three self-tapping screws supplied with new fan motor. Replaced rear cover and plugged it in! Now the refrigerator cools like new (1981 model side-by-side Admiral)
Parts Used:
-
Jeremy from State College, PA
-
Difficulty Level:A Bit Difficult
-
Total Repair Time:30 - 60 mins
-
Tools:Nutdriver, Screw drivers, Wrench set
2 of 6 people
found this instruction helpful.
Was this instruction helpful to you?
Thank you for voting!
The door gasket was very hot which is caused by an overheated expansion line that runs along the area of the door gasket. This was caused by a failed cooling fan motor.
Pulled out the refrigerator and removed the two panels from the rear of the refrigerator. Removed the fan held in by four screws and unplugged the connector. Soldered on the original connector, installed the fan to the motor and re-installed the unit into the refrigerator. Then blew out and vaccumed the condenser coils.
Parts Used:
-
James from Howell, MI
-
Difficulty Level:Easy
-
Total Repair Time:30 - 60 mins
-
Tools:Nutdriver
2 of 6 people
found this instruction helpful.
Was this instruction helpful to you?
Thank you for voting!
Broken Kickplate Support Clip (Left side)
Unscrewed old broken part from the kickplate and attempted to install the new clip. Mounting screws would not go into the new clip. Had to drill out the mounting holes in the plastic clip using a #30 drill bit. Once the new clip was mounted, attempted to snap the kickplate back in place. Unfortunately at the left side the kickplate would not fully mate with the metal clip on the refrigerator body and would not snap all the way back to the refrigerator front surface, as the right side does. At least the kickplate doesn't fall down onto the floor on the left side as it did before. I suspect there is an alignment problem with the left side refrigerator metal clip, but have not pursued that yet.
Parts Used:

-
William from Fountain Valley, CA
-
Difficulty Level:A Bit Difficult
-
Total Repair Time:30 - 60 mins
-
Tools:Screw drivers
0 of 1 people
found this instruction helpful.
Was this instruction helpful to you?
Thank you for voting!
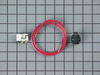
After Hurricane Irene refrigeration compressore did not start
Followed the directions. Installation was quick. Took loner to put the covers back on and push the applicance back in position than the repair.
Parts Used:
-
Bobby from New Bern, NC
-
Difficulty Level:Really Easy
-
Total Repair Time:15 - 30 mins
-
Tools:Pliers, Screw drivers
1 of 4 people
found this instruction helpful.
Was this instruction helpful to you?
Thank you for voting!