















ET18MKXSW02 Whirlpool Refrigerator - Instructions
Keep searches simple. Use keywords, e.g. "leaking", "pump", "broken" or "fit".
Door light switch disintegrated
Very simple fix, remove 3 screws, two connectors to the old switch
Parts Used:

-
Thomas from Roseville, CA
-
Difficulty Level:Really Easy
-
Total Repair Time:Less than 15 mins
-
Tools:Screw drivers
2 of 2 people
found this instruction helpful.
Was this instruction helpful to you?
Thank you for voting!
fridge door switch did not work
I removed the switch housing (4 screws), replacing the switch in the housing was a snap. It took 5 minutes, cost $8 and light works like new!
Why didn't I order this part and do the repair earlier? Very simple.
Why didn't I order this part and do the repair earlier? Very simple.
Parts Used:
-
stu from richmond, VA
-
Difficulty Level:Easy
-
Total Repair Time:Less than 15 mins
-
Tools:Socket set
2 of 2 people
found this instruction helpful.
Was this instruction helpful to you?
Thank you for voting!
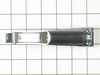
Metal end cap on freezer door handle broke
Parts Select was easy to deal with -- had the item next morning after ordering! But Whirlpool should be ashamed -- this is the FOURTH time this part has had to be replaced in the 13 years we've had this refrigerator. Unrelated, but still a Whirlpool problem, the icemaker broke within 6 months -- had it repaired twice and then gave up. Will buy a different brand frig next time.
Parts Used:
-
Annette Jones from Glendale, KY
-
Difficulty Level:Really Easy
-
Total Repair Time:Less than 15 mins
-
Tools:Screw drivers
2 of 3 people
found this instruction helpful.
Was this instruction helpful to you?
Thank you for voting!
Crisper post was missing
My refrigerator is about 26 yrs old and the part I received must have been for newer models, but I was able to insert the part into a little rubber part attached to the bottom the refrigerator,
Parts Used:
-
Annette from Coon Rapids, MN
-
Difficulty Level:Easy
-
Total Repair Time:Less than 15 mins
3 of 6 people
found this instruction helpful.
Was this instruction helpful to you?
Thank you for voting!
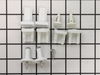
Shelves in freezer falling off
Went online with the model number, the part was very easy to find, diagrams helped me to have confidence in the choice. Parts came in two days, tore them open and used a screw driver to replace the broken shelf brackets, replaced shelves, I am a happy camper!!
Parts Used:
-
wendy from palm coast, FL
-
Difficulty Level:Really Easy
-
Total Repair Time:Less than 15 mins
-
Tools:Screw drivers
2 of 3 people
found this instruction helpful.
Was this instruction helpful to you?
Thank you for voting!
Broke light switch while cleaning
use kitchen knife to pry out. replaced switch assemble and pressed back into place. Could not have done this with out help from previous customers. Thanks
Parts Used:
-
Gail from Golden, CO
-
Difficulty Level:Really Easy
-
Total Repair Time:Less than 15 mins
2 of 3 people
found this instruction helpful.
Was this instruction helpful to you?
Thank you for voting!
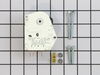
Refrigerator was freezing up and not cooling fresh food compartment
The repair was easy, I removed the cover on the top front of the fresh food compartment. It housed the defrost timer which was easy to identify and replace. Just removed a screw, unplugged the wires and replaced with the new part. Unfortunately, that wasn't the only problem. I also had to replace the defrost element that the timer sent power to. While I was at it, I replaced the defroster thermostat. The entire repair took under an hour, diagnosing the problem took the most time and effort.
Parts Used:
-
Greg from McLoud, OK
-
Difficulty Level:Easy
-
Total Repair Time:30 - 60 mins
-
Tools:Nutdriver, Screw drivers
2 of 3 people
found this instruction helpful.
Was this instruction helpful to you?
Thank you for voting!
The refridgerator will not run
After the front panel was removed, disconnected the timer and installed new in reverse order. The provided instructions could be more straight forward, I spent more time reading it than the installation itself.
Parts Used:
-
Victor from Colton, CA
-
Difficulty Level:Easy
-
Total Repair Time:30 - 60 mins
-
Tools:Nutdriver, Screw drivers
2 of 3 people
found this instruction helpful.
Was this instruction helpful to you?
Thank you for voting!
The plastic water fill tube got cracked when we moved. I called a parts company and they told me they couldn't just sell me the tube I would have to buy a whole kit for about $50 dollars. I decided to glue the tube. It worked for a while then it started leaking. So I thought I would have to buy
I hand screwed the fill tube into the water tube and stuck it into the freezer hole. I screwed the fill tube to the back of the refrigerator.
Thanks so much! You saved me a bundle!!
Thanks so much! You saved me a bundle!!
Parts Used:
-
Joseph from Chesterfield, MO
-
Difficulty Level:Really Easy
-
Total Repair Time:Less than 15 mins
-
Tools:Screw drivers
3 of 6 people
found this instruction helpful.
Was this instruction helpful to you?
Thank you for voting!
Refrigerator light would not turn on.
I first replaced the switch and had no results, I then ordered the Light Socket Kit, and because I had the experience of removing the panel to replace the switch, it took a few minutes to remove the two screws behind the panel, removing the temperature control knobs and then releasing the face plate which is secured by tabs at the bottom. The kit came with extra connectors in case they were needed, but they were not in my case and so I pulled off the wires, pushed the old socket out and the new one in. Attaching the wires to the correct pins, I screwed in the light bulb to be sure that the fix was correct and determining that, I replaced the screws that held the panel in place. Voila, I'm a happy camper who found some outdated jars in the back corners of the newly lighted shelves.
Parts Used:
-
Suzanne from STERLING HTS, MI
-
Difficulty Level:Really Easy
-
Total Repair Time:Less than 15 mins
-
Tools:Nutdriver
3 of 6 people
found this instruction helpful.
Was this instruction helpful to you?
Thank you for voting!
replacing evaporator fan
My fridge did not have icemaker add on. The evap fan is in the freezer behind the back panel. Empty the freezer section (into a cooler) and turn the fridge off. Remove all the shelves in freezer section. Remove the shelf support tabs by lifting them up. use phillips head screwdiver to remove back panel in freezer section. Use nut driver to remove fan shroud. Remove old fan and save the mounting arms. Install mounting arms on new fan and install fan. Install shroud, back panel, shelf mounts and shelves. Thats it!
Parts Used:
-
Steve from SAN CARLOS, CA
-
Difficulty Level:Easy
-
Total Repair Time:30 - 60 mins
-
Tools:Nutdriver, Screw drivers
2 of 3 people
found this instruction helpful.
Was this instruction helpful to you?
Thank you for voting!
Old door gasket became hard, and corners had rubber breaking apart some leakage of cold air
Each side of the door had a metal strip bracket that was held in place by 1/4" sheet metal screws apprx. 8in. apart.. the outer lip of the gasket was tightened into these brackets..loosening the screws allowed the removal of the gasket from all 4 sides and corners..It was just the process of fitting the new gasket into the brackets that took the most time..making sure the new gasket was fitted all the way in for aligned proper fit,then tightening the screws evenly around the door frame..Then, 2 weeks later, this 27-year-old refrigerator's lower compressor went out,,and the refrigerator was history! YEAH!!
Parts Used:
-
lee from PORTLAND, OR
-
Difficulty Level:Easy
-
Total Repair Time:30 - 60 mins
-
Tools:Socket set
1 person
found this instruction helpful.
Was this instruction helpful to you?
Thank you for voting!
Light rocker switch broke and refrigerator light couldn't go on.
I just popped out the old switch with a flat head screwdriver. Removed the connections and then installed new switch by reversing steps. Popped in back in and the light went on.
Parts Used:
-
Cathy from HOPATCONG, NJ
-
Difficulty Level:Very Easy
-
Total Repair Time:Less than 15 mins
2 of 4 people
found this instruction helpful.
Was this instruction helpful to you?
Thank you for voting!
Warm refrigerater
-
charles from REDDING, CA
-
Difficulty Level:Really Easy
-
Total Repair Time:15 - 30 mins
-
Tools:Nutdriver, Screw drivers
1 person
found this instruction helpful.
Was this instruction helpful to you?
Thank you for voting!
Shelf studs broke several years ago and I had a problem locating them. Finally wised up and checked Part Direct and found them, ordered the kit w/ 12 pieces. Then quickly watched the installation video. Took less than 30 minutes to replace two different studs. Wife is very happy.
Simply took broken pieces of old stud out and replaced with the new ones. Used pliers to adjust them. Replace a freezer stud and a fridge stud.
Parts Used:
-
Karl from BIRDSBORO, PA
-
Difficulty Level:Easy
-
Total Repair Time:15 - 30 mins
-
Tools:Pliers
1 person
found this instruction helpful.
Was this instruction helpful to you?
Thank you for voting!