















ET18HTXBW00 Whirlpool Refrigerator - Instructions
Keep searches simple. Use keywords, e.g. "leaking", "pump", "broken" or "fit".
Freezer too warm; noticed sides of refrigertor were warm
I saw on a partselect web site that these symptoms could be caused by a failed condensor fan motor. After removing the cardboard panel in back of the refrigerator I noticed the fan was not running when the rfigerator was. The fan was held in place by three brackets. I unscrewed the screws holding the fan motor to the brackets and also unscrewed one of the brackets to make room to pull the motor out. I cut the wires close to the motor. I removed the fan blade and secured it to the new motor. I had to reroute the old wires in order to have enough slack to use wire nuts to attach them to the leads on the new motor. I then re-attached the motor to the two brackets remaining in place and then re-attacehed the third bracket I had removed to get the motor out.. The most difficult part was working in a very confined space.
Parts Used:

-
W from Nellysford, VA
-
Difficulty Level:A Bit Difficult
-
Total Repair Time:30 - 60 mins
-
Tools:Nutdriver, Pliers, Screw drivers, Socket set, Wrench set
22 of 23 people
found this instruction helpful.
Was this instruction helpful to you?
Thank you for voting!
The old motor wouldn't turn the fan.
After moving the refrigerator away from the wall I removed the cover on the lower back of the unit by removing the screws that held it in place. The condenser fan was not turning and there was heat build up in the area causing the refrigerator to not work properly creating elevated temperatures in both the freezer and regrigerator. Removal of three torx screws from the original motor was all it took to get the motor free. By turining it and working the fan blade around the mounting bracket I had the motor out in just a few minutes. Replacing the new motor was just as easy to reinstall. The fan was removed from the old motor and placed on the new for installation. The original motor was wired to accept a connector from the wiring harness of the refrigerator. I simply cut the connector off the wiring harness and stripped the insulation from the wires which easily allowed me to connet the wires of the motor and harness with two wire nuts. Three self tapping screws were used to hold the motor in place replacing the torx screws. Installed I plugged the unit in and immediately the fan started spinning as the unit came to life. Cleaned and replaced the cover over the back and slid back into its spot. Running as good as it did when it was new. Easy job to take care of.
Parts Used:
-
Bob from Hesston, KS
-
Difficulty Level:Easy
-
Total Repair Time:15 - 30 mins
-
Tools:Socket set, Wrench set
24 of 32 people
found this instruction helpful.
Was this instruction helpful to you?
Thank you for voting!
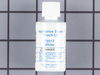
Scratches in Surface
This product comes in a bottle with a brush like Liquid Paper. It goes on incredibly easy. A second coat might be needed. I wanted to prevent rust from setting in so I covered the scratches and dings. The paint is a little brighter since my washer is 10 years old but it still looks great.
Parts Used:
-
Michelle from Richardson, TX
-
Difficulty Level:Really Easy
-
Total Repair Time:Less than 15 mins
81 of 209 people
found this instruction helpful.
Was this instruction helpful to you?
Thank you for voting!
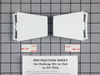
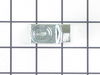
bottom of the door handle had rusted out and fallen off, among other things.
I forgot to order all the parts i needed, and when I placed a second order for the remaining parts on the same day, PartSelect contacted me and asked if I wanted to consolidate the order and save on shipping. I thought this was very thoughtful. Anyway, the lower door handle was very easy to replace, I just cut the handle to the correct length with a hacksaw, put the new end cap on, and screwed it in. The inside shelf end caps were a snap too. Just remove the old ones and snap the new ones in place. Done!
Parts Used:


-
David from Newport, RI
-
Difficulty Level:Really Easy
-
Total Repair Time:30 - 60 mins
-
Tools:Pliers, Screw drivers
23 of 36 people
found this instruction helpful.
Was this instruction helpful to you?
Thank you for voting!
compressor didnt turn on

-
gerardo from el monte, CA
-
Difficulty Level:Really Easy
-
Total Repair Time:Less than 15 mins
-
Tools:Screw drivers
24 of 41 people
found this instruction helpful.
Was this instruction helpful to you?
Thank you for voting!
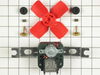
freezer making a squealing sound
First I Removed the racks. Next 3 hex bolts that secured the ice maker. Undid the ponytail wiring. 3 Phillips screws to remove the metal back. unplugged the Evaporator Fan Motor. Replaced the new one. reassembled.
Parts Used:
-
PAUL from Boiling Springs, SC
-
Difficulty Level:Easy
-
Total Repair Time:15 - 30 mins
-
Tools:Nutdriver, Screw drivers
17 of 20 people
found this instruction helpful.
Was this instruction helpful to you?
Thank you for voting!
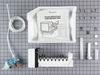
The icemaker in the fridge stopped working
The repair was so simple. I removed the old icemaker in about 3 minutes and unpacked and installed the new one is about 10 minutes. It was literally a matter of removing a few screws! Eady to follow instructions!
Parts Used:
-
Rebecca from Dayton, OH
-
Difficulty Level:Really Easy
-
Total Repair Time:Less than 15 mins
-
Tools:Screw drivers
18 of 27 people
found this instruction helpful.
Was this instruction helpful to you?
Thank you for voting!
Squealing evaporator fan
Unplugged the fridge, emptied the freezer, removed the panel screws, removed the fan assembly retaining nuts, slid the spade wire connectors from the tabs, and performed these tasks in reverse to have the fridge up and running like new. I am not an appliance repair person, but I am not intimidated by simple repairs. Your instructions were easy to follow, and the cry in the kitchen of "we need a new refrigerator" was silenced for less than $50.00. Thanks!
Parts Used:
-
JOHN from BEAVER, PA
-
Difficulty Level:Really Easy
-
Total Repair Time:15 - 30 mins
-
Tools:Nutdriver, Screw drivers
15 of 18 people
found this instruction helpful.
Was this instruction helpful to you?
Thank you for voting!
Freezer was not staying cold enugh for ice maker to work. Discovered fan was not working to cool condensor. Fan motor would only run if manually turned.
Unplugged refrigerator. Removed lower back access panels and panel running up the back of refrigerator. Removed and disconnected old fan. Removed old fan motor from mounting bracket. Removed fan blade from old fan motor and placed on new fan motor. Connected new fan motor to power supply. Tested. Reinstalled.
Parts Used:
-
David from Cedarville, OH
-
Difficulty Level:A Bit Difficult
-
Total Repair Time:More than 2 hours
-
Tools:Screw drivers, Socket set
14 of 16 people
found this instruction helpful.
Was this instruction helpful to you?
Thank you for voting!
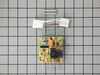
would not defrost and would not get cold.
Had alot of frost build up, coils were frozen solid. Removed the coil cover to defrost.
Ordered the defrost timer on friday, arrived on saturday. only took 15 minutes to install. Working great
Ordered the defrost timer on friday, arrived on saturday. only took 15 minutes to install. Working great
Parts Used:
-
Jack from Beardstown, IL
-
Difficulty Level:Really Easy
-
Total Repair Time:Less than 15 mins
-
Tools:Screw drivers
13 of 14 people
found this instruction helpful.
Was this instruction helpful to you?
Thank you for voting!
evaporator iced up every 5 days or so
Very easy, unscrewed control panel cover (1 screw) which is located under the freezer compartment inside the refrigerator. Took out non working defrost timer installed new one replaced cover, done. Total time: less than 5 minutes.
Parts Used:
-
nicholas from riverside, CA
-
Difficulty Level:Really Easy
-
Total Repair Time:Less than 15 mins
-
Tools:Pliers
14 of 18 people
found this instruction helpful.
Was this instruction helpful to you?
Thank you for voting!
Freezer compartment iced over, food thawing,
I deenergized the refigerator, removed the storage tray, three screws that hold the ice maker, two screws that hold the lower portion of the freezer, two screws tjhat hold the back portion of the freezer. Removed the ice maker and disconnected the wire connector and ground, Removed lower portion of the freezer which allowed the back portion to be lifted out. Once the back was out the bimetal defrost thermostat was located in the upper right corner clipped to a copper line. Using an ohm meter, I found the bimetal defrost thermostat to be electrically open, ordered part from information found on part, Once part arrived I deenergized the refrigerator and replaced bimetal thermostat by cutting the old thermostat wires (pink and brown), stripping the wires back about 5/8 inch and wire nutting the replacement parts like colored wires, clipped the bimetal part on the copper tube, replaced the covers in reverse order, and reenergized the refrigerator. Testing and replacing the part took about 15 minutes, waiting for the ice build up to thaw took considerably longer.
Parts Used:

-
Lawrence from New Bern, NC
-
Difficulty Level:Easy
-
Total Repair Time:Less than 15 mins
-
Tools:Nutdriver
12 of 13 people
found this instruction helpful.
Was this instruction helpful to you?
Thank you for voting!
water was leaking down from freezer section to bottom part of unit
First, unplugged the refrigerator. Then removed bottom plastic liner of the freezer, 2 screws with 5/16 nut driver. At this point the ice maker had to be removed 3 screws, two on the upper part and the other under the ice maker. Now the back wall of the freezer section was removed by unscrewing 2 screws with the nut driver. This gave me access to remove the defective clip-on Bimetal defrost thermostat. It was located in the upper right corner on the back wall of the freezer. Cut off the 2 wires from the bad part( one pink the other brown)then used wire nut to replace with the new part and matched wires from freezer to new part( pink to pink and brown to brown) and clipped the part in one section of the coil. ( where the bad part was located) Put all back in place. And so far no more water leak inside the fridge.
Parts Used:
-
Eric from miami, FL
-
Difficulty Level:Easy
-
Total Repair Time:15 - 30 mins
-
Tools:Nutdriver, Pliers, Screw drivers
13 of 16 people
found this instruction helpful.
Was this instruction helpful to you?
Thank you for voting!
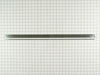
broken door shelf retainer bar needed replacement
The part for this refrigerator/freezer is no longer made by Whirlpool so a longer retainer bar was recommended and it was necessary to cut the bar to fit our freezer shelf. It's easy to cut if you have a powered mitre saw but if you don't have one, you would have to ask someone to cut it for you and that could take you some time and additional expense. It might be better to ask a service company to do this for you if you don't have the powered mitre saw.
Parts Used:
-
Doris from Ashland, OR
-
Difficulty Level:A Bit Difficult
-
Total Repair Time:Less than 15 mins
15 of 22 people
found this instruction helpful.
Was this instruction helpful to you?
Thank you for voting!
installed ice maker
From the time I started to finish I worked 3 hours, this included installing the new ice maker, cutting into the cold water line in the basement and installing a t with a 6inch piece of pipe with a compression valve to connect to the small cooper tube, this is worth your time to do it this way, its a lot better connection than the small pierce valves that come with the kit, they will leak over time. I installed the filter in the waterline in the basement for easy access
Parts Used:
-
Dennis from Spring Valley, MN
-
Difficulty Level:Easy
-
Total Repair Time:15 - 30 mins
-
Tools:Nutdriver, Pliers, Screw drivers, Wrench set
13 of 19 people
found this instruction helpful.
Was this instruction helpful to you?
Thank you for voting!