















ER2MHKXPL05 Whirlpool Refrigerator - Instructions
Keep searches simple. Use keywords, e.g. "leaking", "pump", "broken" or "fit".
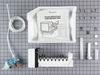
Installed a Ice Maker
-
Don from HOUMA, LA
-
Difficulty Level:Very Easy
-
Total Repair Time:15 - 30 mins
-
Tools:Nutdriver, Screw drivers
3 of 3 people
found this instruction helpful.
Was this instruction helpful to you?
Thank you for voting!
lights wouldn't come on/work in refrigerator
Referencing the info/schematics you have on your website, I unscrewed/unattached top-front panel (carefully), from behind the panel you have to detach the wires (2) from the switch, pushed "in" the switch to remove, put in new switch and attach wires to test BEFORE remounting panel. Tada!! Thank you PartSelect! You saved me at least $80...would have been at least $100 to have a repair person come to the house!
Parts Used:

-
Jane from Albuquerque, NM
-
Difficulty Level:Easy
-
Total Repair Time:15 - 30 mins
-
Tools:Pliers, Screw drivers, Socket set
4 of 6 people
found this instruction helpful.
Was this instruction helpful to you?
Thank you for voting!
Refrigerator Trim was Bent
Ordered the new part, it was the perfect size and slipped right on to the existing brackets.
Parts Used:

-
Jeffrey from Houston, TX
-
Difficulty Level:Really Easy
-
Total Repair Time:Less than 15 mins
3 of 3 people
found this instruction helpful.
Was this instruction helpful to you?
Thank you for voting!
Crisper Glass Shelf
Took the glass shelf out of the fridge in our rental home to clean and it just shattered in our hands. Did a search online and found part select, phoned to make sure I was looking at the correct part, the lady on the phone was very helpful. I ordered the shelf using the next day service as we were returning home to the UK within 3 days so did not want to take the chance of not receiving it before we left. I got the notification the part had been dispatched, the part was delivered early next morning. Took the shelf out the package and placed in the tray, job done!. Great service will definately use again, have book marked the site.
Parts Used:

-
Andrea J from Davenport, FL
-
Difficulty Level:Really Easy
-
Total Repair Time:Less than 15 mins
5 of 9 people
found this instruction helpful.
Was this instruction helpful to you?
Thank you for voting!
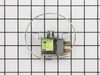
Stopped cooling
Repair man that looked at it said it was the thermostat and that he would order the part. Waited two weeks with no word, so I ordered the part on line, got it the next day and installed it. The only hard part of the installation was getting to the three screws (located vertically in top of refrigerator section) to remove them. Simple three wire clip on changed unit. Total time took about 5 minutes. Refrigerator started cooling when plugged back in. Unfortunately, cooling again stopped within a day, so the original problem was more extensive than just the thermostat (so much for the service call diagnosis). Thoroughly pleased with part ordering, would do it again.
Parts Used:
-
Joseph from Pacific, MO
-
Difficulty Level:Easy
-
Total Repair Time:Less than 15 mins
-
Tools:Nutdriver
5 of 9 people
found this instruction helpful.
Was this instruction helpful to you?
Thank you for voting!
Installed new glass crisper
Open your door as far as it will go. Line it up with the plastic holder should just slide into place.
Parts Used:
-
Rebecca from WEST JORDAN, UT
-
Difficulty Level:Very Easy
-
Total Repair Time:Less than 15 mins
3 of 3 people
found this instruction helpful.
Was this instruction helpful to you?
Thank you for voting!
It was my first time to install a ice maker.
I first read the instruction manual then I watched the installation video. My water line to it was 3/8. Went to the local ACE Hardware to purchase a short peace of 1/4 copper tubing and the fittings to connect them together. It makes ice every 55 minutes.
Parts Used:
-
Gary from MACOMB, OK
-
Difficulty Level:Easy
-
Total Repair Time:1- 2 hours
-
Tools:Nutdriver, Screw drivers, Wrench (Adjustable), Wrench set
3 of 3 people
found this instruction helpful.
Was this instruction helpful to you?
Thank you for voting!
changed the light bulb still would not work so I figured it was the switch sure enough.
I took a chance and ordered a switch that is next to the top of the door. looked for how to remove it easily done in ten minutes works fine last long time.
Parts Used:
-
anthony from HAVELOCK, NC
-
Difficulty Level:Really Easy
-
Total Repair Time:15 - 30 mins
3 of 4 people
found this instruction helpful.
Was this instruction helpful to you?
Thank you for voting!
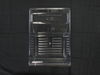
My pan crisper is broken.
The repair story webpage has some problems. I want to rate it "very helpful" but it showed "not helpful". I am pleased with the order service. It was very hard to find the parts on the web. There are a couple of web sites but only partselect has it in inventory. I ordered it, and it came in within 5 days. Excellent service. Will continue to order parts from this site in the future.
Parts Used:
-
Raymond from Westford, MA
-
Difficulty Level:Really Easy
-
Total Repair Time:Less than 15 mins
4 of 7 people
found this instruction helpful.
Was this instruction helpful to you?
Thank you for voting!
defective light switch
inserted a knife between the switch and the plastic interior in order to pop the switch out.
then took off the 2 wires on the old switch put them on the new switch and reinserted the switch into the plastic interior.
then took off the 2 wires on the old switch put them on the new switch and reinserted the switch into the plastic interior.
Parts Used:
-
THOMAS from WILLARD, OH
-
Difficulty Level:Really Easy
-
Total Repair Time:Less than 15 mins
3 of 4 people
found this instruction helpful.
Was this instruction helpful to you?
Thank you for voting!
Compressor hard to start,and pulling to many amps
Remove the cover off of the compressor connection box,,,pull the old start-device,replace it with the new one,and there it is running just fine. The amps droped to normal and the compressor is not over heating any more.Nothing to it. 15 to 20 min. Time to do the repairs
Parts Used:

-
Joel from Childress, TX
-
Difficulty Level:Really Easy
-
Total Repair Time:15 - 30 mins
-
Tools:Pliers
5 of 10 people
found this instruction helpful.
Was this instruction helpful to you?
Thank you for voting!
Light switch wasn't working.. As I would close the door I would notice our frig light wasn't going off...
I simply removed the old switch by gently pulling down on the old switch with a screwdriver. When it was about half way out I just gently pulled down on the old switch and it popped out... I removed the two connectors attached to the old switch by pulling on the connectors with a pliers...I tried using my fingers but wasn't able to pull the connectors off so I used pliers. It worked perfectly.. When pulling off the old connectors, make sure you attach the new switch to the same tabs on the new switch... It was very easy to do and took under 5 mins.....The light switch works perfect....P.S. You should unplug the frig while making the connection just in case....Safety first....!!!
Parts Used:
-
David from Hemet, CA
-
Difficulty Level:Really Easy
-
Total Repair Time:Less than 15 mins
-
Tools:Pliers, Screw drivers
3 of 4 people
found this instruction helpful.
Was this instruction helpful to you?
Thank you for voting!
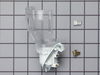
the light socket broke apart
I took out the old socket by moving a clip. Reattached the electrical wires, clicked in the socket and that was it.
Parts Used:
-
Elyse from Skokie, IL
-
Difficulty Level:Really Easy
-
Total Repair Time:15 - 30 mins
-
Tools:Screw drivers
4 of 7 people
found this instruction helpful.
Was this instruction helpful to you?
Thank you for voting!
TOO COLD FREEZER, TOO WARM REFRIGERATOR, EVAP FAN FROZEN SOLID
I just followed the directions on the video of my specific model. Make a note of where to locate that video of your model, as there are many other videos of other models that can have different parts located in different areas and it can be time consuming finding the exact video you want again.
Also note that you must make mental or written notes on exactly what direction any parts you remove are facing, this can save huge amounts of time when reassembling.
I was worried that I might need other parts, but decided to do one part replacement at a time since this unit is a spare and no urgency to get it back working again. I found that the evaporator fan was the only thing needed! The fridge works like new again!
Also note that you must make mental or written notes on exactly what direction any parts you remove are facing, this can save huge amounts of time when reassembling.
I was worried that I might need other parts, but decided to do one part replacement at a time since this unit is a spare and no urgency to get it back working again. I found that the evaporator fan was the only thing needed! The fridge works like new again!
Parts Used:

-
William from GRANTS PASS, OR
-
Difficulty Level:Easy
-
Total Repair Time:1- 2 hours
-
Tools:Nutdriver, Pliers
2 of 2 people
found this instruction helpful.
Was this instruction helpful to you?
Thank you for voting!
The freezer worked fine but the refrigerator wasn’t getting cold.
I removed the flat panel inside freezer & fan blades not turning. I removed 2 1/4” screws, unplugged wires took fan motor out & put that fan blade on new fan motor. Plugged wires into new motor replaced 2 bolts, reinstalled flat panel plugged refrigerator in & reset temperature controls. The next day checked temperature and was all done.
Parts Used:
-
Ray from Wiggins, MS
-
Difficulty Level:Really Easy
-
Total Repair Time:30 - 60 mins
-
Tools:Nutdriver, Screw drivers
2 of 2 people
found this instruction helpful.
Was this instruction helpful to you?
Thank you for voting!