















ECKMF86 Whirlpool Ice Maker - Instructions
Keep searches simple. Use keywords, e.g. "leaking", "pump", "broken" or "fit".
wasnt making ice
-
kandra from newhall, CA
-
Difficulty Level:Really Easy
-
Total Repair Time:15 - 30 mins
-
Tools:Screw drivers
2 of 3 people
found this instruction helpful.
Was this instruction helpful to you?
Thank you for voting!
broken hinge bearing on ice maker
Disconncted power, pulled plug on disconnect, loosened 3 ice maker attach screws, removed ice maker. carefully removed old broken part, to understand reasembly. Reinstalled new water fill & bearing part.. hung icemaker and tightened attach screws. Reattached electrical plug.. turned on power, it all worked. .took about 45 min to remove, 15 min to reinstall. Right tools needed re disassembly AND ASSEMBLY
Parts Used:

-
ROBERT from WESTFIELD, IN
-
Difficulty Level:Easy
-
Total Repair Time:30 - 60 mins
-
Tools:Nutdriver, Pliers, Screw drivers
3 of 7 people
found this instruction helpful.
Was this instruction helpful to you?
Thank you for voting!
Ice maker was not working.
Ordered new single outlet water valve, received in less than two days. Removed old one, and the repair pretty much feel in place. Instructions were there as a backup. ........ Just curious if the connection from the water source to the valve outlet connection could b a quick connect just the like the water line going directly to the ice maker. Gregg in PA.
Parts Used:
-
GREGG from WEST CHESTER, PA
-
Difficulty Level:Really Easy
-
Total Repair Time:30 - 60 mins
-
Tools:Nutdriver
1 person
found this instruction helpful.
Was this instruction helpful to you?
Thank you for voting!
Would not complete ice-making cycle.
Unplugged the refrigerator. No need to remove the entire icemaker (IM). Removed the old module by taking out the 3 screws and carefully wiggling it free from the icemaker. Lined up the blade arm with the new module, pushed the module onto the IM and put in the 3 screws. Lowered the shut off arm and plugged in the refrigerator. Once the freezer compartment reached the proper temperature, the IM began making ice with no further problems.
Parts Used:
-
Wayne from Castile, NY
-
Difficulty Level:Easy
-
Total Repair Time:15 - 30 mins
-
Tools:Nutdriver, Screw drivers
1 person
found this instruction helpful.
Was this instruction helpful to you?
Thank you for voting!
Leaking water
-
David from Valencia, CA
-
Difficulty Level:Really Easy
-
Total Repair Time:30 - 60 mins
-
Tools:Nutdriver, Screw drivers
1 person
found this instruction helpful.
Was this instruction helpful to you?
Thank you for voting!
Not making ice
-
Floyd from GIRARD, OH
-
Difficulty Level:Easy
-
Total Repair Time:15 - 30 mins
-
Tools:Nutdriver, Screw drivers
1 person
found this instruction helpful.
Was this instruction helpful to you?
Thank you for voting!
Connection leaked as tube entered freezer
Followed video and had one problen, the metal pipe would not release as shown,so I used a hacksaw between the plastic and metal pipe, removing the metal pipe from inside as the video shows. Good instructions.
Parts Used:
-
Robert from MERRIMACK, NH
-
Difficulty Level:Very Easy
-
Total Repair Time:15 - 30 mins
1 person
found this instruction helpful.
Was this instruction helpful to you?
Thank you for voting!
Ice maker wasn't working (water line frozen) and showed extensive damage to the metal basin.
Unplug fridge, turn off water to fridge
Uninstall ice maker (some tools needed)
Remove ice buildup inside water line
Purchase new ice maker and installed it while watching a youtube video of how to do it. Once installed, turned on the water line and plugged in fridge.
Uninstall ice maker (some tools needed)
Remove ice buildup inside water line
Purchase new ice maker and installed it while watching a youtube video of how to do it. Once installed, turned on the water line and plugged in fridge.
Parts Used:
-
Sarah from UNIONTOWN, OH
-
Difficulty Level:Easy
-
Total Repair Time:15 - 30 mins
-
Tools:Screw drivers, Socket set
1 person
found this instruction helpful.
Was this instruction helpful to you?
Thank you for voting!
Ice maker was not making ice
We replaced this part 5 years ago, so we considered ourselves "experienced" at this particular job. We followed the video at your site and after some sticky removal parts, we were able to put the new motor in and finish putting the freezer back in its original shape. After a few worried hours, we again had ice. The video was easy to follow and we couldn't be happier. Thank you for saving us hundreds of dollars.
Parts Used:
-
RONNIE from VERO BEACH, FL
-
Difficulty Level:A Bit Difficult
-
Total Repair Time:15 - 30 mins
-
Tools:Nutdriver, Pliers, Screw drivers, Wrench (Adjustable)
1 person
found this instruction helpful.
Was this instruction helpful to you?
Thank you for voting!
No Ice in bin.
Turned off ice maker. Remove one screw with nut driver (1/4") that hold plugin cover. Push the release lock, (up) on bottom of Ice maker to slide unit out enough to unplug and remove ice maker out of freezer. remove white side cover and replace control unit. Reinstall white side cover then plug unit in at freezer and slide unit into locks reinstall plugin cover with screw. Turn on ice maker and watch Ice maker start to move and tray to fill with water. Done.
Parts Used:
-
JOHN from DULUTH, GA
-
Difficulty Level:Very Easy
-
Total Repair Time:Less than 15 mins
-
Tools:Nutdriver, Screw drivers
1 person
found this instruction helpful.
Was this instruction helpful to you?
Thank you for voting!
Ice maker broken. Quick fix
The plastic fill cup part is also used to hold one end of the wire “one/off” switch that is manually activated or activated when the ice tray is full. This wire piece fell out because one end, that is part of the plastic fill cup, broke off. The wire switch was fine.
The video demos show you exactly what to do. The repair man showed me a trick to speed up the testing process. The trick is to insert a wire jumper cable to actuate the ice maker and make it rotate. But this isn’t necessary.
Hardest part of this fix is emptying the freezer (bottom with a slide out door) and removing the door.
Why this part is so expensive is beyond me. But I’m happy it was available for a 24yo fridge that still works!!
The video demos show you exactly what to do. The repair man showed me a trick to speed up the testing process. The trick is to insert a wire jumper cable to actuate the ice maker and make it rotate. But this isn’t necessary.
Hardest part of this fix is emptying the freezer (bottom with a slide out door) and removing the door.
Why this part is so expensive is beyond me. But I’m happy it was available for a 24yo fridge that still works!!
Parts Used:
-
Tim from Berkeley, CA
-
Difficulty Level:Easy
-
Total Repair Time:1- 2 hours
-
Tools:Nutdriver, Screw drivers
1 person
found this instruction helpful.
Was this instruction helpful to you?
Thank you for voting!
We would come home from wintering in Texas and the ice maker would again work for about a week. Decided to replace the valve because it wasn't expensive.
Replaced the valve and cleaned all the coils at the same time. The ice maker is spewing out ice. Wife is happy again.
Parts Used:
-
Tom from MINNEAPOLIS, MN
-
Difficulty Level:Really Easy
-
Total Repair Time:15 - 30 mins
-
Tools:Nutdriver, Wrench (Adjustable)
1 person
found this instruction helpful.
Was this instruction helpful to you?
Thank you for voting!
was NOT making ice
Your youtube ..order part and fix in 2 mins.AWESOME we had our refrigerator since 1983.... my wife keeps her looking new...& happy with the saving .Our frigerator a MAGIC CHEF..the ice maker is the only thing we have replaced.
Parts Used:
-
Donald from ACWORTH, GA
-
Difficulty Level:Really Easy
-
Total Repair Time:Less than 15 mins
1 person
found this instruction helpful.
Was this instruction helpful to you?
Thank you for voting!
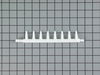
Ice maker ejector arm broke into.
-
Mary L. from Millsboro,, DE
-
Difficulty Level:Really Easy
-
Total Repair Time:Less than 15 mins
-
Tools:Screw drivers
16 of 46 people
found this instruction helpful.
Was this instruction helpful to you?
Thank you for voting!
ice maker not making ice
When I took the ice maker apart I noticed that the shaft of the motor control wheel was broken so when it turned it could not trip the control contacts nor rotate the ice ejector fingers. I ordered a new control and motor assembly which arrived two days later. It was very easy to install and now the ice maker works perfectly.
PartSelect was a great help. A local appliance parts warehouse stocked parts for my ice maker but they only stocked a kit that contained other parts that I did not need. Ordering from PartSelect saved me over $35.
PartSelect was a great help. A local appliance parts warehouse stocked parts for my ice maker but they only stocked a kit that contained other parts that I did not need. Ordering from PartSelect saved me over $35.
Parts Used:
-
James from Van Buren, AR
-
Difficulty Level:Really Easy
-
Total Repair Time:Less than 15 mins
-
Tools:Nutdriver, Screw drivers
1 person
found this instruction helpful.
Was this instruction helpful to you?
Thank you for voting!