Your coupon for will be reflected when you check out!
✖
Your coupon for
✖
Hello!
You're visiting the PartSelect site in U.S.
Would you like to shop on the Canadian site?
Stay on this site
Go to Canadian site
✖
Model Number Locations
1Select Category Type
Select Category Type
2Select Product Type
Select Product Type
3Select {MODEL} Type
Select {MODEL} Type
Sample Model Number Tags
Model numbers can be made up of numbers (1005400, for example) or a combination of letters and numbers (LAT1000AAE). The model number will most likely appear on either a paper sticker or a metal plate. Your appliance's model number tag may look similar to the sample model number tags shown here (model number highlighted in yellow):
Model has been saved to My Models. If you're not signed in, your lists are available on this device and will expire within 30 days.
Model has been saved to My Models.
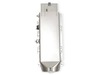
This genuine OEM heater duct assembly in your dryer directs hot air into the drum during operation. Generally, it can be found behind the drum or at the rear of the dryer. If this assembly becomes dam...
The leveling leg on your dryer attaches to the bottom of the dryer base. The function of the leg is to keep your dryer level while it operates. This part is approximately 3 inches in length, 2 inches ...
I purchased wholesale heater element with sensors. Couple wires and bolts to attach. Trickiest part is disassembling the dryer to remove the old heating unit. You-tube it; it's gold.
I firstly over-ordered parts. The general guidance is check one part and replace if bad, then check the next, etc. I only wanted to do the disassembly once so I ordered all the parts which were involved with generating heat. Turned out the heater duct assembly came with the thermal fuse and thermistor already installed, in addition to
... Read morethe heating element. Once I had the parts, I watched the video which was identified in my parts order. Then I started disassembly. I put screws from each step into their own little container so there was no mixing them up. Everything went exactly as shown in the video, except for the front panel containing the control board. My dryer was slightly different, but still easy to get out. When I had the drum out, the heater duct assemble was easy to remove, one screw only. I transferred connecters from the old duct to the new one-at-a-time to make sure there were no mistakes, then installed the new one with the single screw. Re-assembly went quickly. I plugged it in and, with some hesitation, set it to a short timed cycle and started it. After a few minutes, I hit pause and stuck my hand in the drum and it was warm! The dryer has continued to work since. Repair successful!


;FRON – Part Number: DC97-10912A")