















DDT700SSN8SS General Electric Dishwasher - Instructions
Keep searches simple. Use keywords, e.g. "leaking", "pump", "broken" or "fit".
3 Plastic rollers on bottom of dish basket came off and melted by the heating coil in dishwasher,
Simply pick the basket up to slide wheels onto axles and push in until they lock in place.
Parts Used:

-
BENJAMIN from ONALASKA, TX
-
Difficulty Level:Very Easy
-
Total Repair Time:Less than 15 mins
5 of 6 people
found this instruction helpful.
Was this instruction helpful to you?
Thank you for voting!
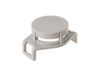
the hub that holds the spinner for the top water in the dishwasher broke
the design of this part is easy to break when closing the top rack.
there is a hub that clicks in place and a spinner within this that makes the water spray evenly on the top of the tub of the dishwasher
the part broke when closing the rack [a dish too tall hit it]
it took less than 5 minutes to replace as the part just clicks into two edge spots i did this without removing the rack or even looking into the tub all by feel
there is a hub that clicks in place and a spinner within this that makes the water spray evenly on the top of the tub of the dishwasher
the part broke when closing the rack [a dish too tall hit it]
it took less than 5 minutes to replace as the part just clicks into two edge spots i did this without removing the rack or even looking into the tub all by feel
Parts Used:
-
Gary from CONNEAUT, OH
-
Difficulty Level:Really Easy
-
Total Repair Time:Less than 15 mins
5 of 6 people
found this instruction helpful.
Was this instruction helpful to you?
Thank you for voting!
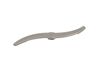
Water blowing out door
Replaced lower spray arm.easiest repair ever saved tons of money doing it myself
Parts Used:
-
David from CROSSVILLE, TN
-
Difficulty Level:Very Easy
-
Total Repair Time:30 - 60 mins
6 of 9 people
found this instruction helpful.
Was this instruction helpful to you?
Thank you for voting!
Thumping Sound during the WashRinse cycles
Chances are your Lower spray arm is worn or jets are off. Replacing this part is very easy. Grab the base of the lower spray arm, twist and pull straight up. Place the new one in and twist lock in place. Repair complete!
Parts Used:
-
Jedrino from HAWTHORNE, CA
-
Difficulty Level:Very Easy
-
Total Repair Time:Less than 15 mins
4 of 4 people
found this instruction helpful.
Was this instruction helpful to you?
Thank you for voting!
Large hole in spray arm
-
Steve from Park Hill, OK
-
Difficulty Level:Very Easy
-
Total Repair Time:Less than 15 mins
4 of 4 people
found this instruction helpful.
Was this instruction helpful to you?
Thank you for voting!
Lower spray arm locking lugs had worn and it would pop off when the dishwasher was in use. It fell on the heating element during the dry cycle and a hole was melted through it.
I took out the old one and simply inserted the replacement. It was an exact replacement part and thus a perfect fit. Dishwasher is working fine now! Cost was around $40 (shipped) which I thought was reasonable.
Parts Used:
-
Mason from JESSIEVILLE, AR
-
Difficulty Level:Very Easy
-
Total Repair Time:Less than 15 mins
4 of 4 people
found this instruction helpful.
Was this instruction helpful to you?
Thank you for voting!
The heating element on our dishwasher burned the lower spray arm, melting it in 2 pieces
Simply unscrewed the old damaged arm and screwed the new one on, took less than a minute
Parts Used:
-
Jake from SACRAMENTO, CA
-
Difficulty Level:Very Easy
-
Total Repair Time:Less than 15 mins
4 of 5 people
found this instruction helpful.
Was this instruction helpful to you?
Thank you for voting!
Lower spray arm had melted tips
-
Ed from TRAVELERS RST, SC
-
Difficulty Level:Really Easy
-
Total Repair Time:30 - 60 mins
4 of 5 people
found this instruction helpful.
Was this instruction helpful to you?
Thank you for voting!
Water leak corners of door onto the floor
After hours looking for problem. I tried cleaning door gasket. Did not stop leak. Looked at lower water spray arm and it was split. It is literally a 2 minute repair to remove and install. Knock on wood, no leaks in the last 10 washes.
Parts Used:
-
John from Aston, PA
-
Difficulty Level:Really Easy
-
Total Repair Time:Less than 15 mins
3 of 3 people
found this instruction helpful.
Was this instruction helpful to you?
Thank you for voting!
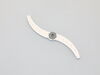
Mid Spray Arm Assembly not spinning
The Mid Spray Arm Assembly was not spinning due to a dish that was in placed the dishwasher that was too high and hitting the arm. When it spun until it broke the center shaft. Replacement was easy. After removing power I pulled the upper tray out and removed the Conduit Mid Tiered Assembly by unsnapping it from the tray. I twisted off the broken spindle of the damaged arm assembly from the Conduit Mid Tiered Assembly and inserted the new arm and gently pushed it until it snapped into the Mid Tiered Assembly. Reinstalled the assembled parts by snapping into the tray making sure it was centered.
Parts Used:
-
Robert from FLUSHING, MI
-
Difficulty Level:Really Easy
-
Total Repair Time:Less than 15 mins
-
Tools:Screw drivers
3 of 3 people
found this instruction helpful.
Was this instruction helpful to you?
Thank you for voting!
Loud banging sound when dishwasher was on.
The base of the spray arm literally just spins a little bit into place like a luer lock. Takes two seconds to replace.
Parts Used:
-
Joseph from KENNEDALE, TX
-
Difficulty Level:Very Easy
-
Total Repair Time:Less than 15 mins
3 of 4 people
found this instruction helpful.
Was this instruction helpful to you?
Thank you for voting!
Old silverware basket wore through and melamine utensils fell through and stuck to heating element which cost me $100 for repairman to remove
-
Diana from NAPLES, FL
-
Difficulty Level:Very Easy
-
Total Repair Time:Less than 15 mins
3 of 4 people
found this instruction helpful.
Was this instruction helpful to you?
Thank you for voting!
Had to replace the lower arm and adapter
One I figured out how to get the original contraption out, it was smooth sailing. I used pliers because thats all I had, but a socket wrench would have been much easier. The adapter has to be pressed a certain way to pull it out, but then the new one easily snapped back into place, and the nut went in mostly with ease. Again, a socket wrench would have been a much better tool to use.
Parts Used:

-
Casey from OMAHA, NE
-
Difficulty Level:A Bit Difficult
-
Total Repair Time:30 - 60 mins
-
Tools:Pliers, Socket set, Wrench (Adjustable)
4 of 7 people
found this instruction helpful.
Was this instruction helpful to you?
Thank you for voting!
roller wheel was melted.
I removed the old roller wheels and the new roller wheels snapped together and the simple instructions made the repair quick and simple..
Parts Used:
-
Julian T from Dalton, GA
-
Difficulty Level:Really Easy
-
Total Repair Time:30 - 60 mins
2 of 2 people
found this instruction helpful.
Was this instruction helpful to you?
Thank you for voting!
Guide Rail for Rack Broke
I determined the guide rail on one side had broke when the white plastic bearings fell out of their track. I decided to replace both sides at the same time, so I ordered 2. They arrived quickly and I installed them and placed the middle rack back into the dishwasher. Went together fairly easily. I took pictures before removing the guides from the rack, so I would remember how to put the new ones back one when they arrived. Very happy with this DIY repair that easily would have taken much longer and would have been way more expensive! Thank you!
Parts Used:
-
Cody from Denver, CO
-
Difficulty Level:Easy
-
Total Repair Time:30 - 60 mins
-
Tools:Nutdriver, Screw drivers
2 of 2 people
found this instruction helpful.
Was this instruction helpful to you?
Thank you for voting!