















DDC4497AAL General Electric Dryer - Instructions
Keep searches simple. Use keywords, e.g. "leaking", "pump", "broken" or "fit".
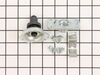
Holes were not threaded on rear bearing kit
Had to tap three holes in the rear bearing to match the three attachment screws. Screw up with the part.
Parts Used:
-
Dennis G from Naples, FL
-
Difficulty Level:A Bit Difficult
-
Total Repair Time:More than 2 hours
-
Tools:Nutdriver, Pliers, Screw drivers, Socket set, Wrench (Adjustable), Wrench set
Was this instruction helpful to you?
Thank you for voting!
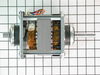
The main symptom was a burning smell that got on the clothes and the dryer was somewhat louder than it had been.
Researching on the web I thought the trouble might be lint buildup or trouble w/ one of the parts involved in spinning the drum. However I cleaned out all the lint and replaced the belt and idler pulley and this didn't improve the smell (drum bearing was fine). I then concluded the trouble was the motor. Running the motor w/o the drum in place confirmed this was where the noise/smell was coming from. Replacing the motor was fiddly--I had to remove the clip holding the motor (pried the top w/ a screwdriver), wires (made a diagram so as to put back in same order, they were hard to get off--a pliers did the job), clamps holding the motor on the duct, the motor mount, the duct, the fan. Putting all this back together took a while (not hard just fiddly). Tested the motor w/out the drum in place and it sounded fine. Put the drum and back/front/top panels back and the dryer runs fine now. All parts came quickly and exactly matched the parts in my 1993 Hotpoint dryer. As others have said the pulley kit is not needed--these are included w/ the motor. BTW I am a 53-year-old lady. Thanks to all who took the time to write up their experiences--big help!!
Parts Used:
-
Kristin from Bellevue, WA
-
Difficulty Level:Difficult
-
Total Repair Time:More than 2 hours
-
Tools:Pliers, Screw drivers, Socket set
Was this instruction helpful to you?
Thank you for voting!
The dryer was making a very loud noise
After having a friend who repairs appliances come and diagnose the problem, I was able to find the parts I needed very easily at PartSelect. They came quickly and I removed the front panel, followed the instructions (they were not very detailed) and also had help reading some of the other posts from people on the website. I replaced the parts and the dryer is now quiet and running fine.
Parts Used:
-
Jana from Eatonton, GA
-
Difficulty Level:Really Easy
-
Total Repair Time:Less than 15 mins
-
Tools:Nutdriver, Screw drivers
Was this instruction helpful to you?
Thank you for voting!
The drum stopped turning in the dryer
Based on the symptom (drum not turning), I figured that the belt was shot. I found a video on YouTube that described how to fix it. I also found directions here on this site on how to fix it! Here's what I did: step1: there were two screws holding the top on. took them off and the top swung up, exposing the drum and broken belt. step2: took off the two screws holding the front on. tipped the front forward so I could get the new belt around the drum. step 3: took the back plate off (10 screws). had to remove the exhaust tube first. cleaned out all the lint with the shop vac. there was plenty of lint everywhere. step 4: put the belt onto the motor pulley wrapping around the tension pulley. step5: put everything back together and plugged it in. everything worked fine. it took longer to vacuum all the lint out than it did for the actual repair.
Parts Used:

-
Alan from Wheaton, IL
-
Difficulty Level:Easy
-
Total Repair Time:15 - 30 mins
-
Tools:Nutdriver, Screw drivers
Was this instruction helpful to you?
Thank you for voting!
Loud Noise coming from dryer (like motor was going out)
I had to take the top panel off of the dryer which is 2 screws inside the dryer door jam. Then the front panel had to come off which was 2 screws inside the dryer above the tumbler. One on each side. Then it lifts off of two hooks at the bottom. Then the left panel (left if you are looking at the front of the dryer) had to come off which was a few screws on the back, a few on the front, and one on the bottom. Once I had the panels off, I unscrewed the blower wheel which is one screw. I took the blower wheel cabinet loose but didn't remove it. There is a metal collar that holds the motor to the bracket. Pull it off from the top. Unplug all the wires attached to the motor. I took a picture of the wire connections with my phone for reference with the new motor. Remove the belt. The motor should pull out towards you. The new motor comes with a pulley. Put the pulley on the motor and tighten locking screw. Put new motor in dryer and replace the metal collar. Connect all wire connections. Reconnect the blower wheel and tighten all screws to the blower wheel housing. Now, I plugged the dryer back in and tested it without reattaching the belt. Know that if you do it this way, the dryer will not stay on because there is a relay switch that is engaged only when the belt is on the pulley and there is tension on the belt tensioner. When the dryer motor worked properly, I replaced the belt and put all the panels back on. Plugged it up and it worked beautifully.
Parts Used:
-
Chad from New Bern, NC
-
Difficulty Level:Easy
-
Total Repair Time:15 - 30 mins
-
Tools:Nutdriver, Screw drivers
Was this instruction helpful to you?
Thank you for voting!
The drum bearing worn and dryer squeaking.
The info from your web site was helpful. I had never taken a dryer apart and the instructions made the job easy. Used socket set to remove the back panel and top control panel. Then used a phillip's screwdriver to remove the two screws that hold the top of the dryer; these screws are accessed by opening the door to the dryer. To remove the front of the dryer remove to the two screws that are located at the top upper corners where front panel meet the side panel. Once these two screws are removed, remove the belt from around the drum and lift the drum out. The drum bearing is located on the back of the drum; remove the remnants of the old bearing and replace it with the new one. Retrace your steps to put the dryer back together. To get the belt back on track you will have to remove the lower back panel to access the belt drive and tension pulley. It is not difficult. God bless you.
Parts Used:

-
jesse from Denison, TX
-
Difficulty Level:Easy
-
Total Repair Time:15 - 30 mins
-
Tools:Socket set, Wrench set
Was this instruction helpful to you?
Thank you for voting!
intermittent failure to heat air until total failure to heat
Unplugged dryer. Removed access door from lower right front of dryer. Disconnected wiring harness to igniter. Couldn't reach retaining bolt with wrench or socket, but was able to spread igniter clip with fingers to be able to remove old igniter and then work new igniter into position without unbolting retaining clip - ultimately a tool-less operation that could have taken 5 minutes. Reconnect wiring harness and reconnect power. Test dryer then replace access cover.
Parts Used:

-
James from Asbury Park, NJ
-
Difficulty Level:Easy
-
Total Repair Time:15 - 30 mins
Was this instruction helpful to you?
Thank you for voting!
Loud Sqeaking noise
the replacement part was easy to replace but remembering how the belt went back on took alittle more time..
Parts Used:
-
Michell from Bellefontaine, OH
-
Difficulty Level:Easy
-
Total Repair Time:15 - 30 mins
Was this instruction helpful to you?
Thank you for voting!
dryer door would not stay closed
-
Dave from Redondo Beach, CA
-
Difficulty Level:Really Easy
-
Total Repair Time:Less than 15 mins
Was this instruction helpful to you?
Thank you for voting!
squealing noise while dryer was running
Removed two screws from front by door. Removed back panel to remove belt from tensioner. lifted lid of dryer. removed two more screws from inside to remove front panel. while holding the barrel I removed the front panel then grabbed barrel and pulled out. took off the old bearing, put the new one on and reassembled it the way I took it apart. The whole thing took about 10 min was quick and easy if there is any problems while you are doing it look it up on youtube.com and you can see it done.
Parts Used:
-
robert from Florissant, MO
-
Difficulty Level:Really Easy
-
Total Repair Time:Less than 15 mins
-
Tools:Nutdriver, Screw drivers
Was this instruction helpful to you?
Thank you for voting!
Dryer door would no longer shut.
Simply popped the old broken part out and popped the new part into place. I wasn't sure if it was the Latch Door or the Door Strike. Once the parts arrived, it was clear the Door Strike was not the issue.
Parts Used:
-
Fawn from Loganville, GA
-
Difficulty Level:Easy
-
Total Repair Time:Less than 15 mins
-
Tools:Screw drivers
Was this instruction helpful to you?
Thank you for voting!
Noise, poor drying
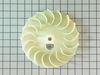
I noticed the original blower wheel was worn, the hole for the motor shaft was reamed out and the blower was not spinning with the motor. Air was not being circulated so the clothes were not drying well. Replacing the wheel was relatively easy. I did see other people commenting on the difficulty of getting the drive belt re installed properly. I noticed a small "lip" bent into the motor frame, and found the arm for the belt tensioner would fit into this lip and it held it out of the way while I reinstalled the drum and reouted the belt onto the motor pulley. Once the belt was in place, I gently let the tensioner out of its holding position and everything went back into place nicely.
Parts Used:

-
Robert from Wyandotte, MI
-
Difficulty Level:A Bit Difficult
-
Total Repair Time:30 - 60 mins
-
Tools:Screw drivers, Socket set
Was this instruction helpful to you?
Thank you for voting!
Defective rear drum bearing
Removed drum, replaced bearing. Installed new belt. Reinstalled drum. No problem
Parts Used:
-
Donald from Alden, NY
-
Difficulty Level:Really Easy
-
Total Repair Time:30 - 60 mins
-
Tools:Nutdriver, Wrench set
Was this instruction helpful to you?
Thank you for voting!
Loud screeching noise
I watched video supplied from parts select, only took about 30 minutes, hardest part was putting belt back on, couldn't fit hands in easily, but once I did it, dryer is like new, can't hear a thing.
Parts Used:
-
Michael from Hopatcong, NJ
-
Difficulty Level:Easy
-
Total Repair Time:30 - 60 mins
-
Tools:Screw drivers
Was this instruction helpful to you?
Thank you for voting!
Dryer was making a vibrating sound near the bottom left rear area.
I suspected the idler pulley shaft was worn. I found the repalcement pulley on parts select web site. finding the part was very easy and delivery was very quick. After removing the dryer from the wall,I removed the access panel in the rear which exposed the motor, belt, and pulley. After removing the belt from the pulley, I removed the pully assembly from the dryer. I removed the keeper retaining ring on the pulley and installed the new pulley with the new parts supplied. The new pulley assembly was then ready for re-installation.
Parts Used:
-
RICHARD from ST. MARTINVILLE, LA
-
Difficulty Level:Really Easy
-
Total Repair Time:30 - 60 mins
-
Tools:Pliers, Screw drivers
Was this instruction helpful to you?
Thank you for voting!