















CTF1921ARA Magic Chef Refrigerator - Instructions
Keep searches simple. Use keywords, e.g. "leaking", "pump", "broken" or "fit".
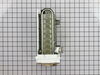
Replaced leaking ice maker after minor screwup!
Old ice maker leaking water and produced ice cubes with black inclusions. First, I removed old ice maker per video instructions. Transferred electrical cable, cover, and bail to new ice maker. First installation failed because I failed to make sure water tube correctly enter back of ice maker. No ice. Initially thought electrical cable wasn't firmly in place. Then I noticed frozen water dripping down back of freezer. A clue! Removed ice maker and reinstalled making sure water tube went through the hole in back of ice maker. Now the new ice maker works beautifully!
Parts Used:
-
Jackson from Leesburg, VA
-
Difficulty Level:Easy
-
Total Repair Time:15 - 30 mins
-
Tools:Nutdriver
2 of 3 people
found this instruction helpful.
Was this instruction helpful to you?
Thank you for voting!
Broke light switch while cleaning
use kitchen knife to pry out. replaced switch assemble and pressed back into place. Could not have done this with out help from previous customers. Thanks
Parts Used:

-
Gail from Golden, CO
-
Difficulty Level:Really Easy
-
Total Repair Time:Less than 15 mins
2 of 3 people
found this instruction helpful.
Was this instruction helpful to you?
Thank you for voting!
The bottom brackets on the inner door were missing.
The frig had broken brackets on the inner door. I connected the clips to the trim piece and I snapped the entire piece into the slots on the door. Presto! All finished.
Parts Used:

-
Linda from Saginaw, MI
-
Difficulty Level:Really Easy
-
Total Repair Time:Less than 15 mins
2 of 3 people
found this instruction helpful.
Was this instruction helpful to you?
Thank you for voting!
icemaker quit working
I took out 1 screw , unplugged the icemaker and lifted it out and installed the new one and had ice in no time at all. can't get much easier.
Parts Used:
-
craig from green bay, WI
-
Difficulty Level:Really Easy
-
Total Repair Time:Less than 15 mins
-
Tools:Nutdriver
2 of 3 people
found this instruction helpful.
Was this instruction helpful to you?
Thank you for voting!
Replaced Ice Maker
Followed the online PartSelect video instructions and it was very helpful. The ice maker has to cycle through before it starts making ice so don't be alarmed when nothing happens when you first hook it up.
Parts Used:
-
Steven from Clinton Corners, NY
-
Difficulty Level:Easy
-
Total Repair Time:Less than 15 mins
-
Tools:Nutdriver
2 of 3 people
found this instruction helpful.
Was this instruction helpful to you?
Thank you for voting!
difficulty unplugging the power pigtail
-
William from Las Cruces, NM
-
Difficulty Level:A Bit Difficult
-
Total Repair Time:30 - 60 mins
-
Tools:Nutdriver, Screw drivers
2 of 3 people
found this instruction helpful.
Was this instruction helpful to you?
Thank you for voting!
Outer case of freezer was heating up, not making ice (sometimes) turned up thermostat several times (especially freezer)
I got the product very quickly. (thank you) Looked at online instructions that were quite vague. Pulled plug.Removed the holder for the fan motor slid it out to see what I had. Removed the mounting screws (3) and slid the motor an fan blade out. I made a cut between the wires and marked the "top" wire to motor to be sure to spin in right direction. Removing fan blade hold down clamp was NOT explained at all but I noted that the shaft on the motor was threaded, so I used pliars and held the shaft white un-screwing clamp. I cleaned the fan blades with degreaser and scraped edges of opening on holder opening. Make sure to use ALL the NEW parts included with this kit when re-installing. They send them for a reason. When slpicing and connecting wires it is a 50/50 shot if you don't mark before cutting. You can connect and try plugging fridge back for moment and make sure it is blowing OUT. Put everything back together and after turning DOWN the thermostats twice, fridge is back to usual. Ice maker is cranking out ice and outside case is cool to the touch.
Note: This can be a DIRTY job especially with 4 dogs in house. Fir and grease don't mix well
Note: This can be a DIRTY job especially with 4 dogs in house. Fir and grease don't mix well
Parts Used:

-
John from Greensboro, NC
-
Difficulty Level:A Bit Difficult
-
Total Repair Time:30 - 60 mins
-
Tools:Nutdriver
3 of 6 people
found this instruction helpful.
Was this instruction helpful to you?
Thank you for voting!
noisy fridge, perimeter of door heating up
figured out the condenser fan was kaput. Tried WD, worked for several days then gave out completely. Took off back of fridge and trained small fan on compressor while I ordered new condenser fan. The swap was easy, undid the housing bolts, stripped off the connector, reconnected and voila! works perfect.
Parts Used:
-
craig from maple grove, MN
-
Difficulty Level:Easy
-
Total Repair Time:15 - 30 mins
-
Tools:Nutdriver, Pliers
2 of 3 people
found this instruction helpful.
Was this instruction helpful to you?
Thank you for voting!
Quit making ice
Loosen the screws on the sidewall (don't take them all the way out and drop them on the floor as I did) and remove the screw from the bottom bracket. Change out the electrical wires and the wire level sensor that does not come with the new unit. Put the new one in place and give it some time to cool down and make ice ( don't be impatient like I was and think the new unit was bad or that you replaced the wrong part)
Parts Used:
-
James from Charleston, SC
-
Difficulty Level:Easy
-
Total Repair Time:15 - 30 mins
-
Tools:Screw drivers
2 of 3 people
found this instruction helpful.
Was this instruction helpful to you?
Thank you for voting!
refrigerator was overheating, condensor fan dead.
First I removed all the screws from the back cover.
2nd removed fan nut and fan blade
3rd removed fan bracket
4th I traced wire to the condenser and disconnected wires from wire nuts.
Installed existing fan brackets to new motor kit
then reconnected wire nuts to new motor cord
Reinstalled fan nut and blade,
reinstalled cover, plugged it in and BAM .WORKS PERF!
2nd removed fan nut and fan blade
3rd removed fan bracket
4th I traced wire to the condenser and disconnected wires from wire nuts.
Installed existing fan brackets to new motor kit
then reconnected wire nuts to new motor cord
Reinstalled fan nut and blade,
reinstalled cover, plugged it in and BAM .WORKS PERF!
Parts Used:
-
David from Granada Hills, CA
-
Difficulty Level:Really Easy
-
Total Repair Time:15 - 30 mins
2 of 3 people
found this instruction helpful.
Was this instruction helpful to you?
Thank you for voting!
original motor stopped
removed old and instaslled new. biggest problem was getting to one of the screws.
Parts Used:
-
Paul from Lowell, MI
-
Difficulty Level:A Bit Difficult
-
Total Repair Time:1- 2 hours
-
Tools:Nutdriver, Socket set
2 of 4 people
found this instruction helpful.
Was this instruction helpful to you?
Thank you for voting!
icicles from pooled water in ice collector bucket
I watched the repair video on the web site a couple of times just to get comfortable with what to expect. (i.e. pressing tabs on wiring harness to remove, placement of lift arm for removal and installation) These instructions were a big help...I had the removal, modifications and installation completed in less than 30 minutes. Ice cubes (without the extra icicles) in 1 hour...
Parts Used:
-
Roberta A from WINTER HAVEN, FL
-
Difficulty Level:Really Easy
-
Total Repair Time:30 - 60 mins
-
Tools:Nutdriver
1 person
found this instruction helpful.
Was this instruction helpful to you?
Thank you for voting!
Ice maker broken. Quick fix
The plastic fill cup part is also used to hold one end of the wire “one/off” switch that is manually activated or activated when the ice tray is full. This wire piece fell out because one end, that is part of the plastic fill cup, broke off. The wire switch was fine.
The video demos show you exactly what to do. The repair man showed me a trick to speed up the testing process. The trick is to insert a wire jumper cable to actuate the ice maker and make it rotate. But this isn’t necessary.
Hardest part of this fix is emptying the freezer (bottom with a slide out door) and removing the door.
Why this part is so expensive is beyond me. But I’m happy it was available for a 24yo fridge that still works!!
The video demos show you exactly what to do. The repair man showed me a trick to speed up the testing process. The trick is to insert a wire jumper cable to actuate the ice maker and make it rotate. But this isn’t necessary.
Hardest part of this fix is emptying the freezer (bottom with a slide out door) and removing the door.
Why this part is so expensive is beyond me. But I’m happy it was available for a 24yo fridge that still works!!
Parts Used:

-
Tim from Berkeley, CA
-
Difficulty Level:Easy
-
Total Repair Time:1- 2 hours
-
Tools:Nutdriver, Screw drivers
1 person
found this instruction helpful.
Was this instruction helpful to you?
Thank you for voting!
Ice Maker Stopped Working
This was a very easy fix. I took the old ice maker out, including the electrical harness. Switched the harness and stop bar to the new ice maker on my bench, then installed the new assembly. Ice initially had some hollow cubes. I checked the ice maker for level. But it was fine. Thought it might be moving too fast. But it seems to have cleared up. Perhaps it took some time to completely cool down.
Parts Used:
-
Mark from Oak Hill, VA
-
Difficulty Level:Really Easy
-
Total Repair Time:15 - 30 mins
-
Tools:Screw drivers, Socket set
1 person
found this instruction helpful.
Was this instruction helpful to you?
Thank you for voting!
Condenser fan making noise
I removed 7 screws hold the heavy cardboard cover on the rear of the fridge. The dificult part was taking the screws that hold the 3 fan motor braces on the fan out. After that it was a matter of making the wire conections and putting it back in. I did not have enough room to laydown to do the work, If i had it would have been a lot easier to see the screws that had to be removed. All in all an easy job, and the part was a perfect fit.
Parts Used:
-
Richard from North Easton, MA
-
Difficulty Level:Easy
-
Total Repair Time:15 - 30 mins
-
Tools:Nutdriver, Pliers, Wrench set
2 of 4 people
found this instruction helpful.
Was this instruction helpful to you?
Thank you for voting!