















CSX22BCBGWH Hotpoint Refrigerator - Instructions
Keep searches simple. Use keywords, e.g. "leaking", "pump", "broken" or "fit".
Ice buildup. The Ice Machine was frosting over. Ice (due to frosting) would block the drop chute.
Unfortunately, the replacement part didn't come with instructions. The repair, nevertheless, was fairly straightforward. After removing the plastic parts that guide the ice through the door (by removing a few screws that attach the parts to the inside of the door), I was able to slip my hand into the ice maker dispenser and remove the old part. The part clips on. It is a tight fit through the funnel (from the outside of the freezer), however, and requires that the gasket first be "flipped" open wherein it unfolds 180 degrees. Doing this will make it easier to clip the new gasket onto the assembly.
Parts Used:
-
Tim from The Woodlands, TX
-
Difficulty Level:Really Easy
-
Total Repair Time:15 - 30 mins
-
Tools:Screw drivers
9 of 12 people
found this instruction helpful.
Was this instruction helpful to you?
Thank you for voting!
Twice I ordered the oven light bulb & each time the light bulb was defected
I had to call for a appointment for repair with GE Appliance because I thought then it . .was something electrical. The technician came out & checked everything out, turned out it was not electrical, The technician went out to his truck got a light bulb from his truck, put it in & it worked. It cost me $121.00 for trip charge from GE appliance for a light bulb that worked, your light bulbs were defective twice. Very disappointed with your products, cost me alot of money for a good light bulb thru GE appliance
Parts Used:

-
Barbara from BELLEVUE, WA
-
Difficulty Level:Very Difficult
-
Total Repair Time:Less than 15 mins
17 of 36 people
found this instruction helpful.
Was this instruction helpful to you?
Thank you for voting!
The two parts I replaced had rusted. Left rust chips in ice.
I carefully removed the screws and laid aside in order. Taking off the ice grinders was the trickiest part, but I had read before to make sure to keep them in order. Replaced two new parts and reassembled. Pretty simple, but just keep track of where each part goes.
Parts Used:
-
David from Jupiter, FL
-
Difficulty Level:Easy
-
Total Repair Time:30 - 60 mins
-
Tools:Nutdriver, Pliers, Screw drivers
9 of 12 people
found this instruction helpful.
Was this instruction helpful to you?
Thank you for voting!
Plastic light sheild over freezer light had broken.
Removed old sheild and reached in freezer replacing sheild with screwdriver. 3 - 4 minutes.
Ordered sheild online one afternoon and received the nest afternoon. Great transaction. will use again when needed.
George in Louisville, KY
Ordered sheild online one afternoon and received the nest afternoon. Great transaction. will use again when needed.
George in Louisville, KY
Parts Used:
-
George from Louisville, KY
-
Difficulty Level:Really Easy
-
Total Repair Time:Less than 15 mins
-
Tools:Screw drivers
7 of 7 people
found this instruction helpful.
Was this instruction helpful to you?
Thank you for voting!
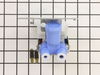
Solenoid controlling the valve had stopped operating.
I first tested to make sure the solenoid was receiving power. Every time the arm on the ice maker cycled, the meter would go up to 120v for about 10-15 seconds, and then back to almost 0, so I knew the electical control and timer was working as it should.
The valve was easy to change - took about 20 minutes total (including pulling the fridge out and pushing it back in). I just turned the water off, removed the valve assembly from the fridge, and took all of the lines off of the old one. I then hooked up the supply line to the new valve assembly. The lines to the water and ice had compression fittings on them, but the new vavle has a "push-in" connector. So, I cut the old water and ice lines squarely, just past the fitting, then pushed them in firmly. Plugged the connectors in, re-attached the vavle assembly to the fridge, turned the water back on, and viola - I had ice in about an hour! Gravy! :)
The valve was easy to change - took about 20 minutes total (including pulling the fridge out and pushing it back in). I just turned the water off, removed the valve assembly from the fridge, and took all of the lines off of the old one. I then hooked up the supply line to the new valve assembly. The lines to the water and ice had compression fittings on them, but the new vavle has a "push-in" connector. So, I cut the old water and ice lines squarely, just past the fitting, then pushed them in firmly. Plugged the connectors in, re-attached the vavle assembly to the fridge, turned the water back on, and viola - I had ice in about an hour! Gravy! :)
Parts Used:
-
Eric from Rose Hill, KS
-
Difficulty Level:Really Easy
-
Total Repair Time:15 - 30 mins
-
Tools:Screw drivers
8 of 10 people
found this instruction helpful.
Was this instruction helpful to you?
Thank you for voting!
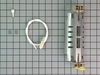
Stopped cooling
Removed panel from inside the back of the freezer section, by removing four screws. Then, sprayed the ice build-up on the coils, with hot water until all of the ice was melted away. (Note: be certain to plug the drain hole, and use several towels to catch the water drainage. ) Removed the Defrost Heater Element by removing two holding screws. Unplug the unit and pluged-in the new unit and replaced all screws as originally mounted.
Parts Used:
-
Curt from Selma, NC
-
Difficulty Level:Really Easy
-
Total Repair Time:30 - 60 mins
-
Tools:Nutdriver, Screw drivers
8 of 11 people
found this instruction helpful.
Was this instruction helpful to you?
Thank you for voting!
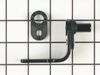
Cams on Hinge assembly broken, door didn't close properly
I supported door with 2* 6 scrap wood. I used cedar shingles to raise door to correct height.
Using a socket wrench, I removed the hinge from the fridge and the cam assembly from the door.
I installed the new hinge and cam using the shims thatwere behind the original parts.
I removed the 2*6 supports and the door now works perfectly.
Using a socket wrench, I removed the hinge from the fridge and the cam assembly from the door.
I installed the new hinge and cam using the shims thatwere behind the original parts.
I removed the 2*6 supports and the door now works perfectly.
Parts Used:
-
Stephen from Lafayette, NY
-
Difficulty Level:Really Easy
-
Total Repair Time:15 - 30 mins
-
Tools:Socket set
7 of 9 people
found this instruction helpful.
Was this instruction helpful to you?
Thank you for voting!
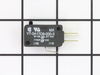
Ice maker would not shut off
Removed the ice maker from the freezer. Removed the switch. Tested the switch with a multimeter. Ordered a new switch. Replaced it in the box. Installed the ice maker ( 3screws and electric cord plug. It works. Details available on the internet.
Parts Used:
-
Jack from Bloomington, IL
-
Difficulty Level:Easy
-
Total Repair Time:15 - 30 mins
8 of 12 people
found this instruction helpful.
Was this instruction helpful to you?
Thank you for voting!
Freezer hinge was worn
Shut off water and disconnected at factory joint at bottom hinge. Unplugged the electrical at the top hinge. Removed the door and installed new bottom hinge and cam assembly. Reinstalled the door and hooked water and electric back up. Part worked fine.
Parts Used:
-
Wilbur from Waynesboro, PA
-
Difficulty Level:A Bit Difficult
-
Total Repair Time:30 - 60 mins
-
Tools:Nutdriver, Wrench (Adjustable)
6 of 6 people
found this instruction helpful.
Was this instruction helpful to you?
Thank you for voting!
Coils in Freezer over frosted restricting air flow.Warm Frig.
1) Unplug Refrigerator. Remove all shelves and light shield in the freezer.
2)Remove panel covering refrigeration coils inside freezer in back. Two hex head screws w/nut driver.
3)Remove the defrost heater using phillips screw driver. Two screws.
4)Unplug two quick disconnect stakons and wires from heater.
5)Plug the wire coming down the right side into one side of the new heater and plug the shipped white wire into the other quick disconnect spade at the heater.
6)Install the new dual element defrost heater into the same place where the old was. Connections to the right.
7)Route the wire that was on the left across the top of the coils and down the right side.
8)Bring the existing wire from the left side down the right side and the white wire up the right side. Wires should not be tight at all and do not remove the tape at the stakon.
9)Now wires need to be cut (if necessary)and crimped together in the shipped stakon. This stakon looks like a wire nut.
10)Wires should be tucked gently into the styrofoam up and down the right side. Wirenut should be positioned so that water can not collect in it.
11)Replace the panel over the cooling coils.
12)Plug Refigerator back into the wall outlet. Put shelves and light shield back in.
13)My refrigerator is now working without a problem. It's been est two weeks.
Ice maker is also working correctly.
2)Remove panel covering refrigeration coils inside freezer in back. Two hex head screws w/nut driver.
3)Remove the defrost heater using phillips screw driver. Two screws.
4)Unplug two quick disconnect stakons and wires from heater.
5)Plug the wire coming down the right side into one side of the new heater and plug the shipped white wire into the other quick disconnect spade at the heater.
6)Install the new dual element defrost heater into the same place where the old was. Connections to the right.
7)Route the wire that was on the left across the top of the coils and down the right side.
8)Bring the existing wire from the left side down the right side and the white wire up the right side. Wires should not be tight at all and do not remove the tape at the stakon.
9)Now wires need to be cut (if necessary)and crimped together in the shipped stakon. This stakon looks like a wire nut.
10)Wires should be tucked gently into the styrofoam up and down the right side. Wirenut should be positioned so that water can not collect in it.
11)Replace the panel over the cooling coils.
12)Plug Refigerator back into the wall outlet. Put shelves and light shield back in.
13)My refrigerator is now working without a problem. It's been est two weeks.
Ice maker is also working correctly.
Parts Used:
-
Timothy from Hartford, MI
-
Difficulty Level:Easy
-
Total Repair Time:Less than 15 mins
-
Tools:Nutdriver, Screw drivers
7 of 10 people
found this instruction helpful.
Was this instruction helpful to you?
Thank you for voting!
Refrigerator door would not shut
Removed old hinge assembly, bolted on new assembly-door shut like new
Parts Used:
-
Bobby from SENECA, SC
-
Difficulty Level:Very Easy
-
Total Repair Time:15 - 30 mins
-
Tools:Socket set
5 of 5 people
found this instruction helpful.
Was this instruction helpful to you?
Thank you for voting!
Unit had stopped making ice
Ordered the icemaker replacement. unplugged the unit, followed the simple instructions and got it done in less than 30 minutes. It did take a LONG time to start making ice. But it's working now.
Parts Used:
-
Ron from ORANGE, CA
-
Difficulty Level:Really Easy
-
Total Repair Time:30 - 60 mins
-
Tools:Nutdriver, Screw drivers
5 of 5 people
found this instruction helpful.
Was this instruction helpful to you?
Thank you for voting!
broken auger in the bucket assembly.
I ordered the wrong part, the ice maker assembly, because your diagram was not marked properly. I returned the part and you credited my account. Thanks. Ordered the new bucket. It worked fine. Now I have ice and crushed Ice whenever I want. Thanks.
p.s. I didnt use any tools, but to satisfy you I select nut driver.
p.s. I didnt use any tools, but to satisfy you I select nut driver.
Parts Used:
-
Chip from Mandeville, LA
-
Difficulty Level:Easy
-
Total Repair Time:Less than 15 mins
-
Tools:Nutdriver
6 of 9 people
found this instruction helpful.
Was this instruction helpful to you?
Thank you for voting!
Ice Maker would not fill.
Was concerned that new icemaker was quite a bit different than the one we were replacing. Called GE to confirm it was correct.
Went ahead and installed the unit, using the supplied electric cable adapter.
A little difficult to deal with the extra cable, but everything worked OK and it's making ice normally.
Went ahead and installed the unit, using the supplied electric cable adapter.
A little difficult to deal with the extra cable, but everything worked OK and it's making ice normally.
Parts Used:
-
Charles from Keller, TX
-
Difficulty Level:Easy
-
Total Repair Time:15 - 30 mins
-
Tools:Screw drivers
5 of 6 people
found this instruction helpful.
Was this instruction helpful to you?
Thank you for voting!
no Ice
Turned off The water supply. Removed the back panel corner(nut driver). Removed valve (nut driver) and water supply inlet line. Cut the old outlet lines at the valve (new lines are push in) disconnected electrical lines, Reinstalled inlet line and electrical lines. Reinstalled valve and back panel. Turned on the water. Ice maker filled with water and a short time later I had ice. Easy job.
Parts Used:
-
George from Brandywine, MD
-
Difficulty Level:Easy
-
Total Repair Time:15 - 30 mins
-
Tools:Nutdriver
5 of 6 people
found this instruction helpful.
Was this instruction helpful to you?
Thank you for voting!