















CRE8600CCE Maytag Range - Instructions
Keep searches simple. Use keywords, e.g. "leaking", "pump", "broken" or "fit".
Oven would over heat and produce a F2 error code on the display. It would not turn off or cool down until I switched the circuit breaker off.
I switched the oven sensor easily enough, but it did not remedy the problem, so we are in the process of replacing the oven since it's about 20 yrs. old.
Parts Used:
-
richard from SAINT MARYS, KS
-
Difficulty Level:Very Easy
-
Total Repair Time:Less than 15 mins
-
Tools:Screw drivers
2 of 2 people
found this instruction helpful.
Was this instruction helpful to you?
Thank you for voting!
The element on my 20+ year old Jenn Zaire oven had broken in two...
Went online to find replacement part. (Because I’m cheap) Came across the website, found the part by model number, and watched the wonderful replacement video that was right on the same page as the part. After the part arrived, (in just a couple of days) I put the new one in. Only took a couple of minutes! Perfection! Thanks for making my problem, no problem at all!
Parts Used:
-
Mary from New Britain, PA
-
Difficulty Level:Very Easy
-
Total Repair Time:Less than 15 mins
-
Tools:Screw drivers
2 of 2 people
found this instruction helpful.
Was this instruction helpful to you?
Thank you for voting!
Oven would not heat
Spoke to your very helpful staff, who advised me that a likely problem was the oven sensor. I took a chance and ordered the part, which came promptly. Your service video for the part was most helpful in my decision to try the part. Installation was a breeze, but it was the oven controller board that had failed and not the oven sensor. That called for a service professional, who ultimately fixed the problem. Your service though, was excellent and I would highly recommend you to others.
Parts Used:
-
francis from mount holley, VA
-
Difficulty Level:Really Easy
-
Total Repair Time:Less than 15 mins
-
Tools:Screw drivers
2 of 2 people
found this instruction helpful.
Was this instruction helpful to you?
Thank you for voting!
Bake element caught on fire
I got the run around about my HARWICK stove at several part stores. Like they all said the same thing (cant look it up just bring it down) So i did and then they would say, what's the model number. ERR! SO my wife found parts select on the web and they beat the three price quotes I got. First turn the power off to the stove!!! The repair was simple. Just remove the two screws on both side's and pull the element out but just enough for the wire's to show. Disconnect the two wire's and pull the element out. Reverse the processes but when wire's are reconnected squeeze terminals end gently to ensure a good connection. This is a great company to deal with, I will be using them again. Thanks and good luck!!!
Parts Used:
-
Dan from TomRriver, NJ
-
Difficulty Level:Really Easy
-
Total Repair Time:Less than 15 mins
-
Tools:Pliers, Screw drivers
2 of 2 people
found this instruction helpful.
Was this instruction helpful to you?
Thank you for voting!
left cover for the oven light broke when trying to replace the bulb
Ordered the part. when it arrived-quite speedily, I just unpacked it and put the cotton gasket around the glass and screwed it to the proper place in the oven. Very easy.
Parts Used:

-
Mark from SHOREVIEW, MN
-
Difficulty Level:Very Easy
-
Total Repair Time:Less than 15 mins
2 of 2 people
found this instruction helpful.
Was this instruction helpful to you?
Thank you for voting!
Replacing the bulb in the freezer side
Removed the ice brucket,
Removed the light shield by releasing one screw using a nutdriver.
Replacing the bulb and reinstalled the light shield.
Your web site is one of the best and most helpfull service sites I ever used. Just wish that in the future you will ship parts overseas.
Removed the light shield by releasing one screw using a nutdriver.
Replacing the bulb and reinstalled the light shield.
Your web site is one of the best and most helpfull service sites I ever used. Just wish that in the future you will ship parts overseas.
Parts Used:

-
Yafa (and David) from Bothell, WA
-
Difficulty Level:Easy
-
Total Repair Time:Less than 15 mins
-
Tools:Nutdriver
5 of 11 people
found this instruction helpful.
Was this instruction helpful to you?
Thank you for voting!
Broken glass in oven door
Disassembled the oven door, removed broken glass, replaced with new glass and reassembled oven door. Took very little time. Online diagram on this site helped to keep everything in order and easily know what part was needed. Thanks!!!!
Parts Used:
-
Jamie from Hoover, AL
-
Difficulty Level:Easy
-
Total Repair Time:30 - 60 mins
-
Tools:Screw drivers
3 of 6 people
found this instruction helpful.
Was this instruction helpful to you?
Thank you for voting!
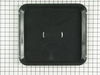
I needed a broiler pan
I took the broiler pan out of the shipping container and put it in the oven.
Parts Used:
-
Rhoda P. from Secaucus, NJ
-
Difficulty Level:Really Easy
-
Total Repair Time:Less than 15 mins
4 of 9 people
found this instruction helpful.
Was this instruction helpful to you?
Thank you for voting!
The oven glass shattered when I dropped water in the heated Glass
I Lifted the oven door from the hinges and removed all the screws to get to the broken glass pane, since the oven door is in layers I taped the screws close to where they belonged, so that I could screw everything together again in the right order..
The last time this happened to me(!!) I brought the door to a repair man and hadto pay 200 dollars , I saved 150 Dollars doing it myself!
The last time this happened to me(!!) I brought the door to a repair man and hadto pay 200 dollars , I saved 150 Dollars doing it myself!
Parts Used:
-
Franziska from Salt Lake City, UT
-
Difficulty Level:A Bit Difficult
-
Total Repair Time:30 - 60 mins
-
Tools:Screw drivers
2 of 3 people
found this instruction helpful.
Was this instruction helpful to you?
Thank you for voting!
Oven Temperature was 50 degrees low
Took screws out of the back on the side the sensor was on, unplugged it & took out the two screws on the inside of the oven to release the sensor. Put new sensor in place with the two screws & used one of the adapters to plug in the new sensor. Put screws back in the back panel & turned on the oven which unfortunately is still 50 degrees low. Need a new clock with computer which is out of stock & unavailable. I was an electrician for 25 years so didn't experience any problems. It was a cheap thing to try.
Parts Used:
-
Eugene from Clinton, IA
-
Difficulty Level:Really Easy
-
Total Repair Time:15 - 30 mins
-
Tools:Screw drivers
2 of 3 people
found this instruction helpful.
Was this instruction helpful to you?
Thank you for voting!
No temperature control
Turned off breakers to oven. Removed two screws that held oven in cabinet. Removed oven door by opening slightly and pulling up on door. Pulled oven out 1/3 of way. Took out four screws on top of control panel. Took oven light switch off by unscrewing holding ring. Removed temp knob on right by pulling. Removed start / stop knob same way.Removed glass straight out. Removed four screws that held elecrtonic clock conrtol board. Unpluged three wire plug from right side and the nine wire plug from the left side. Worked board out at and angle. Went backwards to connect and replace board, screws and door.Slid oven back in and tested oven after turning breakers back on, worked like new.
Parts Used:
-
Max from Houston, TX
-
Difficulty Level:Easy
-
Total Repair Time:30 - 60 mins
-
Tools:Screw drivers
2 of 3 people
found this instruction helpful.
Was this instruction helpful to you?
Thank you for voting!
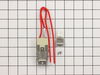
Frayed and exposed receptical wires in cartridge
* Do not lose the supplied CERAMIC electric connecting nuts; they will not fry in the heat.
* Unplug the heating elements from the old receptacles, and remove any rings; unplug the cartridge by lifting up the back side and pulling gently toward the back of the stovetop.
* Unscrew the cartridge top from the cartridge base (about 12 screws) and the recepticals, and cut the old wire close to the old receptacle.
* If you have a spare magnetic thingy around, use it to hold the screws and not lose them.
* Screw in the new receptacles, route the newer wiring from the receptacles (use as much of the new wire as possible), back toward the wiring block on the cartridge plug.
* Recut the old wiring to accomodate the length of the new wiring, but leave at least 2-3" from the wiring block, if possible. Re-connect them using only the supplied CERAMIC electric nuts.
* The CERAMIC nuts allayed my fears about the effect of heat on a plastic nut; ceramic is designed for high-heat environments.
* Reverse the disassembly steps to reassemble and reinstall the cartridge.
* Unplug the heating elements from the old receptacles, and remove any rings; unplug the cartridge by lifting up the back side and pulling gently toward the back of the stovetop.
* Unscrew the cartridge top from the cartridge base (about 12 screws) and the recepticals, and cut the old wire close to the old receptacle.
* If you have a spare magnetic thingy around, use it to hold the screws and not lose them.
* Screw in the new receptacles, route the newer wiring from the receptacles (use as much of the new wire as possible), back toward the wiring block on the cartridge plug.
* Recut the old wiring to accomodate the length of the new wiring, but leave at least 2-3" from the wiring block, if possible. Re-connect them using only the supplied CERAMIC electric nuts.
* The CERAMIC nuts allayed my fears about the effect of heat on a plastic nut; ceramic is designed for high-heat environments.
* Reverse the disassembly steps to reassemble and reinstall the cartridge.
Parts Used:
-
Richard C from San Jose, CA
-
Difficulty Level:Easy
-
Total Repair Time:30 - 60 mins
-
Tools:Nutdriver, Pliers, Screw drivers
2 of 3 people
found this instruction helpful.
Was this instruction helpful to you?
Thank you for voting!
The bake element burst.
Removed the two screws that held the element in place and then pulled off the element from the connectors. Slipped the new connectors on. Tested the oven - Baked some blackberry cobbler!
Parts Used:
-
Diane from Littleton, CO
-
Difficulty Level:Easy
-
Total Repair Time:30 - 60 mins
-
Tools:Screw drivers
1 person
found this instruction helpful.
Was this instruction helpful to you?
Thank you for voting!
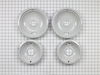
my first order a small drip bowl
-
marie from WATERBURY, CT
-
Difficulty Level:Really Easy
-
Total Repair Time:30 - 60 mins
1 person
found this instruction helpful.
Was this instruction helpful to you?
Thank you for voting!
Oven baking coil had burned out
Removed two screws from back of oven ,pulled apart old coil from wires, inserted new coil into the small metal pieces, pushed back and screws replaced. Really easy , anyone can do. Oh, I am 70 years old so probably people younger could do more quickly.
Parts Used:
-
Marie from Fredericksburg, VA
-
Difficulty Level:Really Easy
-
Total Repair Time:30 - 60 mins
-
Tools:Screw drivers
1 person
found this instruction helpful.
Was this instruction helpful to you?
Thank you for voting!