















CP220B-C Jenn-Air Range - Instructions
Keep searches simple. Use keywords, e.g. "leaking", "pump", "broken" or "fit".
worn out burner switch
easy enough. Before you start, draw a picture of where the wires go on the old switch ( or take a picture).
Parts Used:
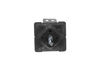
-
William from ARCADIA, FL
-
Difficulty Level:A Bit Difficult
-
Total Repair Time:30 - 60 mins
-
Tools:Pliers, Screw drivers
1 person
found this instruction helpful.
Was this instruction helpful to you?
Thank you for voting!
The 6in burner would go to max heat regardless of the setting.
Un screwed the two screws in the downdraft section enough to release the unit that holds the surface burner controls.Then removed the control nob, unscrewed the two screws that holds the switch in the unit, removed the wires, making sure the color of the wires were placed on the same contact point. Put it back together and it worked
fine.Of course I did shut off the power before starting any of the above
fine.Of course I did shut off the power before starting any of the above
Parts Used:
-
James from Dunnellon, FL
-
Difficulty Level:Really Easy
-
Total Repair Time:Less than 15 mins
-
Tools:Pliers, Screw drivers
2 of 4 people
found this instruction helpful.
Was this instruction helpful to you?
Thank you for voting!
Burner had one temp. hot
Changed out surface burner switch.Unscrewed two screws, changed plug onto new switch.Don't forget to turn off power!
Parts Used:
-
James from Charlotte, NC
-
Difficulty Level:Easy
-
Total Repair Time:Less than 15 mins
-
Tools:Pliers, Screw drivers
1 of 2 people
found this instruction helpful.
Was this instruction helpful to you?
Thank you for voting!
burner control stopped functioning.
-
Kenneth from GAITHERSBURG, MD
-
Difficulty Level:Really Easy
-
Total Repair Time:1- 2 hours
-
Tools:Nutdriver, Pliers, Screw drivers
1 of 2 people
found this instruction helpful.
Was this instruction helpful to you?
Thank you for voting!
Control switch would not operate
Looked up schematic. Removed 3 screws holding cover. after I shut power off of course. Took off knob. Oriented new control to the one on panel. Disconnected each wire one at at time and immediately attached it to the new control for each wire. Removed screws holding old control and inserted and screwed to the new control and put the knob back on. Put the cover back on. Worked fine. Probably should replace the others as they don't turn as easily as the new one. Probably will spray some contact cleaner which will give me a few more years.
Parts Used:
-
Thomas from Batavia, NY
-
Difficulty Level:Easy
-
Total Repair Time:15 - 30 mins
-
Tools:Pliers, Screw drivers
1 of 2 people
found this instruction helpful.
Was this instruction helpful to you?
Thank you for voting!
burned up switch
Opened the back of the cooktop and found upper right element control switch burned. I removed the retaining screws and wires and spent two weeks chasing the switch at a local dealer. Found exactly what I needed at PartSelect.com and paid less even with shipping than at the local. Installed the switch with original screws and presto!! it worked.
Parts Used:
-
Scott from Chehalis, WA
-
Difficulty Level:Really Easy
-
Total Repair Time:15 - 30 mins
-
Tools:Screw drivers, Socket set
1 of 2 people
found this instruction helpful.
Was this instruction helpful to you?
Thank you for voting!
Broken Surface Burner control
Remove 4 screws that holds down panel;removed dial;removed screw that held switch to panel. Took off wire one at a time ann put on corresponding lug. Repeated above in reverse.
Parts Used:
-
Thomas from Batavia, NY
-
Difficulty Level:Easy
-
Total Repair Time:30 - 60 mins
-
Tools:Pliers, Screw drivers
1 of 2 people
found this instruction helpful.
Was this instruction helpful to you?
Thank you for voting!
burned burner control out of warranty
switch power supply off at breaker panel
unscrew control box assembly from stove
slide control out of stove
unscrew burner control out of assembly
transfer wiring from old control to new in same relative location
reassemble in reverse order
restore power
test burner in all positions
unscrew control box assembly from stove
slide control out of stove
unscrew burner control out of assembly
transfer wiring from old control to new in same relative location
reassemble in reverse order
restore power
test burner in all positions
Parts Used:
-
Daniel from Temple, TX
-
Difficulty Level:A Bit Difficult
-
Total Repair Time:30 - 60 mins
-
Tools:Pliers, Screw drivers
1 of 2 people
found this instruction helpful.
Was this instruction helpful to you?
Thank you for voting!
Burner would not turn off
It was easy enough I unplugged the stove. removed the screws under the control panel,removed the panel, removed the two screws holding the switch in place. moved the electrical wires from the old switch and placed them on the new switch. put it all back together in the reverse order.
it took greater than 15 minutes as this is the first time I did any work on my stove and wanted to be careful and not dismantle too much or scratch anything.
it took greater than 15 minutes as this is the first time I did any work on my stove and wanted to be careful and not dismantle too much or scratch anything.
Parts Used:
-
Randall from Colorado Springs, CO
-
Difficulty Level:Really Easy
-
Total Repair Time:15 - 30 mins
-
Tools:Nutdriver, Screw drivers
1 of 2 people
found this instruction helpful.
Was this instruction helpful to you?
Thank you for voting!
front burner stayed on high
We unplugged the range from the wall first so as not to get electrocuted. We removed the face of the control panel by removing the screws and 2 hex nuts underneath that hold it in place, and removed the trim. Then we disconnected the malfunctioning control switch, taking note of what order the wires go in. Hooked the new switch up and popped it through the face of the control panel. We then put the trim back, and reattached the control panel with the screws. Very easy!!
Parts Used:
-
Natalie from North Reading, MA
-
Difficulty Level:Really Easy
-
Total Repair Time:Less than 15 mins
-
Tools:Screw drivers, Wrench (Adjustable)
1 of 3 people
found this instruction helpful.
Was this instruction helpful to you?
Thank you for voting!
could not adj. temp. stayed high all the time
-
Don from CARROLLTON, TX
-
Difficulty Level:Really Easy
-
Total Repair Time:15 - 30 mins
-
Tools:Screw drivers
0 of 1 people
found this instruction helpful.
Was this instruction helpful to you?
Thank you for voting!
grill was getting red hot with out control
Followed instructions, once saw and how to replace and replug wires as the instructions it was easy as per your instructions
Parts Used:
-
gilbert from san antonio, TX
-
Difficulty Level:Easy
-
Total Repair Time:15 - 30 mins
-
Tools:Pliers, Screw drivers
0 of 1 people
found this instruction helpful.
Was this instruction helpful to you?
Thank you for voting!
Switch inoperative
Remove cover plate, install new switch, replace cover place. Replace one wire at a time, a pair of needle nose pliers may be helpful. Surprise of this job was that I had a torque screw driver (I think that's what it's called) to remove the switch from the cover plate. These are the screws you'll see after removing the knob. Find that driver before you begin, mine was in the garage and for the life of me, I can't remember why I ever had one in the first place.
Thanks for a great web site!
Thanks for a great web site!
Parts Used:
-
Rex from Schaumburg, IL
-
Difficulty Level:Really Easy
-
Total Repair Time:15 - 30 mins
-
Tools:Screw drivers
0 of 1 people
found this instruction helpful.
Was this instruction helpful to you?
Thank you for voting!
No controlling Left side back burner
Really easy ...followed advice posted from others with same problem. Before anything disconnect the power at the breakers and use a voltage detector to verify there is NO POWER!!!! Only need to remove the two phillips screws on the four controller panel, Slide panel away from you to access the controllers. Match wire/connector for connector from the old to new controller. Reassemble, restore power .. Happy wife!!!. She has been on my case to fix this thing for several years.
Parts Used:
-
Gary from Vienna, WV
-
Difficulty Level:Easy
-
Total Repair Time:15 - 30 mins
-
Tools:Screw drivers
0 of 1 people
found this instruction helpful.
Was this instruction helpful to you?
Thank you for voting!
The switch would not turn off the range. The switch just kept turning but nothing happened.
I removed two screws that held the switch plate together. Then I removed two screws that held the faulty switch to the swtich plate. I then unpluged one wire at a time from the old switch and pluged it into the new switch. Reattached the switch to the switch plate and then reattached the switch plate to the stovetop. Bingo! Everything worked beautifully. It was so easy and I saved ~ $100.00 by doing it myself, as opposed to a quote that I got from a local repairman.
Parts Used:
-
Jose from Victor, NY
-
Difficulty Level:Easy
-
Total Repair Time:15 - 30 mins
-
Tools:Screw drivers
0 of 1 people
found this instruction helpful.
Was this instruction helpful to you?
Thank you for voting!