















CGL1100ADQ Magic Chef Range - Instructions
Keep searches simple. Use keywords, e.g. "leaking", "pump", "broken" or "fit".
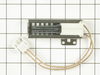
Defective Gas Oven Igniter
After reading how others replaced their defective Gas Oven Igniter, I decided to attempt the project. My only mistake was Removing the Oven Door. Though it came off with ease, it was a complete bear to put back on.
Once I removed the oven door, I located the two phillips head screws that held the bottom oven floor in place. One screw came off without much effort, however the other stripped and had to be drilled out.
After removing the oven floor plate, I quickly located the Igniter and using a nut driver, unscrewed it. One of the two screws stripped on me and had to be replaced. The new part was put in position and the process was reversed. This is where I encounted a problem.
After repeated attempts, I soon found that the oven door hindges had to be held in the open position with a flat head screwdriver in order to be put in place. I found no instructions or info on how to complete this process (even from Maytag) and only completed the tast by trial and error. I highly suggest NOT REMOVING THE OVEN DOOR to complete the repair. The repair itself is rather simple even with stripped screws.
Once I removed the oven door, I located the two phillips head screws that held the bottom oven floor in place. One screw came off without much effort, however the other stripped and had to be drilled out.
After removing the oven floor plate, I quickly located the Igniter and using a nut driver, unscrewed it. One of the two screws stripped on me and had to be replaced. The new part was put in position and the process was reversed. This is where I encounted a problem.
After repeated attempts, I soon found that the oven door hindges had to be held in the open position with a flat head screwdriver in order to be put in place. I found no instructions or info on how to complete this process (even from Maytag) and only completed the tast by trial and error. I highly suggest NOT REMOVING THE OVEN DOOR to complete the repair. The repair itself is rather simple even with stripped screws.
Parts Used:
-
MICHAEL from WARREN, RI
-
Difficulty Level:Easy
-
Total Repair Time:15 - 30 mins
-
Tools:Nutdriver, Pliers, Screw drivers
0 of 1 people
found this instruction helpful.
Was this instruction helpful to you?
Thank you for voting!
Oven would take 3 min. too lite,would not hold temp,sometimes go up too 350* then down too 250* maybe not relite @ all.
It took all of 10 mins. Open oven door slightly lift to remove.took out shelves and bottom of oven,lift at back to remove.Two screws hold the Igniter, was able to pull the connector into the oven to change. Oven works great!
Parts Used:
-
dave from troy, ID
-
Difficulty Level:Really Easy
-
Total Repair Time:Less than 15 mins
-
Tools:Screw drivers
0 of 2 people
found this instruction helpful.
Was this instruction helpful to you?
Thank you for voting!
oven wouldn't heat up, but igiter turned red hot!
First i removed the two screws that hold the element in place. I then pulled the wire out of the hole and disconected the plug. then plug in the new one, put the two screws back in, and checked it to see if it worked,It worked like a new one! So as my reward my wife baked me cookies!
Parts Used:
-
barney from spencerville, OH
-
Difficulty Level:Really Easy
-
Total Repair Time:Less than 15 mins
-
Tools:Socket set
0 of 2 people
found this instruction helpful.
Was this instruction helpful to you?
Thank you for voting!
Oven took too long to heat
This is simple for most people - unscrew and remove the bottom oven floor pan. There is the igniter, removed with two screws with a 1/4 nutdriver. However, my problem was that when I unclipped the old igniter, I dropped the over part of the connection, it fell down the hole, through the insulation, to the bottom of the stove where the wiring is. I had to pull out the stove to get to the connection, push it back up the hole to the oven, then install the igniter. My advice: do no lose your grip on the oven wire whatever you do. Otherwise, it was a snap, even for a klutz.
Parts Used:
-
George from Richardson, TX
-
Difficulty Level:Really Easy
-
Total Repair Time:1- 2 hours
-
Tools:Nutdriver, Screw drivers
0 of 4 people
found this instruction helpful.
Was this instruction helpful to you?
Thank you for voting!
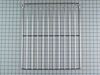
missing one oven rack
-
Ana from Riverside, RI
-
Difficulty Level:Really Easy
-
Total Repair Time:Less than 15 mins
0 of 7 people
found this instruction helpful.
Was this instruction helpful to you?
Thank you for voting!
Gas smell and oven won't get hot, or takes too long.
I turned off the gas supply and unplugged the power source first. Then I removed the old igniter, by removing the plug wire clip from the back of the stove. I then removed the oven door by simply sliding it up and off the track. Once the oven door was removed I could easily access the igniter after removing the heat shield at the bottom of the stove. I had to remove two screws that mount the igniter. I had a little problem removing one screw, because it was stripped, so I had to use my Dremel tool to cut off the screw. Once it was removed the igniter was easily replaced with the new one. My wife and I was really excited that the fix worked! Saved me hundreds of dollars. Money I used for the holidays. Thanks Part Select!
Parts Used:
-
Louis from Alpharetta, GA
-
Difficulty Level:Really Easy
-
Total Repair Time:15 - 30 mins
-
Tools:Screw drivers
Was this instruction helpful to you?
Thank you for voting!
igniter went bad
opened the oven door, remove racks, remove lower drawer, unscrew protective panel on lower part, take out the bottom plate, unclip the old igniter, clip in new igniter, put everything back together and you are done!
Parts Used:
-
Workforce Initiatives from Jeffersonville, VT
-
Difficulty Level:Really Easy
-
Total Repair Time:15 - 30 mins
-
Tools:Screw drivers
Was this instruction helpful to you?
Thank you for voting!
Oven would not turn on
Replaced igniter, removed inside bottom cover 2 screws,removed igniter 2 screws & unplugged igniter from back of oven after removing plate with 1 screw. Could not have been any easier took less than 10 minutes. And doing business with PartSelect was great, would recommend and use again any chance I get.
Parts Used:
-
Dave from Nashua, NH
-
Difficulty Level:Really Easy
-
Total Repair Time:Less than 15 mins
-
Tools:Screw drivers
Was this instruction helpful to you?
Thank you for voting!
oven wouldn't light sometimes, smelled gas
removed two screws from ignitor, pulled connector from hole behind it, replaced ignitor, reconnected. tried the oven and it worked first time. easy, easy.
Parts Used:
-
griff from gonzales, LA
-
Difficulty Level:Really Easy
-
Total Repair Time:Less than 15 mins
-
Tools:Nutdriver
Was this instruction helpful to you?
Thank you for voting!
Oven wouldn't heat up properly
-
Dominic from Jersey City, NJ
-
Difficulty Level:Really Easy
-
Total Repair Time:Less than 15 mins
-
Tools:Screw drivers
Was this instruction helpful to you?
Thank you for voting!
Oven would not heat up
I lifted up the bottom insert of the inside of my oven and then followed the instructions on this site. Originally I purchased the wrong igniter, so I would encourage you to look at yours and make sure you are buying the right part. I am a complete novice. Even with my purchase debacle, my oven was back up and running within 5 days (total cost was $60). Do this even if you are scared of a screwdriver. Just remember to turn off the gas first. Make sure you've turned off the gas by trying to light a burner (if your burners are otherwise working correctly). If it doesn't light, the gas is off and there is nothing to be afraid of. The igniter is far enough away from the gas pipe that I wasn't afraid of breaking it and once I saw how the oven was put together, I wasn't afraid of working on it. And, if you need to return anything, the return policy is awesome.
Parts Used:
-
Jessica from Hercules, CA
-
Difficulty Level:Really Easy
-
Total Repair Time:Less than 15 mins
-
Tools:Screw drivers
Was this instruction helpful to you?
Thank you for voting!
The Oven would not light
I called the yellow pages repair man and he quoted me $450 to replace the igniter. I did it myself for $63 and it took 10 minuet's. I'm gonna get a T shirt that says "Mr Fix It" Next is the refrigerator door gaskets! Someone from part select had mentioned that to take the door off the oven you "just open the door a little and lift it off". that was a helpful hint because I would have been looking for screws for half a day!
Parts Used:
-
Fred from Dearborn Heights, MI
-
Difficulty Level:Really Easy
-
Total Repair Time:Less than 15 mins
-
Tools:Nutdriver
Was this instruction helpful to you?
Thank you for voting!
Oven would not light.
Removed oven bottom. 2 screws and igniter was removed. 1 screw for back panel unplugged igniter.
Parts Used:
-
Jeff from Three Forks, MT
-
Difficulty Level:Really Easy
-
Total Repair Time:Less than 15 mins
-
Tools:Screw drivers
Was this instruction helpful to you?
Thank you for voting!
Oven would NOT heat up!!
Open the oven door, take the bottom out. The ignitor is right there!! unscrew it and unplug it... plug in and screw in the new one! Took about five minutes!! Our oven worked again after not working for a year!! Yeah!!
Parts Used:
-
Nina from Saint Albans, VT
-
Difficulty Level:Really Easy
-
Total Repair Time:Less than 15 mins
-
Tools:Screw drivers
Was this instruction helpful to you?
Thank you for voting!
Oven Starter glows but oven does not get hot
Hello,
Your website and prediction that this replacement part was the problem were exactly correct. This part was easy to remove and replace, it is the starter for the oven so it comes with a heating element and a built in connector. I simply pulled the old wires up, unhooked the connector and removed the two mounting screws. Plugged in the new part, pushed the connector back down past the insulation, re-installed the screws and turned the oven on and poof, it started up again. We have also noticed that the oven stays hotter now, just like it did when we bought it.
Thank you very much for the advice and for supplying the correct part. A $65 part is much better than having to buy a $500 new stove/oven. We are very happy we found you and will use you again should some other appliance break down.
Sincerely,
Jim Arao
Seaside, CA 93955
Your website and prediction that this replacement part was the problem were exactly correct. This part was easy to remove and replace, it is the starter for the oven so it comes with a heating element and a built in connector. I simply pulled the old wires up, unhooked the connector and removed the two mounting screws. Plugged in the new part, pushed the connector back down past the insulation, re-installed the screws and turned the oven on and poof, it started up again. We have also noticed that the oven stays hotter now, just like it did when we bought it.
Thank you very much for the advice and for supplying the correct part. A $65 part is much better than having to buy a $500 new stove/oven. We are very happy we found you and will use you again should some other appliance break down.
Sincerely,
Jim Arao
Seaside, CA 93955
Parts Used:
-
Jim from Seaside, CA
-
Difficulty Level:Really Easy
-
Total Repair Time:Less than 15 mins
-
Tools:Nutdriver
Was this instruction helpful to you?
Thank you for voting!