















CGIF3061NFE Frigidaire Range - Instructions
Keep searches simple. Use keywords, e.g. "leaking", "pump", "broken" or "fit".
Aluminum foil baked on surface
Took out 2 screws, removed panel.
When you put the panel in don’t push it tight to the front or the screws won’t align. Just place in gently and the screws will align
When you put the panel in don’t push it tight to the front or the screws won’t align. Just place in gently and the screws will align
Parts Used:
-
Cindy from RHINELANDER, WI
-
Difficulty Level:Easy
-
Total Repair Time:Less than 15 mins
-
Tools:Screw drivers
5 of 5 people
found this instruction helpful.
Was this instruction helpful to you?
Thank you for voting!
Original Meat Probe insulation separated on the probe end
I searched the web for a replacement and Parts Select had a picture and part number for the exact same probe. I ordered the probe and it arrived very quickly. The problem was that the probe I received didn't match the picture as shown on the web site. Instead I received a probe that was a different color and the actual probe was about 2" shorter than the one I was replacing. I called customer service and was told that the probe I received was the new version that the older version was discontinued. If they had updated their pictures on the web site I would not have ordered the probe. Parts Select customer service did apologize for the issue and offered to have me return for a refund.
I will order from Parts Select but I will call first to verify that the item pictured is the actual item being shipped. Parts Select please update the part pictures to show the actual items being sold.
I will order from Parts Select but I will call first to verify that the item pictured is the actual item being shipped. Parts Select please update the part pictures to show the actual items being sold.
Parts Used:
-
john from PITTSFIELD, MA
-
Difficulty Level:Really Easy
-
Total Repair Time:Less than 15 mins
5 of 6 people
found this instruction helpful.
Was this instruction helpful to you?
Thank you for voting!
Rusted leveling foot
I couldn't unscrew the leveling foot because it was rusted and corroded. The bracket holding it was easy to remove so I took the bracket with the corroded foot off and replaced it with the new foot and bracket. Very simple. I made sure I oiled it so it wouldn't rust again.
Parts Used:

-
Melinda from Three Rivers, MA
-
Difficulty Level:Really Easy
-
Total Repair Time:Less than 15 mins
-
Tools:Pliers, Screw drivers, Socket set, Wrench (Adjustable)
6 of 9 people
found this instruction helpful.
Was this instruction helpful to you?
Thank you for voting!
slow to get to temperature
first the temperature sensor then the igniter. started to do the igniter by using common sense then I used YouTube which made it a lot faster.
the temperature sensor installs from the back of the stove, the igniter installs from thr front ie, the drawer and inside oven.
the temperature sensor installs from the back of the stove, the igniter installs from thr front ie, the drawer and inside oven.
Parts Used:
-
SHAUN from ALBUQUERQUE, NM
-
Difficulty Level:Easy
-
Total Repair Time:30 - 60 mins
-
Tools:Screw drivers, Socket set
4 of 4 people
found this instruction helpful.
Was this instruction helpful to you?
Thank you for voting!
oven temp was not heating up to desired temp and using an oven thermometer to confirm
moved the range out to access back
removed 5 screws from back panel
removed 1 screw from thermostat installed new one
replaced screws, done in 20 minutes
problem solved
removed 5 screws from back panel
removed 1 screw from thermostat installed new one
replaced screws, done in 20 minutes
problem solved
Parts Used:
-
philip from CLIFTON, NJ
-
Difficulty Level:Very Easy
-
Total Repair Time:15 - 30 mins
-
Tools:Nutdriver, Screw drivers
4 of 4 people
found this instruction helpful.
Was this instruction helpful to you?
Thank you for voting!
Oven was not heating up properly
I followed the video on the website. The probe is on back of the oven. Just unplug part and replace. That was not our fix all though as I later found that the igniter was not working. The igniter is also an easy fix but you access it through the front of the oven. Also an easy swap.
Oven is working great now.
Our issues kind of fell between two of the descriptions so I went with high percentage cheaper fix first.
If your oven is intermittingly getting hot or to temperature of 100, it is probably the igniter.
Have used PartsSelect for Washing Machine, Dryer, Refridgerator and now the Range. Super easy to figure out needed parts and videos walk you through the repair.
Thanks
Oven is working great now.
Our issues kind of fell between two of the descriptions so I went with high percentage cheaper fix first.
If your oven is intermittingly getting hot or to temperature of 100, it is probably the igniter.
Have used PartsSelect for Washing Machine, Dryer, Refridgerator and now the Range. Super easy to figure out needed parts and videos walk you through the repair.
Thanks
Parts Used:
-
Robert from GILROY, CA
-
Difficulty Level:Really Easy
-
Total Repair Time:30 - 60 mins
-
Tools:Nutdriver, Screw drivers
4 of 5 people
found this instruction helpful.
Was this instruction helpful to you?
Thank you for voting!
F10 code going off
-
edward from BRISTOL, IN
-
Difficulty Level:Really Easy
-
Total Repair Time:30 - 60 mins
-
Tools:Screw drivers
4 of 5 people
found this instruction helpful.
Was this instruction helpful to you?
Thank you for voting!
top elment didn't heat
turned power off at fuse box took of back panel about8-10 nuts unhooked wires with pliers that went to element then took2 nuts out that held element up and 2nuts holding element took out and put new one in works great
Parts Used:
-
gail from SIOUX FALLS, SD
-
Difficulty Level:Really Easy
-
Total Repair Time:30 - 60 mins
-
Tools:Nutdriver, Pliers
4 of 5 people
found this instruction helpful.
Was this instruction helpful to you?
Thank you for voting!
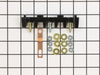
Oven wires arced and caused the terminal block to melt and become detached from the back of the range
Removed the wires that I could, then terminal block. Installing the new terminal block was very easy; however the wires that arced were fused to the terminal bock screws and needed to be cut and new connectors had to be put on the wires to allow them to be reattached to the block safely.
Once all was replaced and reinstalled the oven has worked great. The length of the repair was increased because of the melted parts and having to run to the store to get the new wire connectors big enough to fit on the wires. If we were simply replacing the block and had not encountered the melted ends, it would have been a very quick and easy repair.
Once all was replaced and reinstalled the oven has worked great. The length of the repair was increased because of the melted parts and having to run to the store to get the new wire connectors big enough to fit on the wires. If we were simply replacing the block and had not encountered the melted ends, it would have been a very quick and easy repair.
Parts Used:
-
Daniel from Falmouth, MA
-
Difficulty Level:A Bit Difficult
-
Total Repair Time:30 - 60 mins
-
Tools:Nutdriver, Pliers, Screw drivers, Wrench set
3 of 3 people
found this instruction helpful.
Was this instruction helpful to you?
Thank you for voting!
Oven wasn’t heating
-
Felicia from FORT MILL, SC
-
Difficulty Level:Very Easy
-
Total Repair Time:15 - 30 mins
-
Tools:Nutdriver
3 of 3 people
found this instruction helpful.
Was this instruction helpful to you?
Thank you for voting!
Had aluminum foil stuck on bottom
Removed 2 screws, pulled out the panel, replaced the new panel and replaced the two screws. Less than 5 minutes.
Parts Used:
-
George from JACKSON, MI
-
Difficulty Level:Very Easy
-
Total Repair Time:Less than 15 mins
-
Tools:Screw drivers
3 of 3 people
found this instruction helpful.
Was this instruction helpful to you?
Thank you for voting!
My five-year-old Frigidaire Gas stove was giving an F 10 code.
I looked up the problem on YouTube and it said it was the oven temperature probe was going out. So I ordered the probe and it was shipped out, received within two days. Took out a few screws on the back of the stove installed it, put it all back together and it’s working perfect.
Parts Used:
-
Tracy from Summerville, SC
-
Difficulty Level:Really Easy
-
Total Repair Time:30 - 60 mins
-
Tools:Screw drivers
4 of 7 people
found this instruction helpful.
Was this instruction helpful to you?
Thank you for voting!
Oven was over heating. In bake mode broiler would glow red and didn’t cut off after preheat
Removed 4 screws on back cover removed 1 screw holding probe and unplugged the probe took it out and installed new probe.
Parts Used:
-
James from S CHESTERFLD, VA
-
Difficulty Level:Very Easy
-
Total Repair Time:15 - 30 mins
-
Tools:Nutdriver
3 of 4 people
found this instruction helpful.
Was this instruction helpful to you?
Thank you for voting!
Range not heating properly
The youtube video clearly described how to remove the back panel and how to replace the probe.
The repair took maybe 20 minutes to complete and 1/2 of that time was spent cleaning behind and underneath the range!
Range is working perfectly now!
The repair took maybe 20 minutes to complete and 1/2 of that time was spent cleaning behind and underneath the range!
Range is working perfectly now!
Parts Used:
-
Eloisa from SPOKANE VLY, WA
-
Difficulty Level:Very Easy
-
Total Repair Time:15 - 30 mins
-
Tools:Screw drivers
4 of 7 people
found this instruction helpful.
Was this instruction helpful to you?
Thank you for voting!
Range displayed error code F10
Unplugged range; removed back cover; removed old oven probe. Installed new probe; replaced cover; connected power and turned on range - that simple. My only issue was probe was shipped in bubble rap and unit was slightly damaged (bent). Once straightened, the probe could be installed. Probe should have been shipped in sturdy cardboard cylinder or box. I called customer service, they were very nice, and noted my feedback on my account in case the unit fails prematurely.
Parts Used:
-
Timothy from Palm City, FL
-
Difficulty Level:Very Easy
-
Total Repair Time:15 - 30 mins
-
Tools:Nutdriver, Screw drivers
2 of 2 people
found this instruction helpful.
Was this instruction helpful to you?
Thank you for voting!