















CFU17F3AW2 Uni Freezer - Instructions
Keep searches simple. Use keywords, e.g. "leaking", "pump", "broken" or "fit".
thermostate stop working frozzen up
-
Augusto from Gretna, LA
-
Difficulty Level:Really Easy
-
Total Repair Time:Less than 15 mins
-
Tools:Nutdriver
Was this instruction helpful to you?
Thank you for voting!
The defrost timer burned out.
This is an upright Frigidaire freezer. The defrost timer is at the bottom left side of the rear of the unit. One screw holds it in place and it only plugs in one way. When your freezer won't stay cold enough to freeze this is the first part to check. It is cheep to replace (20-30 dollars) and will usually fix the problem. It took about 5 minutes to replace the part and my freezer is up and running like new.
Parts Used:
-
Steven E from Lisle, IL
-
Difficulty Level:Really Easy
-
Total Repair Time:Less than 15 mins
-
Tools:Screw drivers
Was this instruction helpful to you?
Thank you for voting!
Freezer freezes up; lower unit to warm
-
David from Front Royal, VA
-
Difficulty Level:Easy
-
Total Repair Time:15 - 30 mins
-
Tools:Nutdriver
Was this instruction helpful to you?
Thank you for voting!
Fan in freezer quit
This was an easy job. First remove the ice maker, if you have one. Mine was mounted with just two screws. Loosen these screws, unplug the power cord at the connector and then lift the ice maker off. Remove the light bulb cover and the light bulb, just so you dont break it. Remove two hex screws and the back cover can be removed. My fan was mounted in the middle of a bracket retained between two rubber bushingings. Just push the fan blad of the shaft and pull the motoer out. Dissonect the power cord at the connector. My moter was differant than the replacement on the mounting so with the removial of the two screws on the motor I was able to exchange the upper and lower cast motoer housings. Reverse the assembly process and you good. Mine is running great.
Parts Used:
-
Dan from Woodstock, GA
-
Difficulty Level:Easy
-
Total Repair Time:30 - 60 mins
-
Tools:Nutdriver, Screw drivers
Was this instruction helpful to you?
Thank you for voting!
freezer not staying cold enough
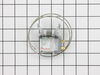
After researching other issues found on internet about same problem, decided to replace both thermostat and temperature control thermastat before going to the repairman way. I saw the videos given on this web site, ordered the parts and when they came in, unplugged freezer and started taking apart the back cover not sure what I would find. Turns out it was just that simple, unplugged the thermastat and unclipped it from the cooling fins, unplugged the temperature control switch and then plugged both units back in. The tricky part was coiling the temperature sensor ( not that tricky). I was done in about 45 minutes but that also included cleaning out and scrubbing the bottom and sides of freezer since I had everything out anyways. Started the freezer back up and took about 8 hours to freeze ice and other food at a setting of 4, where as before I had it set on 7 and was still not keeping the ice cream cold.
Parts Used:
-
Kevin from Frisco, TX
-
Difficulty Level:Really Easy
-
Total Repair Time:15 - 30 mins
-
Tools:Screw drivers
Was this instruction helpful to you?
Thank you for voting!
Freezer was no longer keeping items frozen,
I followed the You-Tube instructions, removed the ice from the compressor and replaced the thermostat with the part I received from Part Select. What I took out was a part that was very much inferior to the replacement part. The repair saved me a lot of money for a new freezer and it was not difficult to do following the video. Now the freezer runs better and quieter than ever. Thank you Parts Select.
Parts Used:
-
Philippa from New York, NY
-
Difficulty Level:Easy
-
Total Repair Time:30 - 60 mins
-
Tools:Screw drivers
Was this instruction helpful to you?
Thank you for voting!
would not defrost
-
Nick from Silver Spring, MD
-
Difficulty Level:Really Easy
-
Total Repair Time:30 - 60 mins
-
Tools:Screw drivers
Was this instruction helpful to you?
Thank you for voting!
Would not freeze or defrost
Unplug freezer let stand all night to defrost. Remove the tray cover which is located on the upper back area inside the freezer.( 3 twist fittings remove it ). Remove the upper stainless steel panel which is secured with 6 screws. This will drop down exposing the condenser. Note all the wires and fan will stay attached to the stainless steel panel, this panel will drop down no need to unplug anything. On the left upper side next to the condenser you will see the thermostat. Two color coded wires. Remove the thermostat and install the new one at the same location.
Parts Used:
-
RONALD from Sevierville, TN
-
Difficulty Level:Easy
-
Total Repair Time:30 - 60 mins
-
Tools:Pliers, Screw drivers
Was this instruction helpful to you?
Thank you for voting!
coils would freeze over not allowing air to circulate throughout freezer
replace thermostat and timer after defrosting and cleaning out freezer. I took less than 10 minutes and now freezer has a defrost cycle that eliminates frost buildup on the coils.
Parts Used:
-
robert from royal oaks, CA
-
Difficulty Level:Really Easy
-
Total Repair Time:Less than 15 mins
-
Tools:Screw drivers, Socket set
Was this instruction helpful to you?
Thank you for voting!
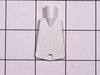
freezer door got locked and we couldn't find the key
-
Linda from Fresno, CA
-
Difficulty Level:Really Easy
-
Total Repair Time:Less than 15 mins
Was this instruction helpful to you?
Thank you for voting!
Coils not Defrosting and stopped freezing
Upluged power pulled freezer out from wall removed the two screws that holds the defrost timer unpluged defrost timer pluged new timer in mounted new timer back with the two screws pluged freezer back in and job was complete. Freezer working fine.
Parts Used:
-
Joseph from Yulee, FL
-
Difficulty Level:Really Easy
-
Total Repair Time:15 - 30 mins
-
Tools:Screw drivers
Was this instruction helpful to you?
Thank you for voting!
lost key
Ordered freezer key friday afternoon received it saturday afternoon. Fast service
Parts Used:
-
Stephen from noble, OK
-
Difficulty Level:Really Easy
-
Total Repair Time:Less than 15 mins
Was this instruction helpful to you?
Thank you for voting!
Freezer ran alot, then temperture began to vary.
Watched video on Part Select which shows you how to replace the thermostat with several good pointers. Very easily done and now the freezer works great.
Parts Used:
-
John from Port Republic, VA
-
Difficulty Level:Easy
-
Total Repair Time:15 - 30 mins
-
Tools:Screw drivers
Was this instruction helpful to you?
Thank you for voting!
Freezer was warm
I first noticed my ice cream getting soft. Then 2 days later the alarm went. I emptied the freezer, opened the panels and saw no frost. I saw that 99% of issues were resolved with a defrost timer and thermostat so I ordered those. I have to say the parts came quickly and they went in very easy. My freezer seems to be in the 1% category though. It's still not cooling even though I can measure the temperature at the front of the evaporator coil is cold but by the end of the coil it's almost room temperature. I think a repairman is called for.
Parts Used:
-
Charles from Macomb, MI
-
Difficulty Level:Really Easy
-
Total Repair Time:30 - 60 mins
-
Tools:Screw drivers
Was this instruction helpful to you?
Thank you for voting!