















CFGF3017LWB Frigidaire Range - Instructions
Keep searches simple. Use keywords, e.g. "leaking", "pump", "broken" or "fit".
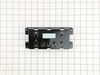
The oven control board did not respond and was kicking out the GFI
I replaced the oven control board. I used the old overlay because I could not find a model # but I was able to locate the exact replacement part. it took some to find, but it paided off.Thanks for your help. I Got the replacement part # from the old control board.
Parts Used:
-
MELVIN from ST LOUIS, MO
-
Difficulty Level:Really Easy
-
Total Repair Time:15 - 30 mins
-
Tools:Screw drivers
Was this instruction helpful to you?
Thank you for voting!
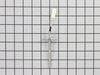
Oven Temperture probe.
Would have been simple if Frigidare had not changed the plastic snap wire connector on the part. The replacement part had a different snap together wire connection. After a couple of phone calls stating that the new part and the old part had different part numbers was informed that you have to snip off the ends and use wire connects but it was the right part. Once I knew that it was a simple repair if you have the wire connects to connect the wires.
Parts Used:
-
Kenneth from Edgemount, SD
-
Difficulty Level:Really Easy
-
Total Repair Time:15 - 30 mins
-
Tools:Pliers, Socket set
Was this instruction helpful to you?
Thank you for voting!
inner glass door was broken
removed the door from the range. removed the 4 layers of glass and carefully set aside the unbroken ones. the 3rd and 4th glasses were held together with a metal frame which had to be dismantled. The old broken glass was rusted and hard to get out of the frame. It had to be cleaned thoroughly of broken glass and rust. the removal process could then be reversed to assemble the parts and re assemble the door to the front of the range
Parts Used:

-
Norma J from Riverview, FL
-
Difficulty Level:Difficult
-
Total Repair Time:30 - 60 mins
Was this instruction helpful to you?
Thank you for voting!
Oven Wouldn't Turn On (F-10) Displayed
I thought it was the temperature sensor. I was wrong it was the e. O. C. It wasn't that hard to change,just alot of small screws. Once I plugged it in I tryed to turn on the oven it turned on right away. Only thing is I wish the part was cheaper & also there should have been a white cover on it. Not peel off the old one and re-use it???? The oven is only 2yr's old, but never the less it got fixed. . . Works fine now.
Parts Used:
-
DAVID from PALMDALE, CA
-
Difficulty Level:Easy
-
Total Repair Time:Less than 15 mins
-
Tools:Screw drivers, Socket set
Was this instruction helpful to you?
Thank you for voting!
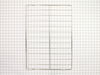
I needed an extra oven rack to bake more at one time.
I just installed the extra rack and re-arranged the existing ones. Works great!
Parts Used:
-
Sally from Cincinnati, OH
-
Difficulty Level:Really Easy
-
Total Repair Time:Less than 15 mins
Was this instruction helpful to you?
Thank you for voting!
old oven racks were nasty!
We recently purchased condo and WhiteWestinghouse range needed some love. the old racks were not in very good shape so we ordered new.
Parts Used:
-
Richard from Fort Wayne, IN
-
Difficulty Level:Really Easy
-
Total Repair Time:Less than 15 mins
Was this instruction helpful to you?
Thank you for voting!
Temp did not match readout.
Replaced temp probe and checked OK. This model did not have a full back as the instructional video showed. No cover to remove at all. Only suggestion might be to include two wire nuts of proper size. Average wire nut would be too big. Fortunately, I happened to have a couple.
Parts Used:
-
John from Columbiana, OH
-
Difficulty Level:Really Easy
-
Total Repair Time:Less than 15 mins
-
Tools:Nutdriver
Was this instruction helpful to you?
Thank you for voting!
really bad ugly streaks inside of glass
open door,throw the door latches at the hinges and remove door. Take the out of the outer panel so you can separate the glasses. remove clip that hold the outer glass in place. I ordered a replacement glass as I never thought that it would come clean it looked so bad, but it cleaned up like new so I now have a spare glass for my oven door. Just reverse the way you take it apart to put it back together.
Parts Used:
-
John from Hemet, CA
-
Difficulty Level:Really Easy
-
Total Repair Time:15 - 30 mins
-
Tools:Screw drivers
Was this instruction helpful to you?
Thank you for voting!
no heat in oven
replaced temp probe per your suggestion. No improvement! checked both heating elements with ohm meter. OK Next suggestion was replace circuit boards. Bought new range for less than cost of 2 oven/range control boards.
Parts Used:
-
BARBARA from NORTH PORT, FL
-
Difficulty Level:Easy
-
Total Repair Time:15 - 30 mins
-
Tools:Nutdriver, Pliers
Was this instruction helpful to you?
Thank you for voting!
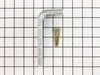
Needed to install an anti-tip bracket on my stove.
Moved the stove. Used the template to position the bracket. Put the supplied screws to attach bracket to the floor. Slid stove back into place. DONE!
Parts Used:
-
Daniel from Provo, UT
-
Difficulty Level:Really Easy
-
Total Repair Time:Less than 15 mins
-
Tools:Socket set
Was this instruction helpful to you?
Thank you for voting!
Old rusty worn out oven racks
-
June from Mt. Vernon, AL
-
Difficulty Level:Really Easy
-
Total Repair Time:Less than 15 mins
Was this instruction helpful to you?
Thank you for voting!
Just had to replace the racks in the stove.
Did just want to comment on the customer service. It was great. The easiest to order that I have ever dealt with. Received prompt attention to the order and processing the same. JUST GREAT> Thanks
Parts Used:
-
charles from El Paso, TX
-
Difficulty Level:Really Easy
-
Total Repair Time:Less than 15 mins
Was this instruction helpful to you?
Thank you for voting!
self clean process changes the color of the trim
I checked the internet and found PartSelect.com the most affordable (lowest price) for the part. I got the part within 3 days which was very quick. Replacing was unscrew and re-screw at two points. it took me about 15 minutes (including opening the box and talking to my wife on the phone for 5 minutes).
Parts Used:
-
Benjamin from Savoy, IL
-
Difficulty Level:Really Easy
-
Total Repair Time:Less than 15 mins
-
Tools:Screw drivers
Was this instruction helpful to you?
Thank you for voting!
Sliced Outlet Cord
I was replacing a range oven hood, so I pulled the oven away from the wall but left it plugged in. I removed the old oven hood, which had an exhaust pipe that was still mounted through the cupboard. While I was preparing the new oven hood the exhaust pipe fell out of the cupboard and cut the oven wire in half. I was able to find the part number on the existing cord and looked up on line. I ordered the part using 3-5 business days and it showed up in 2 days. I was able to attach the new cord, which had an easy clip plug, and secure back to the stove. Very easy and very inexpensive to do.
Parts Used:

-
William from Saint Clair Shores, MI
-
Difficulty Level:Really Easy
-
Total Repair Time:Less than 15 mins
-
Tools:Screw drivers
Was this instruction helpful to you?
Thank you for voting!
55 yr old wall oven had burnt out seal
Very easy--just had to drill new holes for the clips because the are already pre set in the rubber gasket
Parts Used:
-
Diane from Natrona Heights, PA
-
Difficulty Level:Really Easy
-
Total Repair Time:Less than 15 mins
Was this instruction helpful to you?
Thank you for voting!