















CEC4S7DTAA Gibson Range - Instructions
Keep searches simple. Use keywords, e.g. "leaking", "pump", "broken" or "fit".
Heating element went "out" (burned up!!)
Unscrewed back of oven the plate that was holding on old element, removed it (plugged into small wire device)
Plugged in new one and replaced screws to hold in place.
Plugged in new one and replaced screws to hold in place.
Parts Used:
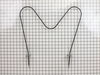
-
Patricia from Kirkwood, MO
-
Difficulty Level:Easy
-
Total Repair Time:Less than 15 mins
-
Tools:Screw drivers
1 of 3 people
found this instruction helpful.
Was this instruction helpful to you?
Thank you for voting!
replace baking element in stove
unplug old baking element using socket tool and put in new baking element - very simple and it works!
Parts Used:
-
gene from SANDUSKY, OH
-
Difficulty Level:Very Easy
-
Total Repair Time:Less than 15 mins
-
Tools:Socket set
1 of 3 people
found this instruction helpful.
Was this instruction helpful to you?
Thank you for voting!
Bake element arcing & small flame
Removed the 2 element holding screws, disconnected the element leads & remover element. Replaced with new element.
All in all a real easy job (wish all repairs went this easy)
PartSelect had the element at the house within a couple days (Correct part I might add) which made the wife happy !!
All in all a real easy job (wish all repairs went this easy)
PartSelect had the element at the house within a couple days (Correct part I might add) which made the wife happy !!
Parts Used:
-
Melvin from Attica, MI
-
Difficulty Level:Really Easy
-
Total Repair Time:Less than 15 mins
-
Tools:Nutdriver
1 of 3 people
found this instruction helpful.
Was this instruction helpful to you?
Thank you for voting!
light bilb went out

-
Denise from Landover, MD
-
Difficulty Level:Really Easy
-
Total Repair Time:Less than 15 mins
2 of 6 people
found this instruction helpful.
Was this instruction helpful to you?
Thank you for voting!
bake element went out
Took the back panel off. Removed the 2 screws from the old element,removed it. Put the new one in and replaced the screws. Put the back panel on done. What took the longest was cleaning behind there !!
Parts Used:
-
Robert from Silverdale, WA
-
Difficulty Level:Really Easy
-
Total Repair Time:15 - 30 mins
-
Tools:Nutdriver
1 of 3 people
found this instruction helpful.
Was this instruction helpful to you?
Thank you for voting!
the element got too hot and burned a bad spot in the element.
First I removed the 2 screws on each side of the element and then pulled the element out, disconnected the 2 wires that were holding the element, got the new element and connected it to the wires, slid back into position, put the screws back in that hold the element and put the racks back in and turned on for test. It was so easy I had it done before my husband arrived home from work.
Parts Used:
-
Lois J. from Henderson, KY
-
Difficulty Level:Really Easy
-
Total Repair Time:15 - 30 mins
-
Tools:Wrench set
1 of 3 people
found this instruction helpful.
Was this instruction helpful to you?
Thank you for voting!
Replaced bake element which had burned out
Removed sheet metal plate from back of oven. Disconnected two lead from existing bake element. Removed existing bake element, replaced with new one. Connected wires, replaced sheet metal.
The trick with this old oven is to access the wires from the back.
The trick with this old oven is to access the wires from the back.
Parts Used:
-
Mark from Seattle, WA
-
Difficulty Level:Really Easy
-
Total Repair Time:15 - 30 mins
-
Tools:Nutdriver
0 of 1 people
found this instruction helpful.
Was this instruction helpful to you?
Thank you for voting!
bake part of oven would not heat, element fried in many areas
(e.g. First I removed the two screws that hold the element in place. I then pulled the element out about 3 inches and disconnected the two wires...) I did have a problem with the wire connectors. they were a little over heated and loose, so I used pliers to ajust the connection.
Parts Used:
-
peter from edmore, MI
-
Difficulty Level:A Bit Difficult
-
Total Repair Time:30 - 60 mins
-
Tools:Nutdriver, Pliers, Screw drivers
0 of 1 people
found this instruction helpful.
Was this instruction helpful to you?
Thank you for voting!
Burned out oven bake element (bottom element).
***Make sure power is off the stove*** then remove oven racks.
Used 1/4 inch socket to remove 2 screws holding in the heating element, then pulled the element out a couple of inches to get at the wiring. Used pliers to unplug 2 spade clips.
Reversed procedure to install new element.
Used 1/4 inch socket to remove 2 screws holding in the heating element, then pulled the element out a couple of inches to get at the wiring. Used pliers to unplug 2 spade clips.
Reversed procedure to install new element.
Parts Used:
-
George from Spokane, WA
-
Difficulty Level:Easy
-
Total Repair Time:30 - 60 mins
-
Tools:Nutdriver, Pliers
0 of 1 people
found this instruction helpful.
Was this instruction helpful to you?
Thank you for voting!
oven element was out
took me longer to find my 1/4 inch nut runner and drill than to change out the element.........simpliest replacement i've ever encountered and i'm 64 years old. less than 2 minutes......
Parts Used:
-
ronnie from orange, TX
-
Difficulty Level:Really Easy
-
Total Repair Time:Less than 15 mins
-
Tools:Nutdriver
0 of 1 people
found this instruction helpful.
Was this instruction helpful to you?
Thank you for voting!
Bake Element (lower element) in oven quick working
Even though my exact model was not matched by Parts Select the bake element shown in a picture for a different model was correct. The length the bake element protruded through the wall of the oven was the same as the old one. The element arrived within two days, packaged so it would not be damaged en transit.
Parts Used:
-
John from North Manchester, IN
-
Difficulty Level:Really Easy
-
Total Repair Time:Less than 15 mins
-
Tools:Nutdriver
0 of 1 people
found this instruction helpful.
Was this instruction helpful to you?
Thank you for voting!
very little heat in the oven
The problem was that there was heat in the oven but only a little. This threw me off at first but my wife tells me that the broiler element is used as the oven heats up. So bottom line is, the main element was burned out and once I replaced it, everything worked fine.
Parts Used:
-
Daniel from Freeland, MD
-
Difficulty Level:Really Easy
-
Total Repair Time:Less than 15 mins
-
Tools:Nutdriver
0 of 1 people
found this instruction helpful.
Was this instruction helpful to you?
Thank you for voting!
Element burnt out
It was really easy. Removed the racks, removed the 2 quarter-inch screws with a nutdriver. Pulled the bad element out about 3-4 inches, enough to unhook the wires attached to the element with spade connectors. Unhooked the wires and removed bad element. Hooked up new element and reversed the process. Thanks PartSelect!
Parts Used:
-
Charles from Fleetwood, PA
-
Difficulty Level:Really Easy
-
Total Repair Time:Less than 15 mins
-
Tools:Nutdriver
0 of 1 people
found this instruction helpful.
Was this instruction helpful to you?
Thank you for voting!
Found bake element cracked
Read the reviews and followed the same procedure. Very east..took about 10-15 minutes.
Product shipped same day/next day it was delivered and it was installed less than 30 hours after it was ordered.
Exceptional service.
Product shipped same day/next day it was delivered and it was installed less than 30 hours after it was ordered.
Exceptional service.
Parts Used:
-
John from Sheffield, MA
-
Difficulty Level:Really Easy
-
Total Repair Time:Less than 15 mins
-
Tools:Socket set
0 of 1 people
found this instruction helpful.
Was this instruction helpful to you?
Thank you for voting!
Heating element went out
First, I removed the two screws that hold the element in place. I pulled out the element about 2 inches, and then I wasn't sure what to do, so I called my son and he finished the project in about 5 minutes or less. He pulled off the wires and then put the new element in place, slipped the wires on the new element, then pushed it back into the holes and screwed the screws back in. Worked great.
Parts Used:
-
Fran from Frankfort, KY
-
Difficulty Level:Really Easy
-
Total Repair Time:Less than 15 mins
-
Tools:Nutdriver, Pliers
0 of 1 people
found this instruction helpful.
Was this instruction helpful to you?
Thank you for voting!