















CC35111BCV Crosley Range - Instructions
Keep searches simple. Use keywords, e.g. "leaking", "pump", "broken" or "fit".
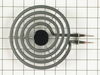
i sat a tupperware bowl on a hot burner and it stuck to the burner so i had to replace it
-
judy from palatine, IL
-
Difficulty Level:Really Easy
-
Total Repair Time:15 - 30 mins
3 of 4 people
found this instruction helpful.
Was this instruction helpful to you?
Thank you for voting!
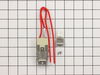
Burner wouldn't heat (wiring failure)
1. Shut the breaker off; Jenn-Air's design will have you working around hot leads if you don't.
2. Raise the control panel
3. Remove burner and unscrew the burner connector; trace the wires back to the control panel bottom and remove them
4. On the replacement connector, add the electrical for the control panel. These are not included and can be found at any hardware store; they are a standard size.
5. Connect the new wires and put everything back together.
6. Reset the break and test.
2. Raise the control panel
3. Remove burner and unscrew the burner connector; trace the wires back to the control panel bottom and remove them
4. On the replacement connector, add the electrical for the control panel. These are not included and can be found at any hardware store; they are a standard size.
5. Connect the new wires and put everything back together.
6. Reset the break and test.
Parts Used:
-
Eugene from San Antonio, TX
-
Difficulty Level:A Bit Difficult
-
Total Repair Time:15 - 30 mins
-
Tools:Pliers, Screw drivers, Wrench set
3 of 4 people
found this instruction helpful.
Was this instruction helpful to you?
Thank you for voting!
The bottom oven element burned out.
This was very easy. All I did was unscrew the brackets from the back of the oven holding the element. Then I removed the wires from the bad element and reversed the procedure adding the new element. It was easy to order the right part and I got the item in plenty of time for the Thanksgiving holiday!
Parts Used:

-
Sherry from Georgiana, AL
-
Difficulty Level:Easy
-
Total Repair Time:Less than 15 mins
-
Tools:Screw drivers
3 of 4 people
found this instruction helpful.
Was this instruction helpful to you?
Thank you for voting!
Bake element burned-out.
Removed element's two mounting screws and disconnected the wire leads on each end. Connected wire leads to the new element and replaced mounting screws. Only took a few minutes to make the change. The oven is good as new.
Parts Used:
-
Thomas from Green Lane, PA
-
Difficulty Level:Really Easy
-
Total Repair Time:Less than 15 mins
-
Tools:Screw drivers
3 of 4 people
found this instruction helpful.
Was this instruction helpful to you?
Thank you for voting!
Indicator Lens melted and fell back into the control panel
I took the back panel off, removed the old lens, installed the new lens. How easy to order from home, receive the part, do the repair and pay less than it costs to simply drive to the parts house. Cool....
Parts Used:

-
Philip from Houston, TX
-
Difficulty Level:Really Easy
-
Total Repair Time:Less than 15 mins
-
Tools:Screw drivers
3 of 4 people
found this instruction helpful.
Was this instruction helpful to you?
Thank you for voting!
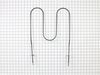
Broil element non functional
Power turned off. Door of the oven lifted off. Four screws removed, old element pulled out to reveal electrical connectors. Wires easily removed, and element discarded. New element connected to the two conductors, four screws installed and the job was completed.
Very easy. Took about 10 minutes.
Very easy. Took about 10 minutes.
Parts Used:
-
Clifford A from Melbourne Beach, FL
-
Difficulty Level:Really Easy
-
Total Repair Time:Less than 15 mins
-
Tools:Screw drivers
3 of 4 people
found this instruction helpful.
Was this instruction helpful to you?
Thank you for voting!
Oven bake element not working
Turned oven circuit breaker off. Removed oven racks. Removed 2 screws from old element. Pulled element out slightly disconnected wires on each end and reattached to new element. Pushed back in and reinstalled the 2 screws, reinstalled oven racks and turned circuit breaker back on. All done in about 20 minutes.
Parts Used:
-
Stephen from Sterling, MA
-
Difficulty Level:Very Easy
-
Total Repair Time:Less than 15 mins
-
Tools:Screw drivers
2 of 2 people
found this instruction helpful.
Was this instruction helpful to you?
Thank you for voting!
Replacing the bulb in the freezer side
Removed the ice brucket,
Removed the light shield by releasing one screw using a nutdriver.
Replacing the bulb and reinstalled the light shield.
Your web site is one of the best and most helpfull service sites I ever used. Just wish that in the future you will ship parts overseas.
Removed the light shield by releasing one screw using a nutdriver.
Replacing the bulb and reinstalled the light shield.
Your web site is one of the best and most helpfull service sites I ever used. Just wish that in the future you will ship parts overseas.
Parts Used:

-
Yafa (and David) from Bothell, WA
-
Difficulty Level:Easy
-
Total Repair Time:Less than 15 mins
-
Tools:Nutdriver
5 of 11 people
found this instruction helpful.
Was this instruction helpful to you?
Thank you for voting!
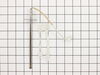
Oven would not heat
Spoke to your very helpful staff, who advised me that a likely problem was the oven sensor. I took a chance and ordered the part, which came promptly. Your service video for the part was most helpful in my decision to try the part. Installation was a breeze, but it was the oven controller board that had failed and not the oven sensor. That called for a service professional, who ultimately fixed the problem. Your service though, was excellent and I would highly recommend you to others.
Parts Used:
-
francis from mount holley, VA
-
Difficulty Level:Really Easy
-
Total Repair Time:Less than 15 mins
-
Tools:Screw drivers
2 of 2 people
found this instruction helpful.
Was this instruction helpful to you?
Thank you for voting!
bake element burnt out
It is very easy shut off the power yo the stove at the fuse box, unscrew the two screws and pull the element out replace and screw back into place.
Parts Used:
-
Dawn from Biscoe, AR
-
Difficulty Level:Really Easy
-
Total Repair Time:Less than 15 mins
-
Tools:Screw drivers
3 of 5 people
found this instruction helpful.
Was this instruction helpful to you?
Thank you for voting!
Replace the oven Sensor
The sensor is mounted in the top right side of the oven.An extra long screw driver helps to avoid damage to the sensor when replacing it.The connectors were the opposite to the old sensor and I did not see that there were adapter cables included. It might help to connect or tie these together as I only expected the sensor and did not look for adapters.I had cut the wires and used wire nuts when I found the adapters.The repairs works fine.
Mike
Mike
Parts Used:
-
Michael from Exeter, NH
-
Difficulty Level:Really Easy
-
Total Repair Time:15 - 30 mins
-
Tools:Nutdriver, Pliers, Screw drivers
3 of 5 people
found this instruction helpful.
Was this instruction helpful to you?
Thank you for voting!
Bake element had deteriorated
Turned the power off to the oven, unscrewed the ends of the element, connected new element, screwed it back in to place and turned the powe back on. The video provided in my shipping confirmation was very helpful.
Parts Used:
-
Sandra from LAKESIDE, CA
-
Difficulty Level:Very Easy
-
Total Repair Time:Less than 15 mins
-
Tools:Screw drivers
2 of 2 people
found this instruction helpful.
Was this instruction helpful to you?
Thank you for voting!
Oven would over heat and produce a F2 error code on the display. It would not turn off or cool down until I switched the circuit breaker off.
I switched the oven sensor easily enough, but it did not remedy the problem, so we are in the process of replacing the oven since it's about 20 yrs. old.
Parts Used:
-
richard from SAINT MARYS, KS
-
Difficulty Level:Very Easy
-
Total Repair Time:Less than 15 mins
-
Tools:Screw drivers
2 of 2 people
found this instruction helpful.
Was this instruction helpful to you?
Thank you for voting!
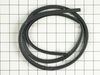
1960's oven door gasket fell apart, actual gasket not available any more
Chose rubber flexible gasket with metal tabs. cut to size. unscrewed metal bracket on inside oven edge on 3 sides, slipped metal tabs between oven and metal and screwed back in. Done! Not a perfect fit but pretty good - better than no gasket.
Parts Used:
-
Mary from WINCHESTER, MA
-
Difficulty Level:Really Easy
-
Total Repair Time:15 - 30 mins
-
Tools:Screw drivers
2 of 2 people
found this instruction helpful.
Was this instruction helpful to you?
Thank you for voting!
Heating element stopped heating
I unplugged the cord to the stove. Then I removed the two screws on the broken heating element. Once the screws were removed, I slid off the two wires attached to the element prones. Grab the new element and attached the two wires. Reinstalled screws. Plugged in the cord, and turned on oven. Heating element came on.
Parts Used:
-
Miguel R from MCKINNEY, TX
-
Difficulty Level:Really Easy
-
Total Repair Time:Less than 15 mins
-
Tools:Screw drivers
2 of 2 people
found this instruction helpful.
Was this instruction helpful to you?
Thank you for voting!