















CBC980SN3SS General Electric Range - Instructions
Keep searches simple. Use keywords, e.g. "leaking", "pump", "broken" or "fit".
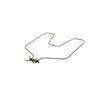
Bake element buned and broken
The repair was somewhat easy. The replacement elements are pushon type. The only thing is that the G.E. Hotpoint wire on the right side of the bake element is short. Be extra careful to not have it go back into the back oven wall or you will have to take the back cover plate (Pull out the range, remove the back cover using a nut driver or a magnetic tip srewdriver with the bit removed works[Wires are right there]. This is as easy a job as can be.
Parts Used:

-
Charles from Pittsburgh, PA
-
Difficulty Level:Easy
-
Total Repair Time:15 - 30 mins
-
Tools:Nutdriver, Pliers, Screw drivers
Was this instruction helpful to you?
Thank you for voting!
Bake element not working
Removed element with 1/4 " nut driver, unhooked element,started to install new element and discovered the wires were too short and had to remove cover on the back to replace wires on the new element. The wires on my range were not as long as the ones showed on the video.It was still an easy repair and the delivery time was less than 2 days. excellent service. Thanks
Parts Used:
-
Rodney from Chambersburg, PA
-
Difficulty Level:Easy
-
Total Repair Time:15 - 30 mins
-
Tools:Nutdriver, Screw drivers
Was this instruction helpful to you?
Thank you for voting!
element burnt out
ordered part shut electricity off took out 2 screws took of connectors put in new element replaced connectors replaced screws turn on elec started cooking
Parts Used:
-
don from protection, KS
-
Difficulty Level:Really Easy
-
Total Repair Time:15 - 30 mins
-
Tools:Nutdriver
Was this instruction helpful to you?
Thank you for voting!
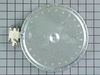
Bad Burner
I simply removed the 2 anchor screws in front of the stove and wrote down the wiring order on the instillation diagram, removed the old burner, removed the two studs, made sure they were installed on the right numbers place them in the new burner, wired the new burner, placed the springs respectively. Placed them in the correct holes in the frame to be sure that the burner was aligned properly. Put the washers on the studs and replaced the frame screws, lowered the cook top and returned the screws to lock the cook top in place.
Parts Used:
-
Roosevelt from Waggaman, LA
-
Difficulty Level:Really Easy
-
Total Repair Time:15 - 30 mins
Was this instruction helpful to you?
Thank you for voting!
8 inch burner was burnt out
replacement was easy. pulled away the stove from wall. unplug the stove. open oven door. remove the two hex head screws holdings stove top. raise the stove top in the front. supported stove top with a 16 inch piece of wood. place New Burner under old burner. remove old burner remove wires remove old burner and place it on top of new burner connected the wires from burner to new burner. install new burner. remove support lowered top down. plugged in stove tested. .burner. burner w.ork fine. reinstall hex head screws back top. pushback stove back into the wall. testes over again. all the stove work done.
Parts Used:
-
Luis from Kissimmee, FL
-
Difficulty Level:Really Easy
-
Total Repair Time:Less than 15 mins
-
Tools:Nutdriver, Screw drivers
Was this instruction helpful to you?
Thank you for voting!
Element was burned out
Disconnected the plug from the receptacle; removed the 2 screws holding the element in place at the rear of the oven; removed the support bracket at the front (also 2 screws); removed the panel on the back of the range; pulled the wire clips off the element (had to replace one of them); slid the new element in place; reconnected the wires and fastened the element in place; reattached the support bracket and rear panel ... With the assistance of my wife (extra hands) this was an easy job!
Parts Used:
-
William from Franklin, TN
-
Difficulty Level:Really Easy
-
Total Repair Time:15 - 30 mins
-
Tools:Nutdriver, Pliers
Was this instruction helpful to you?
Thank you for voting!
A large burner (haliant Burner 8" ) went out on my Hotpoint Electric Range
I ordered the part on a Monday and Tuesday afternoon I received it! I went a route I often take first. I read the instructions of others before starting my job and opened the top of the range. There are two screws under the range top in front near the oven door, one on either side, that must be removed. After this I opened the top of the range and positioned a piece of 2X2 about 20 inches long at an angle to hold the top up while I worked on the burner. I then used my phone to take a close up picture of the old burner while in place in my range so I could refer to it when putting the new one in place. I then took a pair of needle nose pliers and pulled off the wiring, then removed lock washers under the burner and removed the old burner, being careful not to lose the washers and springs. I took the new burner and layed it along side the old one to see exactly how it would be placed under the glass cover. I replace the springs and lock washers then referred to my photo and replace all the wires to the burner as they had been. Then lowered the top in place and put the screws back in place. That was it. I'm a 67 year old female, if I can do this, anyone can!
Parts Used:
-
Ruth from Potosi, MO
-
Difficulty Level:Easy
-
Total Repair Time:15 - 30 mins
-
Tools:Screw drivers, Wrench set
Was this instruction helpful to you?
Thank you for voting!
broken light socket
The only tool needed was a nutdriver to remove the lamp socket. I needed my head mounted light to see what I was doing, and everything went smoothly from there. Simple job.
Parts Used:
-
James from Monterey, TN
-
Difficulty Level:Easy
-
Total Repair Time:15 - 30 mins
-
Tools:Nutdriver
Was this instruction helpful to you?
Thank you for voting!
missing meat thermistor
-
John R from Asheville, NC
-
Difficulty Level:Really Easy
-
Total Repair Time:Less than 15 mins
Was this instruction helpful to you?
Thank you for voting!
Oven Probe broke
-
Kathleen from Munt Laurel, NJ
-
Difficulty Level:Really Easy
-
Total Repair Time:Less than 15 mins
Was this instruction helpful to you?
Thank you for voting!
Broiler Element Replacement
There were two small screws at the back of the stove (this was the part that intimidated me. At first glance it doesn't look like it should be removed). But you just have to unscrew them, disconnect the wires behind them (this part can be done by hand), and pull the element out. The new element slides right in! Just make sure the power to the stove is disconnected either by breaker or by unplugging it. I'm not sure if it matters, but I made sure to connect the wires to the same side of the element that they were removed from.
Parts Used:
-
Emily from Snoqualmie Pass, WA
-
Difficulty Level:Really Easy
-
Total Repair Time:Less than 15 mins
-
Tools:Nutdriver
Was this instruction helpful to you?
Thank you for voting!
Heating element not working
Saw the brief video and as stated took less than five minutes to replace. It took longer to clean up the floor under the oven than to replace heating element.
Parts Used:
-
Stuart from Yelm, WA
-
Difficulty Level:Really Easy
-
Total Repair Time:Less than 15 mins
-
Tools:Nutdriver
Was this instruction helpful to you?
Thank you for voting!
burned out
-
mary from morton, WA
-
Difficulty Level:Really Easy
-
Total Repair Time:Less than 15 mins
-
Tools:Nutdriver
Was this instruction helpful to you?
Thank you for voting!
Bake Element burnt out
-
Greg from Chicopee, MA
-
Difficulty Level:Really Easy
-
Total Repair Time:Less than 15 mins
-
Tools:Socket set
Was this instruction helpful to you?
Thank you for voting!
the bottom element of the oven was broken
attached the element,pushed it back in the pocket,put the plate back on, screwed the nut and bolt back on and was done in less than 4 minutes!!
Parts Used:
-
DAVID from PARIS, MI
-
Difficulty Level:Really Easy
-
Total Repair Time:Less than 15 mins
Was this instruction helpful to you?
Thank you for voting!