















CADG265RCL General Electric Dryer - Instructions
Keep searches simple. Use keywords, e.g. "leaking", "pump", "broken" or "fit".
Gas flame turns off after a while, dryer keeps turning but no heat is generated.
Before this fix which worked beautifully, I tried replacing the flame sensor which did not work. To read that story, search under part number PS459818 (Flame Sensor). Our model is a Westinghouse, so access to the unit is a bit different than the other stories. It's a stacked front-loader sitting on top of a washing machine.
1. Open the little front door (lower left side) by unscrewing the little screw right below it. The door will pivot and slide out vertically.
2. Disconnect the electrical main lead coming from the back of the unit (just in case).
3. Close the gas switch lever on main gas pipe coming from the back on left side (just in case).
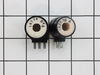
2. Remove 2 phillips screws on top of the metal bracket holding the two coils. The screws have to be removed completely along with the bracket. It's easy, they are right in front and there is room for the screwdriver. Use a thin long one instead of one with multiple bits to better align with the screws, which are very close to the coils.
3. The two coils slide right out and are very different so it's easy to keep them straight. Remove electrical connectors before or after removing the coils (I marked the plastic on top with a sharpie to keep them in the right orientation).
4. Drop in the two new coils and reconnect them to the electrical leads.
5. Reconnect main electrical lead from back (match wire colors)
6. Reopen gas lever on gas pipe.
7. Drop in front cover at an angle, tilt vertically and put screw back underneath. Use magnetized screwdriver or a piece of scotch tape to hold the screw or it might fall off the screwdriver.
8. Voila'. It worked.
This website is great. Our dryer is a Westinghouse bought in 1991 (almost 20 years old!) and with this fix it's just like new. In 1994 we used parts bought here to fix our washing machine (Westinghouse LT350RXW1). That machine is now 15 years old and still going!
1. Open the little front door (lower left side) by unscrewing the little screw right below it. The door will pivot and slide out vertically.
2. Disconnect the electrical main lead coming from the back of the unit (just in case).
3. Close the gas switch lever on main gas pipe coming from the back on left side (just in case).
2. Remove 2 phillips screws on top of the metal bracket holding the two coils. The screws have to be removed completely along with the bracket. It's easy, they are right in front and there is room for the screwdriver. Use a thin long one instead of one with multiple bits to better align with the screws, which are very close to the coils.
3. The two coils slide right out and are very different so it's easy to keep them straight. Remove electrical connectors before or after removing the coils (I marked the plastic on top with a sharpie to keep them in the right orientation).
4. Drop in the two new coils and reconnect them to the electrical leads.
5. Reconnect main electrical lead from back (match wire colors)
6. Reopen gas lever on gas pipe.
7. Drop in front cover at an angle, tilt vertically and put screw back underneath. Use magnetized screwdriver or a piece of scotch tape to hold the screw or it might fall off the screwdriver.
8. Voila'. It worked.
This website is great. Our dryer is a Westinghouse bought in 1991 (almost 20 years old!) and with this fix it's just like new. In 1994 we used parts bought here to fix our washing machine (Westinghouse LT350RXW1). That machine is now 15 years old and still going!
Parts Used:
-
Giuseppe from San Francisco, CA
-
Difficulty Level:Easy
-
Total Repair Time:15 - 30 mins
-
Tools:Screw drivers
3 of 5 people
found this instruction helpful.
Was this instruction helpful to you?
Thank you for voting!
Gas dryer would generate heat at the beginning of the cycle but would stop after 5 min and would start making a buzzing noise.
Unplug from electric outlet. Use putty knife to press on two brackets holding the top cover. Raise top cover. Unscrew two screws holding the front panel. Raise front panel up and move to the right (careful with the wires). Disconnect wires from coils. Unscrew two screws holding a small bracket holding the coils. Replace coils and reassemble everything. (HINT: make sure you drum is empty. Mine contained dump clothes, and it turned out front panel actually provides support to the drum, so mine was hanging there with some weight in it - probably not good).
Parts Used:
-
Denis from LONGMEADOW, MA
-
Difficulty Level:Easy
-
Total Repair Time:15 - 30 mins
-
Tools:Screw drivers
2 of 2 people
found this instruction helpful.
Was this instruction helpful to you?
Thank you for voting!
Dryer motor was running, but the drum stopped turning. The drive belt was broken.
I followed the instructions in your detailed online video. Fortunately on my model there was a removable panel on the back of the dryer which provided easy access to install the drive belt on the motor pulley and the idler pulley. Great video and very easy repair.
Parts Used:

-
Charles from POINT HARBOR, NC
-
Difficulty Level:Really Easy
-
Total Repair Time:30 - 60 mins
-
Tools:Nutdriver, Pliers, Screw drivers, Socket set
2 of 2 people
found this instruction helpful.
Was this instruction helpful to you?
Thank you for voting!
No flame. Igniter came on but no gas.
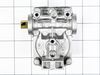
Opened up dryer for access to all components and tested. All checked good. Put back together and tested and igniter came on but no flame. Purchased two new coils and tested again. No flame. Purchased complete valve assembly and replaced old one. Tested again and viola, success! TY PartSelect for exact replacement part.
Parts Used:
-
Gary from CHRISMAN, IL
-
Difficulty Level:Really Easy
-
Total Repair Time:30 - 60 mins
-
Tools:Pliers, Screw drivers, Wrench set
2 of 2 people
found this instruction helpful.
Was this instruction helpful to you?
Thank you for voting!
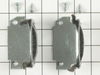
Dryer leaving marks on clothes. Clothes were getting caught between drum and outside ring. Worn slides.
Remove top panel and front panel. 12 Screws. Be sure to vacuum entire inside of cabinet free of lint.
Parts Used:
-
E. Thomas from REDONDO BEACH, CA
-
Difficulty Level:A Bit Difficult
-
Total Repair Time:1- 2 hours
-
Tools:Nutdriver, Screw drivers
2 of 2 people
found this instruction helpful.
Was this instruction helpful to you?
Thank you for voting!
Belt broke, tumbler did not turn.
After identifying the issue, the biggest issue was trying to identify how to get the belt around the drum tumbler. After looking through the back hatch, I figured the best way was through the top. I removed the top just enough to work the belt in between the drum and the front sheet metal. Then I turned it on its side and worked the belt from the back hatch. I pulled the pulley back on the tensioner and slipped the belt under neath. Put it back together, been working great.
Parts Used:
-
John from Dushore, PA
-
Difficulty Level:A Bit Difficult
-
Total Repair Time:30 - 60 mins
-
Tools:Nutdriver, Screw drivers
3 of 5 people
found this instruction helpful.
Was this instruction helpful to you?
Thank you for voting!
Dryer shut down completely, wouldn't start
Removed 3 torx screws on the control panel. Removed two more regular screws from the dryer opening. This allows removal of the top. Removed some panels from the back to access where belt feeds through the motor. Found the belt snapped in two inside.
Now that I knew what the problem was I found partselect.com on Google. Ordered the part friday morning with ground. The belt arrived SATURDAY MORNING! I didn't even know fedex would deliver ground shipments on Saturday. Less than 24 hours later I had it. AWESOME.
Removed the front panel by removing two hex bolts to allow me to drape the belt over the drum. Not having seen how the belt was originally around the tensioner and the bad diagrams included with the dryer, it took some figuring to get it back on right. But we did it and we're back in business. I will absolutely buy from PartSelect.com again!
Now that I knew what the problem was I found partselect.com on Google. Ordered the part friday morning with ground. The belt arrived SATURDAY MORNING! I didn't even know fedex would deliver ground shipments on Saturday. Less than 24 hours later I had it. AWESOME.
Removed the front panel by removing two hex bolts to allow me to drape the belt over the drum. Not having seen how the belt was originally around the tensioner and the bad diagrams included with the dryer, it took some figuring to get it back on right. But we did it and we're back in business. I will absolutely buy from PartSelect.com again!
Parts Used:
-
Rob from Valencia, CA
-
Difficulty Level:Easy
-
Total Repair Time:30 - 60 mins
-
Tools:Nutdriver, Screw drivers
2 of 2 people
found this instruction helpful.
Was this instruction helpful to you?
Thank you for voting!
Drum was not turning
This is the third time for a belt on this 28 year old dryer. Not too much to it. Unplug the dryer. Open the door. Remove the screws holding on the front panel and loosen the screw at the bottom. Disconnect the wires to the door switch and lift off the front panel and start up the shop vac to clean out the lint - there is a lot to be found in various places. Slide the new belt over the front of the drum and make sure there are no twists. You can now reverse the order to mounte the front panel but don't close the top so you have light to see inside. Go around to the back panel and remove the machine bolts holding on the access panel at the back. This allows access to the motor and belt tensioner. Get the shop vac out here and get to some more lint. Google the model number to find a diagram on how to route the belt. Put the belt on the motor shaft and around the tensioner as depicted. Occaisionally the plastic idler pully is worn and this can be the cause of the brokent belt. If the idler wheel does not spin freely, squeads or is cracked it should be replaced or you will be right back replacing the belt again. If all is fine it is time for a test run. CAUTION - you can plug the dryer in but keep your hands out of the cabinet as there are live exposed 220 volt terminals exposed. This allows you to observe that all is working and not binding during a test run with NO heat. If all is fine, unplug the dryer and put the covers back on. Reconnect the exhaust hose (now is a good time to clean that and the vent to outdoors as well).
Parts Used:
-
David from Dublin, OH
-
Difficulty Level:Easy
-
Total Repair Time:30 - 60 mins
-
Tools:Nutdriver, Screw drivers
2 of 2 people
found this instruction helpful.
Was this instruction helpful to you?
Thank you for voting!
Dryer Don't turn
I removed the 2 screws and lock assemblies from both sides on the back. Then i removed 4 screws (two from each side) on the control panel and lifted that up as i tipped the cover forward to disconnect the wires from the door switch. I found the wiring diagram inside the control panel cover, which included a belt routing diagram (very helpful, being the belt was laying in the bottom. I then removed 3 torx srews holding the drum to the bearing, and removed the drum. Let the fun begin! i proceded to put the belt onto the motor pulley and around the tensioner. i needed some help from my wife to set the drum back in as i held the belt up around it. once the drum was back in, i found the beld had fallen away from the tensioner. I lifted the front of the drum up just enough to get both arms below it and move the tensioner back to slip the belt over it correctly. With the new belt on i started to put the screws back in the drum. This got very frustrating, as you have to correctly line up all the holes again, while holding the drum in the correct angle to start the screws. this was the hardest part, not physically, but wears on a person's nerves quickly! Once all the screws were in and tight, i took a deep sigh of relief before i tipped the front cover up just enought to get the wires hooked back up for the door. I turned the unit on to verify the repair before re-assembly. Yep! works again, for well under $20.00! Thanks PartSelect!
Parts Used:
-
Matthew from Alma, WI
-
Difficulty Level:A Bit Difficult
-
Total Repair Time:30 - 60 mins
-
Tools:Screw drivers, Socket set
2 of 3 people
found this instruction helpful.
Was this instruction helpful to you?
Thank you for voting!
No Heat
Removed gas line. removed control panel, removed top, removed front, removed burner, replaced igniter, put back in. paused and played the video. very easy to do. 42 minutes and I had a few beers.
Parts Used:

-
Steve from Santa Ana, CA
-
Difficulty Level:Really Easy
-
Total Repair Time:30 - 60 mins
-
Tools:Screw drivers, Wrench (Adjustable)
2 of 3 people
found this instruction helpful.
Was this instruction helpful to you?
Thank you for voting!
broken belt
Took the top and front off. DO NOT TAKE DRUM OFF!! Lifted drum slightly and worked belt around drum. Replaced front and top. Took off rear panel at bottom near vent pipe. Put belt around motor and then tension pulley. Buttoned everything up and that was it!
Parts Used:
-
John from Perry, FL
-
Difficulty Level:Really Easy
-
Total Repair Time:Less than 15 mins
-
Tools:Nutdriver, Screw drivers
2 of 3 people
found this instruction helpful.
Was this instruction helpful to you?
Thank you for voting!
Broken dryer belt on 30-year-old dryer
Found excellent instructions and diagrams online by searching under the model number. Best of all was the service from PartSelect. Belt arrived 24 hours after ordering. It was the right part, it was easy to install, and the dryer is running beautifully.
Parts Used:
-
James from Marco Island, FL
-
Difficulty Level:Easy
-
Total Repair Time:1- 2 hours
-
Tools:Nutdriver, Screw drivers, Socket set
2 of 3 people
found this instruction helpful.
Was this instruction helpful to you?
Thank you for voting!
loud noise when ran for 5 min.
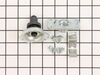
Replaced the rear drum bearing. Not doing it before ,it took about 1 1/2 hrs. Problem was fixed.
Parts Used:
-
Joseph from Freeland, MI
-
Difficulty Level:Easy
-
Total Repair Time:1- 2 hours
-
Tools:Screw drivers, Socket set
1 person
found this instruction helpful.
Was this instruction helpful to you?
Thank you for voting!
sqeekysqueeky rear drum bearing
Open top by removing 4 phillips head screws above opened door, pop top up. Remove rear access panel, remove belt from drive & tension pully. Loosen top front screws, remove front panel to gain access to remove drum. After drum removed, I realized why rear bearing went bad- two front guides were worn causing rear bearing to angle and wear out. Replaced front pads, buttoned her up and now quite as new. Also replaced drive belt while in there.
Parts Used:
-
mitchell from Warren, NJ
-
Difficulty Level:Easy
-
Total Repair Time:More than 2 hours
-
Tools:Nutdriver, Screw drivers, Socket set
1 person
found this instruction helpful.
Was this instruction helpful to you?
Thank you for voting!
Dryer squeaked when running
Took the dryer apart to get to the rear bearing. Took the bearing assembly out, kept the e-ring from the old bearing shaft, replaced the bearing kit, took the o-ring off the new shaft and replaced it with the e-ring, then reassembled the unit. Make sure to place a nail or long screw into into the rear of the drum, so that you can realign bearing on the drum. It is easier with two people when reassembling.
Parts Used:
-
George from Dassel, MN
-
Difficulty Level:A Bit Difficult
-
Total Repair Time:1- 2 hours
-
Tools:Pliers, Screw drivers, Socket set, Wrench set
1 person
found this instruction helpful.
Was this instruction helpful to you?
Thank you for voting!