















BNEW3H9TZ Norge Range - Instructions
Keep searches simple. Use keywords, e.g. "leaking", "pump", "broken" or "fit".
Sockets burnt out.
Repair was very east. The suppliers package had all of the necessary parts ceramic wire nuts wire Ect. Excellent.
Will buy from Part Select Appliance again.
Will buy from Part Select Appliance again.
Parts Used:

-
James from Bear, DE
-
Difficulty Level:Really Easy
-
Total Repair Time:15 - 30 mins
-
Tools:Screw drivers
1 of 2 people
found this instruction helpful.
Was this instruction helpful to you?
Thank you for voting!
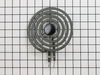
burned out stove eye, 6"
remove burned out eye, replaced with new eye.new eye does not fit exactally correct onto splash pan as point on end of steel " rod " not pointed enough to slip into mate on splash pan
Parts Used:
-
Robert from Birmingham, AL
-
Difficulty Level:Easy
-
Total Repair Time:15 - 30 mins
1 of 2 people
found this instruction helpful.
Was this instruction helpful to you?
Thank you for voting!
my stovetop light did not work
We actually had to get the repairman back that had repaired our microwave. Our range has the attached microwave above the range. My stovetop light worked prior to the visit. When he left, I prepared supper without the light, which did not go on. Ultimately, we had to replace the fluorscent tube, which thankfully, you had. No appliance store in a 35 mile radius did. We finally got the glass protector off, and the new tube did not go on. Back to the repairman, to tell him the new bulb did not work and that probably something happened when he visited before. He came back, found that indeed a wire had been broken when he was working on the microwave. I had indicated to him I did not expect to pay another repair bill after I had alrealy spent 117. before plus the cost of the new bulb, 22. something including shipping. He obliged and id not charge me anythink to repair the broken wire.
Now I have the old bulb for back up!!!
Thank you for having my replacement tube!!
Now I have the old bulb for back up!!!
Thank you for having my replacement tube!!
Parts Used:

-
Geraldine M. from Fork Union, VA
-
Difficulty Level:Really Easy
-
Total Repair Time:15 - 30 mins
1 of 2 people
found this instruction helpful.
Was this instruction helpful to you?
Thank you for voting!
2 of the burners were not working arching and smoking
Time was do to the fact that I replaced two elements! I turned off the power to the braker box, unplugged the stove and removed the screw holding the element plug in, removed the part, and cut the wires where they were clean looking (not damaged by smoke or the arch) I then stripped the wire and took the new part and twisted the parts together with the caps and then put the heat shrink on and used the blow dryer on them, attached the part to the bracket and screwed it to the hood of the stove plugged the burner in, plugged in the oven and turned on the power tested it worked, did the same for the next burner and yes mind you I am a woman it was very easy to do.
Parts Used:
-
Tina from Laurel, MT
-
Difficulty Level:Really Easy
-
Total Repair Time:15 - 30 mins
-
Tools:Screw drivers
1 of 3 people
found this instruction helpful.
Was this instruction helpful to you?
Thank you for voting!
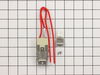
Receptacle had become bad poor connection.
First I disconnect the breaker. I removed the defected receptacle and cut the wires. I connected the new receptacle with parts with the new part. Turned the breaker back on and everthing worked fine.
Parts Used:
-
JAMES from Harrodsburg, KY
-
Difficulty Level:Really Easy
-
Total Repair Time:Less than 15 mins
-
Tools:Pliers, Screw drivers
1 of 3 people
found this instruction helpful.
Was this instruction helpful to you?
Thank you for voting!
The burner was shortening out and would work sometime. The first time I replace the burner but the new one shorted out quickly.
I unplugged the stove. Took out the burner and removed receptacle by pulling it out of the bracket and clipping the wires. One thing you want to make sure is that when you clip the wires from the receptacle you're replacing you leave enough wire so that you can connect them to the wires on the new receptacle when it is in place on the stove. I had just enough but would have liked more. The bracket I received didn't match the one on the stove so I used the one on the stove since the receptacle itself was the same as the one I was replacing.
Parts Used:
-
shawn from Vancouver, WA
-
Difficulty Level:Really Easy
-
Total Repair Time:Less than 15 mins
-
Tools:Pliers
1 of 3 people
found this instruction helpful.
Was this instruction helpful to you?
Thank you for voting!
burned oven bulb
The hardest part was taking out original light bulb because screws on shield where hard to unscrew after all this years . The old bulb vent out leaving neck in socket. It took narrow electrical pliers to get neck out .The generic appliance bulb did not fit and had aluminum neck ,not recommended for brass sockets in ovens.Putting new light bulb in was not the problem.
Parts Used:

-
Ivanka from Atlantra, GA
-
Difficulty Level:Really Easy
-
Total Repair Time:30 - 60 mins
-
Tools:Pliers, Screw drivers
3 of 9 people
found this instruction helpful.
Was this instruction helpful to you?
Thank you for voting!
cooking element shorted out and did not heat.
I had bought the 1st set of plug-in blocks at lowes, They were the only type they had the univeral ones! They did not hold the elements plug tight enough and half the time they would have to be punshed in more then they would snap and sizzle- I ordere the newer style and they have done great they are better made and heavier metal parts- they elements fit in snuggly and do not sizzle or nor do I have to push the element in. This stove is 35 years old and I have replaced most everything on it. But it's still cooking...
Parts Used:
-
Carolyn from Fyffe, AL
-
Difficulty Level:Really Easy
-
Total Repair Time:30 - 60 mins
-
Tools:Screw drivers
0 of 1 people
found this instruction helpful.
Was this instruction helpful to you?
Thank you for voting!
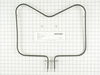
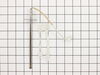
Little or no heat from oven, cakes baking unevenly
Replaced both parts to not take any chances. Had to first find the hole in the back of the oven for the temperature sensor kit. We were trying too hard and overlooked the obvious. It goes behind the small black panel, as you look at the back of the stove it is top left and held in place by only one screw. Once we found it everything went very well and the oven is working great-back in the cake business again!
Parts Used:
-
STEVE from Lehigh Acres, FL
-
Difficulty Level:Easy
-
Total Repair Time:30 - 60 mins
-
Tools:Screw drivers
3 of 10 people
found this instruction helpful.
Was this instruction helpful to you?
Thank you for voting!
Oven temperature lagging set temperature by almost 100F
Removed frame to cabinet lag screws
Slid oven out of cabinet (required because wire harness could not be pulled through inside of oven)
Removed two screws holding attaching sensor inside oven
Uncoupled wire harness
Installed new sensor in reverse order
Unfortunately, neither the new bake element or sensor fixed the problem, so I just ordered the more expensive control board -- hope that does it.
Slid oven out of cabinet (required because wire harness could not be pulled through inside of oven)
Removed two screws holding attaching sensor inside oven
Uncoupled wire harness
Installed new sensor in reverse order
Unfortunately, neither the new bake element or sensor fixed the problem, so I just ordered the more expensive control board -- hope that does it.
Parts Used:
-
William from Edgewood, WA
-
Difficulty Level:Easy
-
Total Repair Time:30 - 60 mins
-
Tools:Pliers, Screw drivers
0 of 1 people
found this instruction helpful.
Was this instruction helpful to you?
Thank you for voting!
Electrical receptacle for burner was defective.
After buying a 'universal' part at Lowe's and it not fitting correctly and shorting out the burner, I went online and found this source for an exact replacement part. Beside having to disassemble the drop in stove burner two or three times it went well when I had the correct part. I lost one screw somewhere and that delayed me a short time to find a replacement. Thus the 1 to 2 hours. It would have been about a 30 minute job if I had been smarter.
Parts Used:
-
gerald from Hillsboro, TN
-
Difficulty Level:Easy
-
Total Repair Time:1- 2 hours
-
Tools:Pliers, Screw drivers, Socket set
0 of 1 people
found this instruction helpful.
Was this instruction helpful to you?
Thank you for voting!
no heat from burner
I raised the stove top, read the instructions to my son while he did the work, then I lowered the stove top, installed the burner, and it worked like magic.
Parts Used:
-
George from ST. Charles, MO
-
Difficulty Level:Really Easy
-
Total Repair Time:Less than 15 mins
-
Tools:Screw drivers
0 of 1 people
found this instruction helpful.
Was this instruction helpful to you?
Thank you for voting!
light bulb went out in my oven
My husband took the plastic cover off and took out old bulb and screwed in the new one. Then put the cover back on.
Parts Used:
-
Janet from Ada, MI
-
Difficulty Level:Really Easy
-
Total Repair Time:Less than 15 mins
2 of 7 people
found this instruction helpful.
Was this instruction helpful to you?
Thank you for voting!
Burner Would Not Heat
One screw taken out, 2 wires switched, new part & screw put in. Burner like new!
Parts Used:
-
David from Toledo, OH
-
Difficulty Level:Really Easy
-
Total Repair Time:Less than 15 mins
-
Tools:Screw drivers
0 of 1 people
found this instruction helpful.
Was this instruction helpful to you?
Thank you for voting!
Varying heat
Removed two screws, unplugged the old unit, plugged in the new, screwed the new in. Job done. Would have been less than five minutes if I hadn't kept dropping the screws.
Parts Used:
-
Kimbel from Rhoadesville, VA
-
Difficulty Level:Really Easy
-
Total Repair Time:Less than 15 mins
-
Tools:Screw drivers
0 of 1 people
found this instruction helpful.
Was this instruction helpful to you?
Thank you for voting!