















ART5400L Whirlpool Range - Instructions
Keep searches simple. Use keywords, e.g. "leaking", "pump", "broken" or "fit".
Broiler burned out
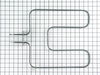
The Job didn’t take very long at all. I pulled the unit out and unplug it before I started the repair. I had to remove the back two access cover plates to get to the two wire leads that connect the broiler. I don’t believe there was enough wire to be able to do it all from the front side. Next I disconnected the two wires that connected it while remembering what color goes to the correct side (just incase this does matter). After removing the wires I moved on to remove the element with a Philips screwdriver. The new part already had the hangers on it so I reused the old screws and installed the new element. Next I reconnected the wires in the back and re-installed the back panels. I plugged it up and it works as good as new now. This was definitely a lot cheaper to fix this myself than hire a repairman.
Parts Used:
-
David from Lewisburg, TN
-
Difficulty Level:Easy
-
Total Repair Time:Less than 15 mins
-
Tools:Screw drivers, Socket set
8 of 8 people
found this instruction helpful.
Was this instruction helpful to you?
Thank you for voting!
Broil element broke
Top (broil) element broke in two on oven. Ordered part,it was there in three days. Quick fix, removed screw holding element to oven wall, unplugged wires, then just swaped out elements. Re-attached wires just as they were on old element and screwed back into same place and oven is working again.
Parts Used:
-
Randall from Cartersville, GA
-
Difficulty Level:Really Easy
-
Total Repair Time:Less than 15 mins
-
Tools:Screw drivers
4 of 5 people
found this instruction helpful.
Was this instruction helpful to you?
Thank you for voting!
Broiler Element went out
I unscrewed the 3 screws that held the element in place. My husband disconnected the back wired part of element .Then he reconnected new element wires and I rescrewed 3 screws in of new element. Very simple. I just wasn't sure about the back wired part, but like I said my husband seemed to know what he was doing so I let him do that part!
Parts Used:
-
Michele from Salem, OR
-
Difficulty Level:Easy
-
Total Repair Time:Less than 15 mins
-
Tools:Screw drivers
3 of 3 people
found this instruction helpful.
Was this instruction helpful to you?
Thank you for voting!
burned out element
Shut off power to the oven.
Unscrewed the old broiler element, unplugged it.
plugged in new one, screwed it in.
Turned on the power. Voila!
Unscrewed the old broiler element, unplugged it.
plugged in new one, screwed it in.
Turned on the power. Voila!
Parts Used:
-
Neil from Oak Park, MI
-
Difficulty Level:Really Easy
-
Total Repair Time:Less than 15 mins
-
Tools:Screw drivers
3 of 4 people
found this instruction helpful.
Was this instruction helpful to you?
Thank you for voting!
Blowing Breaker
Removed screws holding rear cover, removed cover. Male connector on Broil Element had rusted off and caused wire to fall onto the frame of the range, shorting it out.
Removed element by disconnecting other wire and removing the single Phillips head screw accessible from inside the oven. Released the element from the two hooks towards the front of the oven near the door and removed.
The wire to the element that burned off had a high temperature female push on connector that I did not have on hand. I had a high temp ring connector so I drilled one of the male connectors on the new element so I could use a small stainless screw and nut which I had to hold the ring terminal on.
After crimping the new connector on I fastened it to the element, connected the other wire and put the rear cover back.
Good to go now!
Removed element by disconnecting other wire and removing the single Phillips head screw accessible from inside the oven. Released the element from the two hooks towards the front of the oven near the door and removed.
The wire to the element that burned off had a high temperature female push on connector that I did not have on hand. I had a high temp ring connector so I drilled one of the male connectors on the new element so I could use a small stainless screw and nut which I had to hold the ring terminal on.
After crimping the new connector on I fastened it to the element, connected the other wire and put the rear cover back.
Good to go now!
Parts Used:
-
Jason from Wrentham, MA
-
Difficulty Level:Easy
-
Total Repair Time:15 - 30 mins
-
Tools:Nutdriver, Screw drivers
3 of 4 people
found this instruction helpful.
Was this instruction helpful to you?
Thank you for voting!
Burned out broiler element
The repair went real easy. Turned off power, unscrewed two screws at back of oven and disconnected the two wires. Reconnected two wires to new broiler element and remounted the new one with the two screws. Turned the breaker back on and had a steak cooking in no time.
Parts Used:
-
James from Matamoras, PA
-
Difficulty Level:Easy
-
Total Repair Time:15 - 30 mins
-
Tools:Pliers, Screw drivers
3 of 4 people
found this instruction helpful.
Was this instruction helpful to you?
Thank you for voting!
broil element quit working.
After receiving the part I was able to quickly remove the old piece and replace with the new. For this project you have to remove the back of the oven to remove the electrical attachments.
Parts Used:
-
Robert from Houston, TX
-
Difficulty Level:Easy
-
Total Repair Time:15 - 30 mins
-
Tools:Screw drivers
2 of 2 people
found this instruction helpful.
Was this instruction helpful to you?
Thank you for voting!
Broiler Replacement
Oven was missing the broiler element when I moved in so the connector/wires to plug the broiler were no longer visable in the main part of the oven (otherwise the repair would take 2 minutes). Moved oven away from wall and unplugged. Unscrewed sheet metal on the back of oven and found the broiler wires (the only two NOT connected to something). Fed the wires back into the oven and plugged in the broiler. Attached the broilers to the top hooks. Put sheet metal back on. Everything worked fine. I wouldn't say I know much about fixing things, but this was a very straight-forward job.
Parts Used:
-
Nick from Cottonwood Heights, UT
-
Difficulty Level:Easy
-
Total Repair Time:15 - 30 mins
-
Tools:Pliers, Screw drivers
2 of 3 people
found this instruction helpful.
Was this instruction helpful to you?
Thank you for voting!
None
Unplugged the stove, unscrewed the two screws, unplugged the element....plugged in the new element, screwed to top of stove, plugged stove back in and tested. Pizza was great!
Parts Used:
-
Bradley from Neillsville, WI
-
Difficulty Level:Very Easy
-
Total Repair Time:Less than 15 mins
-
Tools:Screw drivers
1 person
found this instruction helpful.
Was this instruction helpful to you?
Thank you for voting!
Our broiler element bit the dust
The Parts Select folks talked me through the procedure, starting with turning off the electricity to the stove. I'm glad they mentioned that, as I had to connect the element and would be touching the wires to do so. The only glitch I ran into was that the screws that attached the element to the oven were quite rusted, so it took a few more minutes to wrest them loose. I was very surprised at how easy this was, and am happy that the Parts Select staff knew how to instruct me. Many Thanks!!
Parts Used:
-
KATHLEEN from Reston, VA
-
Difficulty Level:Easy
-
Total Repair Time:15 - 30 mins
-
Tools:Screw drivers
0 of 1 people
found this instruction helpful.
Was this instruction helpful to you?
Thank you for voting!
element was busted
shut off circut breaker. un pluged stove removed back panel disconected 2 wires on element. removed 1 screw that holds element in place pull out old element put in new reassemble
Parts Used:
-
john from new port richey, FL
-
Difficulty Level:Really Easy
-
Total Repair Time:15 - 30 mins
-
Tools:Screw drivers, Socket set
0 of 2 people
found this instruction helpful.
Was this instruction helpful to you?
Thank you for voting!
Oven lower element
Description of the element indicated that it would work for the oven burner. However, it obviously was meant for the broiler element. I had to remove the thin metal piece with the attachment holes in it (the holes didn't match the holes in the back of the oven). To install I had to drill two holes in the remaining attachment flange to match the holes on the back of the oven. Then I made three metal supports out of sheet metal to hold the element up approximately 1 1/2" off of the bottom of the oven. Just thankful to find one that I could make work. Oven works fine now. LF
Parts Used:
-
Lawrence from South Fork, CO
-
Difficulty Level:Really Easy
-
Total Repair Time:15 - 30 mins
-
Tools:Pliers, Screw drivers
Was this instruction helpful to you?
Thank you for voting!
Broiler heating element quit working
I had no trouble replacing the Broiler heating element, total time 30 minutes. Just had to pull the range out to unplug it and remove the back sheild of the range, then remove the two push on electrical connections. Then removed one screw holding the element to the inside of the oven, replaced with the new element, attached the connections, but the back sheild back on and it was done.
Parts Used:
-
Rhonda from Great Bend, KS
-
Difficulty Level:Really Easy
-
Total Repair Time:30 - 60 mins
-
Tools:Screw drivers
Was this instruction helpful to you?
Thank you for voting!
I had to replace the broiler element because it had burned up like a sparkler.
I read instructions and hints online. Then, I pulled the range out from between the cabinets and unplugged it (carefully). I used a small Philips head screwdriver to remove the 10 metal screws holding the large metal sheet on the back of the oven. Then I removed the 4 screws holding on the metal sheet on the upper level of the back of the range since it had to be removed to move back the big sheet metal away from the back. The large metal sheet has the power cord threaded through it on the bottom and I left that in place. I then removed the oven door by lifting it up off the hinges after I removed the screw on each side that held the door on the hinges. The door is quite heavy for a girl. I unscrewed the plate at the back of the broiler element, unhooked it from the hangers, and carefully pulled the connectors apart from the oven wiring and the dead broiler element. (Being completely unfamiliar with this kind of connector it took me some time to figure out they slid apart.) Following advice online I had used electrical tape to tape down the wires so they wouldn't slip backwards out of the oven. The new broiler element connectors slid smoothly and easily into the oven wires. I removed the electrical tape I had used as temporary holders, hung the element on the previous wire slings and removed the new wire slings for a backup. I screwed back the plate on the new element into the back of the oven wall. I used the part number orientation on the element to make certain I had it right side up. If I have to do this again it will be easy and take very little time. My biggest problem was getting the oven door back on because it was heavy for me and I was too short to be able to see what I was doing as I repeatedly tried to get the oven door and hinges aligned. Eventually the door was back on and screwed down. Everything that had been unscrewed was put back in place and screwed down tightly. The oven and broiler are working perfectly.
Parts Used:
-
Georgia L from Coupeville, WA
-
Difficulty Level:A Bit Difficult
-
Total Repair Time:30 - 60 mins
-
Tools:Pliers, Screw drivers
Was this instruction helpful to you?
Thank you for voting!