















AMK175EN1F Kelvinator Refrigerator - Instructions
Keep searches simple. Use keywords, e.g. "leaking", "pump", "broken" or "fit".
My Frig Light Stopped
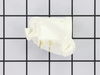
I am a 65 year old woman with no mechanical aptitude: I just unplugged the frig. And used a screw driver to pry of the plastic socket from its outside edge. . Then you just unplug two tiny contact plugs that appear when you pull out the socket and replug in those two the same way on the new part. Pop the socket back into the hole . . . . And screw in the new bulb. I knew I needed the socket part cause when the bulb burned out , a new bulb still did not work. . . If I can do it, anyone can!
Parts Used:

-
Susan from Rapid City, SD
-
Difficulty Level:Really Easy
-
Total Repair Time:15 - 30 mins
-
Tools:Screw drivers
Was this instruction helpful to you?
Thank you for voting!
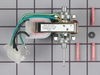
the evaporator fan same time won't stater
-
Armando from Eagle pass, TX
-
Difficulty Level:Really Easy
-
Total Repair Time:15 - 30 mins
-
Tools:Nutdriver
Was this instruction helpful to you?
Thank you for voting!
Fan Motor Malfunction
Followed the instruction video. Removed the old one. Attached the fan blade, ground wire and connected power plug. Reinstalled with 2 screws. Works great.
Parts Used:
-
Donald from Waynesburg, PA
-
Difficulty Level:Easy
-
Total Repair Time:15 - 30 mins
-
Tools:Nutdriver
Was this instruction helpful to you?
Thank you for voting!
Noisy Motor
I original tried to repair the motor but was not able to. I remove the screws on the back plate and removed the the back plate. Removed the shroud for the motor and screws, unplug the power connection and removed the fan motor. Installed the new fan motor and reassembled everything. The refrigerator is working great.
Parts Used:
-
Richard from Simi Valley, CA
-
Difficulty Level:Easy
-
Total Repair Time:30 - 60 mins
-
Tools:Nutdriver
Was this instruction helpful to you?
Thank you for voting!
Temperature intermittently below freezing.
Replaced the refrigerator thermostat. One hex-head screw in the rear and two tabs on the front hold the thermostat cover on. The temperature knob pulls off by friction, exposing two phillips-head screws that hold the thermostat in place. Two power wires and one ground wire are held on by clips. The replacement thermostat is a different shape than the original, but it is a direct fit. This replacement eliminated the problem. The only thing that made the job difficult was not having any instructions nor any wiring diagrams for the refrigerator.
Parts Used:

-
Ronald from Yorktown, VA
-
Difficulty Level:A Bit Difficult
-
Total Repair Time:30 - 60 mins
-
Tools:Nutdriver, Pliers, Screw drivers
Was this instruction helpful to you?
Thank you for voting!
Not freezing
All I had to do was change out motors, and the fam would spin right,and the freezer was alive again. With your older models you may have to re-mount the motor bracket in the back for the fan to clear,due to the fact that the motor sits alittle lower than the old model
Parts Used:
-
Ben from deer park, TX
-
Difficulty Level:A Bit Difficult
-
Total Repair Time:1- 2 hours
-
Tools:Nutdriver, Pliers, Screw drivers
Was this instruction helpful to you?
Thank you for voting!
Refrigerator side not cooling (of Side by Side)
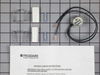
Turned off Refrigerator by thermostat switch in Freezer Compartment,(allowing for light to work in freezer). Then removed all food from freezer side,then all shelves & basket drawer. Next, unplugged refrigerator from electrical source. Removed back of inside of the freezer. Located the Thermostat for defrosting cooling coil. Removed and replaced with new part.(Tip-unplugged the wires for the original thermostat, remove from freezer and cut off and splice with connectors provided with new part, it's easier because you're not trying to do this in the narrow space of the freezer). Then attach the thermostat with new bracket and plug thermostat wires back in, replace back panel, shelves, plug in power supply, turn thermostat switch in Freezer to normal setting. Wait for Freezer to cool and replace food. It's currently working like new. BTW I thought I need a defrost time as well...however after I ordered that part and received it, I turned the existing defroster timer manually with a straight ended screwdriver very slowly and it cycled and the defrost rods glowed/functioned just fine. Therefore I didn't replace defrost timer. I'll save the new timer for future repair if needed. All in all it was fairly easy, and I didn't have to buy another fridge. I was really pleased with the service of this website...and the parts arrived very quickly via Fedex. Thanks www.partselect.com ! KJ
Parts Used:
-
K from Lakeview, MI
-
Difficulty Level:Easy
-
Total Repair Time:30 - 60 mins
-
Tools:Nutdriver, Pliers
Was this instruction helpful to you?
Thank you for voting!
Freezer was not defrosting thus refrigerator was not cooling
1. Unplug the refrigerator.2. Remove the storage rack and back panel in the freezer. 3. Locate the thermostat. 4. Defrost the freezer coils , i used a hair dryer. 5. Remove the thermostat from the cooling coil and then clip the connecting wires close to the unit. 6. Strip the ends of these wires and connect these wires to the wires of the replacement unit using the supplied wire connectors. 6. Heat seal with a lighter the connections using the water shield sleeves provided and further wrap connections with electrical tape. 7. Reconnect the thermostat to the cooling coil at the location it was removed from. 8. Replace the freezer back panel removed earlierand the storage rack if you have one. 9. Plug the freezer back in. My refrigerator has been working ever since the repair. There are several YouTube videos available that walk you through the diagnoses and repair process. They are very good.
Parts Used:
-
Wayne T from Galway, NY
-
Difficulty Level:Easy
-
Total Repair Time:30 - 60 mins
-
Tools:Pliers, Screw drivers
Was this instruction helpful to you?
Thank you for voting!
freezer cold, fridge not cold
Removed shelving, and rear panels. Replaced condenser fan and defrost thermostat. Defrost coil ohmed fine. Reassembled and plugged in fridge with thermometers inside. Freezer at 22degrees and fridge at 32 degrees. My first time repairing a fridge. the partselect videos were very helpful.
Parts Used:
-
Sam from Marshall, NC
-
Difficulty Level:A Bit Difficult
-
Total Repair Time:More than 2 hours
-
Tools:Nutdriver
Was this instruction helpful to you?
Thank you for voting!
Freezer always has ice accumulating
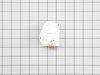
Thermostat assembly, remove light bulb, remove 1 screw, drop thermostat casing, two screws to remove timer from inside and install in reverse. Old Timer had electric motor and lasted 30 years. New one looks to be electronic with plastic motor gears.
Parts Used:
-
Albert from Jefferson, MD
-
Difficulty Level:Easy
-
Total Repair Time:15 - 30 mins
-
Tools:Pliers, Screw drivers
Was this instruction helpful to you?
Thank you for voting!
Fan Motor Noisy
Emptied freezer, removed fan motor cover (2 screws), removed fan and motor (2 screws), removed old motor from bracket and reassembled with new motor, transferred fan blade from old motor to new), re-installed new fan/motor (2 screws) and reinstalled cover...
Parts Used:
-
Dana from Bloomington, IN
-
Difficulty Level:Really Easy
-
Total Repair Time:15 - 30 mins
-
Tools:Screw drivers
Was this instruction helpful to you?
Thank you for voting!
Refrigerator section of fridge was too warm.
Removed the old burned out evaporator fan, and with the model# was able to find a replacement at PartSelect. I was really surprised that you had the exact part on a fridge that old. Installed the new fan, and the fridge is working beautifully. Thanks to PartSelect I was able to save several hundred dollars.
Parts Used:
-
THOMAS from ENDWELL, NY
-
Difficulty Level:Difficult
-
Total Repair Time:1- 2 hours
-
Tools:Nutdriver, Wrench set
Was this instruction helpful to you?
Thank you for voting!
Replace evaporator fan motor.
Replace evap fan motor. Take a close-up picture of the evaporator fan motor installation prior to removing. Take pictures as removing various components.
Parts Used:
-
Joseph from New Ringgold, PA
-
Difficulty Level:Difficult
-
Total Repair Time:1- 2 hours
-
Tools:Nutdriver
Was this instruction helpful to you?
Thank you for voting!