


















ALG643RAC Dryer - Instructions
Keep searches simple. Use keywords, e.g. "leaking", "pump", "broken" or "fit".
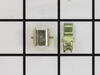
Broken Catch
-
James from LARAMIE, WY
-
Difficulty Level:Very Easy
-
Total Repair Time:Less than 15 mins
-
Tools:Nutdriver, Screw drivers
4 of 4 people
found this instruction helpful.
Was this instruction helpful to you?
Thank you for voting!
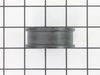
The wheel bearing it doesn't work
Just take the old parts with my tools and fix it, i did take the pulley bearing with care and put the new one, and adjust the screw on the motor base, the belt just was a little difficult but I did it, it's easy.
Parts Used:
-
Diego from DORAVILLE, GA
-
Difficulty Level:Easy
-
Total Repair Time:15 - 30 mins
-
Tools:Pliers, Screw drivers, Socket set
4 of 4 people
found this instruction helpful.
Was this instruction helpful to you?
Thank you for voting!
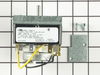
Dryer was operating but the timer would not advance so it kept drying with heat and would not shut off. Danger!!
Installed new timer control unit . Dryer then operated normaly.
the timer moter bench tested ok. I wonder if there was really a problem with a relay that keeps the timer on during the cycle.
the timer moter bench tested ok. I wonder if there was really a problem with a relay that keeps the timer on during the cycle.
Parts Used:
-
Jon from St. Louis, MO
-
Difficulty Level:Easy
-
Total Repair Time:15 - 30 mins
-
Tools:Nutdriver, Screw drivers
5 of 7 people
found this instruction helpful.
Was this instruction helpful to you?
Thank you for voting!
The dryer door latch was broken.
The replacement part just snapped into place. (The old part had fallen out) It took less than 30 seconds to do the repair.
Parts Used:
-
Jack from Memphis, TN
-
Difficulty Level:Really Easy
-
Total Repair Time:Less than 15 mins
5 of 7 people
found this instruction helpful.
Was this instruction helpful to you?
Thank you for voting!
Squeaky belt
Removal of the entire 2 front panels
Removal of the heat exchanger into the drum
Removal and replacement of the belt
Reinstallation of the heat exchanger, and both front panels
Removal of the heat exchanger into the drum
Removal and replacement of the belt
Reinstallation of the heat exchanger, and both front panels
Parts Used:
-
Michael from Marietta, GA
-
Difficulty Level:A Bit Difficult
-
Total Repair Time:30 - 60 mins
-
Tools:Nutdriver, Pliers, Screw drivers
5 of 7 people
found this instruction helpful.
Was this instruction helpful to you?
Thank you for voting!
No heat...
Removed and replaced both the thermostat sensor and the ignitor. Tested thej dryer and it worked. Replaced the front panel and it was good to go.
Parts Used:
-
Charles from Long Beach, CA
-
Difficulty Level:Easy
-
Total Repair Time:30 - 60 mins
-
Tools:Socket set
5 of 7 people
found this instruction helpful.
Was this instruction helpful to you?
Thank you for voting!
dryer would shut off during dry cycle. It was difficult to rotate drum manually
I looked at your on-line diagrams (exploded views) and basically used them as dis-assembly info.
I removed the bottom panel, followed by the front panel, the drum holders and drum.
Toughest part was the spring clips holding the motor in place,,,, but notes on your site from other folks doing the same motor replacement solved that one,,,,,, I used a flat bladed screwdriver and pliers to manipulate the clips both off and on
I removed the bottom panel, followed by the front panel, the drum holders and drum.
Toughest part was the spring clips holding the motor in place,,,, but notes on your site from other folks doing the same motor replacement solved that one,,,,,, I used a flat bladed screwdriver and pliers to manipulate the clips both off and on
Parts Used:
-
Dave from Bend, OR
-
Difficulty Level:Easy
-
Total Repair Time:30 - 60 mins
-
Tools:Pliers, Screw drivers, Wrench (Adjustable)
4 of 4 people
found this instruction helpful.
Was this instruction helpful to you?
Thank you for voting!
Air Duct Damaged
Removed 2 screws from dryer lower front panel and removed panel. Then removed upper front panel (no screws, just clips). Removed screws from existing duct assembly (2 for the duct assembly and 3 that held the top of the assembly to the dryer opening (and the reason for removing the upper front panel). Original part was a two piece assembly, new one is a single part, using less screws. New part is also deeper that original assembly. There was enough room for the extra size. Installed new part, replaced top 3 screws, top panel, and bottom panel. The replacement was very straight forward. Anyone that has done this before could do it in a few minutes but without prior knowledge or a manual, it took a full 1/2 hour to do the replacement.
Parts Used:
-
jEFFREY from Troy, MI
-
Difficulty Level:Easy
-
Total Repair Time:15 - 30 mins
-
Tools:Screw drivers, Socket set
4 of 4 people
found this instruction helpful.
Was this instruction helpful to you?
Thank you for voting!
Female End Of The Door Catch Broke
First I put the square female end iof the door catch kit nto the square hole as snug as I could. Then I gently pushed the door against the piece until I heard it click in to place. That's it!! Sooooo simple--
Parts Used:
-
Tara from North Canton, OH
-
Difficulty Level:Really Easy
-
Total Repair Time:Less than 15 mins
-
Tools:Screw drivers
4 of 4 people
found this instruction helpful.
Was this instruction helpful to you?
Thank you for voting!
Dryer would stop during cycle and then not restart. When I started the dryer, there was a short buzz sound as the motor started.
First I removed the bottom front cover attached with two screws, then the main front cover attached with two screws. I then removed two more screws holding the top in place, detached three wires and raised the top lid. I held the top lid out of the way with a cord tied off to a cabinet above. I then removed four screws holding the front support panel in place and set it to the side with wires still attahced. Then I slid the dryer belt off the drum and removed the drum. Next I removed the cover of the fan wheel by removing several screws. This allowed me to unscrew the fan wheel (reverse threaded) by anchoring the motor shaft with a wrench and using a large socket to turn the nut end of the fan wheel (then was no snap ring). I then popped off the two clamps holding the motor in place and removed the motor. The only tricky part about assembly was putting the belt back on the pulleys once the drum was installed. You can't see the pulleys once the drum is installed so it is done by feel.
Parts Used:
-
Bob from Denver, CO
-
Difficulty Level:Easy
-
Total Repair Time:30 - 60 mins
-
Tools:Nutdriver, Screw drivers, Socket set, Wrench set
6 of 10 people
found this instruction helpful.
Was this instruction helpful to you?
Thank you for voting!
Door would not stay shut
Took off the four screws to get to the female clip and used pliers to squeeze it out. Next was using pliers to pinch out the male connector and place the new one in.
Parts Used:
-
Eli from North Stonongton, CT
-
Difficulty Level:Really Easy
-
Total Repair Time:Less than 15 mins
-
Tools:Pliers, Screw drivers
4 of 4 people
found this instruction helpful.
Was this instruction helpful to you?
Thank you for voting!
Door wasn't staying closed
popped up top of dryer -- With pliers squeezed clips on inside of latch - - with screw driver pryed latch out -- just pused new latch in.......... Thanks to parts select for sending part sooo fast.. wife was happy.. Thanks, Dale
Parts Used:
-
Dale from Livingston, TX
-
Difficulty Level:Easy
-
Total Repair Time:Less than 15 mins
-
Tools:Pliers, Screw drivers
4 of 5 people
found this instruction helpful.
Was this instruction helpful to you?
Thank you for voting!
dryer stoped working
At first i thought i had to buy new dryer, because i did not know what to do.I said, i never done this kind of repair before, well i put everything apart and notice that the idler pulley was worn out, then i said this is something that i can fix it if i get the part. I made several calls and couldn't find it. so went in internet and found it with you.
Parts Used:
-
Roman from Gaithersburg, MD
-
Difficulty Level:Easy
-
Total Repair Time:30 - 60 mins
-
Tools:Screw drivers, Socket set, Wrench (Adjustable)
4 of 5 people
found this instruction helpful.
Was this instruction helpful to you?
Thank you for voting!
Squeaking motor, over heating, thermal switch kicking out.
Unpluged dryer from outlet, disconnected vent, positioned dryer on side, removed screws from bottom panel, pulled pannel away from dryer body to gain access to motor. Disconnected drum belt from motor pulley, disconnected wire harness from motor. Removed motor mounting bracket assembly and placed entire assembly on floor. Removed clamps and blower assembly from old motor, installed new motor and reassembled. Very easy project, hardest part requires some trouble shooting knowledge to determine the exact cause of problem.
Parts Used:
-
Ernest from Ida, MI
-
Difficulty Level:Really Easy
-
Total Repair Time:1- 2 hours
-
Tools:Nutdriver, Pliers, Screw drivers, Wrench (Adjustable)
5 of 8 people
found this instruction helpful.
Was this instruction helpful to you?
Thank you for voting!
Progressively louder squeaky noise when drying
I followed the instructions found on this site. The hardest part was figuring out how to release the clamps at the front of the dryer so I could remove the top.
The key was to unbolt the clamps at the back of the dryer first, then to use a putty knife to release the two clamps at the front of the dryer that hold the top to the front.
The rest was easy by following the steps already listed on this site and removing the two front pieces, then the drum and replacing the parts. Putting it back together was simple since I placed things in order and had taken pictures with my cell phone as I went through the process.
The time I took, included vacuuming the inside of the dryer thoroughly. Now it runs like new.
The key was to unbolt the clamps at the back of the dryer first, then to use a putty knife to release the two clamps at the front of the dryer that hold the top to the front.
The rest was easy by following the steps already listed on this site and removing the two front pieces, then the drum and replacing the parts. Putting it back together was simple since I placed things in order and had taken pictures with my cell phone as I went through the process.
The time I took, included vacuuming the inside of the dryer thoroughly. Now it runs like new.
Parts Used:
-
George W from Austin, TX
-
Difficulty Level:A Bit Difficult
-
Total Repair Time:More than 2 hours
-
Tools:Pliers, Screw drivers, Wrench set
4 of 5 people
found this instruction helpful.
Was this instruction helpful to you?
Thank you for voting!