















ACR4503SFS0 Amana Range - Instructions
Keep searches simple. Use keywords, e.g. "leaking", "pump", "broken" or "fit".
Oven bake would not heat up at all.
Very simple.
Remove 2 mount screws using a #2 phillips screwdriver.
Pull the element out to expose the 2 wires.
Using pliers, slip both wire terminals off the existing element.
Push wires onto the new element and install both mounting screws..
Done!
NOTE: The existing element showed no exterior signs of being bad.
The damage must have been internal.
Remove 2 mount screws using a #2 phillips screwdriver.
Pull the element out to expose the 2 wires.
Using pliers, slip both wire terminals off the existing element.
Push wires onto the new element and install both mounting screws..
Done!
NOTE: The existing element showed no exterior signs of being bad.
The damage must have been internal.
Parts Used:

-
Wilton from CANYON LAKE, TX
-
Difficulty Level:Very Easy
-
Total Repair Time:Less than 15 mins
-
Tools:Pliers, Screw drivers
2 of 2 people
found this instruction helpful.
Was this instruction helpful to you?
Thank you for voting!
Broiler element burned out
After doing a YouTube search. I successfully completed the repair by easily diagnosing the issue with the element.
I watched a video about 5 most common problems with whirlpool broiler elements.
The first being to inspect the element for damage. I found a small section that appeared to be rough and had a raised bump.
I decided to order a new element because the oven is older and it wouldn’t hurt to install a new one even if this wasn’t the issue.
Once the part arrived, which it did quickly, I followed the video instructions. It was easy and straight forward. I completed the task in under thirty minutes. It was very simple and I now have a functional broiler element.
I watched a video about 5 most common problems with whirlpool broiler elements.
The first being to inspect the element for damage. I found a small section that appeared to be rough and had a raised bump.
I decided to order a new element because the oven is older and it wouldn’t hurt to install a new one even if this wasn’t the issue.
Once the part arrived, which it did quickly, I followed the video instructions. It was easy and straight forward. I completed the task in under thirty minutes. It was very simple and I now have a functional broiler element.
Parts Used:

-
chris from HILTON HEAD, SC
-
Difficulty Level:Really Easy
-
Total Repair Time:15 - 30 mins
-
Tools:Screw drivers
3 of 5 people
found this instruction helpful.
Was this instruction helpful to you?
Thank you for voting!
Old lower element fell apart
1. Unplug the power
2. Unscrew the two screws that hold the element
3. Pull the element out a little to expose the wires.
4. Gently pull off each wire (best done with needle nose) MAKE SURE THE WIRES DONT FALL INTO THE BACK OF THE OVEN.
5. Firmly seat wires back onto new element and replace screws
6. Bake stuff!
2. Unscrew the two screws that hold the element
3. Pull the element out a little to expose the wires.
4. Gently pull off each wire (best done with needle nose) MAKE SURE THE WIRES DONT FALL INTO THE BACK OF THE OVEN.
5. Firmly seat wires back onto new element and replace screws
6. Bake stuff!
Parts Used:
-
Matthew from MIDDLETOWN, CT
-
Difficulty Level:Very Easy
-
Total Repair Time:Less than 15 mins
-
Tools:Pliers, Screw drivers
2 of 2 people
found this instruction helpful.
Was this instruction helpful to you?
Thank you for voting!
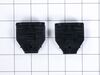
Had lost one of the drawer glide
Just attached the glide to the drawer. It just popped in. No problem.
took about 5 minutes.
took about 5 minutes.
Parts Used:
-
Lydia from SAN ANTONIO, TX
-
Difficulty Level:Very Easy
-
Total Repair Time:Less than 15 mins
2 of 2 people
found this instruction helpful.
Was this instruction helpful to you?
Thank you for voting!
Paint peeling from strip

-
Myron from Punta Gorda, FL
-
Difficulty Level:Easy
-
Total Repair Time:15 - 30 mins
-
Tools:Nutdriver
3 of 5 people
found this instruction helpful.
Was this instruction helpful to you?
Thank you for voting!
You
Pleaae prepopulate the manufacturer and part i purchased. I fix a lot of appliances so cannot expend the effort to decipher this.
Be well.
Be well.
Parts Used:
-
Ron from CARIBOU, ME
-
Difficulty Level:Really Easy
-
Total Repair Time:30 - 60 mins
2 of 2 people
found this instruction helpful.
Was this instruction helpful to you?
Thank you for voting!
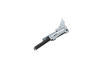
Door hinge fell apart
-
myron from west salem, WI
-
Difficulty Level:Really Easy
-
Total Repair Time:30 - 60 mins
-
Tools:Screw drivers
2 of 2 people
found this instruction helpful.
Was this instruction helpful to you?
Thank you for voting!
Very hard to close the door range, especially one way and it sticks to close.
First, view videos to know what is an active door range problem.
Second, when you know the problem, see videos on you tube and be sure you will replace the right part
Third, I go to Part Select, see reference video for your problem if you need and buy the part on line, good price, very quick delivery.
Second, when you know the problem, see videos on you tube and be sure you will replace the right part
Third, I go to Part Select, see reference video for your problem if you need and buy the part on line, good price, very quick delivery.
Parts Used:
-
Joanne from LAUDERHILL, FL
-
Difficulty Level:Very Easy
-
Total Repair Time:30 - 60 mins
-
Tools:Screw drivers
2 of 2 people
found this instruction helpful.
Was this instruction helpful to you?
Thank you for voting!
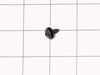
Replaced screw

-
Judith from SALEM, OR
-
Difficulty Level:Very Easy
-
Total Repair Time:Less than 15 mins
-
Tools:Screw drivers
2 of 2 people
found this instruction helpful.
Was this instruction helpful to you?
Thank you for voting!
Oven not reaching temperature
Simple-pulled range away from wall, unplug from socket. Removed back panel unscrewed thermoses and replace. Put back panel back on plug in, tested temperature setting before sliding range back on place
Parts Used:

-
Marsha from Clermont, FL
-
Difficulty Level:Really Easy
-
Total Repair Time:Less than 15 mins
-
Tools:Screw drivers
2 of 2 people
found this instruction helpful.
Was this instruction helpful to you?
Thank you for voting!
Replacing the bulb in the freezer side
Removed the ice brucket,
Removed the light shield by releasing one screw using a nutdriver.
Replacing the bulb and reinstalled the light shield.
Your web site is one of the best and most helpfull service sites I ever used. Just wish that in the future you will ship parts overseas.
Removed the light shield by releasing one screw using a nutdriver.
Replacing the bulb and reinstalled the light shield.
Your web site is one of the best and most helpfull service sites I ever used. Just wish that in the future you will ship parts overseas.
Parts Used:

-
Yafa (and David) from Bothell, WA
-
Difficulty Level:Easy
-
Total Repair Time:Less than 15 mins
-
Tools:Nutdriver
5 of 11 people
found this instruction helpful.
Was this instruction helpful to you?
Thank you for voting!
Extremely easy repair
Unplug stove. Remove the two screws attaching the element to the rear of the oven. Carefully pull out. Disconnect wires. Reconnect wires. Screw back in. Done. The hardest part was moving the stove away from the wall.
Parts Used:
-
Melissa from MILL CITY, OR
-
Difficulty Level:Very Easy
-
Total Repair Time:Less than 15 mins
-
Tools:Screw drivers
2 of 2 people
found this instruction helpful.
Was this instruction helpful to you?
Thank you for voting!
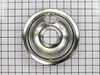
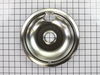
Drip pans were not original to range, I could not get them clean.
I reoved old drip pans and installed new ones. Very easy, they look great!
Parts Used:
-
Lynn from BRADENTON, FL
-
Difficulty Level:Really Easy
-
Total Repair Time:Less than 15 mins
2 of 2 people
found this instruction helpful.
Was this instruction helpful to you?
Thank you for voting!
Heating element, broken
Unplugged appliance, removed the 2 screws that mount element. Unhooked the electric wires,with pliers.
Connected, the wires to new element replaced the 2 screws. And was done in about 9 minutes.
Connected, the wires to new element replaced the 2 screws. And was done in about 9 minutes.
Parts Used:
-
Frank from COLUMBIA, TN
-
Difficulty Level:Very Easy
-
Total Repair Time:Less than 15 mins
-
Tools:Pliers, Screw drivers
2 of 2 people
found this instruction helpful.
Was this instruction helpful to you?
Thank you for voting!
Bake element was broken
Remove the old part and install the new part.
Parts Used:
-
Alexander from LINCOLN, NE
-
Difficulty Level:Really Easy
-
Total Repair Time:30 - 60 mins
-
Tools:Pliers, Screw drivers
2 of 2 people
found this instruction helpful.
Was this instruction helpful to you?
Thank you for voting!