















958AF-CLZ Admiral Range - Instructions
Keep searches simple. Use keywords, e.g. "leaking", "pump", "broken" or "fit".
Light bulb failure
Received the part the day after ordering. Appreciated the quick service and repair took less than a minute.
Parts Used:

-
Grant from Alexandria, VA
-
Difficulty Level:Really Easy
-
Total Repair Time:Less than 15 mins
Was this instruction helpful to you?
Thank you for voting!
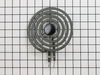
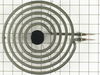
Cooking elements had come apart and pans did not sit evenly on the burners. Only two of my four burners were usable.
Replaced the old elements with new ones. So easy and can now cook four things at the same time and none are tipping over!!!!
Parts Used:
-
Judith L. from Enterprise, AL
-
Difficulty Level:Really Easy
-
Total Repair Time:Less than 15 mins
Was this instruction helpful to you?
Thank you for voting!
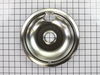
old drip bowl was worn out
-
Richard from Germantown, MD
-
Difficulty Level:Really Easy
-
Total Repair Time:Less than 15 mins
Was this instruction helpful to you?
Thank you for voting!
When The Burner Started To Heat (Front) And Then Put The Rice Bag On The Burner. Then The Plastic Bag Began To Burn And The Bag Of Rice Began To Pour Over The Burner. Someone Tried To Clean Up On The Burner But The Burner With Plastic And Hard To Clean The Plastic Off From The Burner.
Just pull the old out from the stove and put new one on the stove and then tested the burner that is working fine. Thank you very much for order the part. Have a great day.
Parts Used:
-
Robert J from Indianapolis, IN
-
Difficulty Level:Really Easy
-
Total Repair Time:Less than 15 mins
Was this instruction helpful to you?
Thank you for voting!
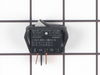
Oven light Switch
Compressed the springs and removed the damaged switch, then changed the wiring over to the new switch and press into place, worked fine.
Parts Used:
-
William from APACHE JUNCTION, AZ
-
Difficulty Level:Really Easy
-
Total Repair Time:Less than 15 mins
-
Tools:Pliers
Was this instruction helpful to you?
Thank you for voting!
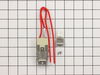
Burner element stopped working
The repair itself is really quite easy. Cut the wires, strip the ends and attach the new receptacle with wire nuts. The hard part was getting to it. My cooktop is about 30 years old, so I had to wade through piles of nasty built up grease. Some of the sheet metal screws were unworkable, so I had to cut them off with a Dremel tool. Not a pretty picture, but that's how repair work is on old stuff.
Parts Used:
-
Robert from Lodi, CA
-
Difficulty Level:Really Easy
-
Total Repair Time:1- 2 hours
-
Tools:Screw drivers
Was this instruction helpful to you?
Thank you for voting!
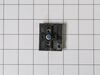
Burner did not heat, but element is ok.
The Burner Control Switch - 250V Part Number: PS2089409 that this site recommended was the right part for this older range. Had to remove screws to pull out the front panel with knobs, but it only pulls out a couple inches due to wires so it is tight to remove old switch. The five tabs are not in same spot so go by the labels and the wire lugs fit just fine, and the knob snapped right on and works great. Thank You!
Parts Used:
-
Philip from Hull, MA
-
Difficulty Level:A Bit Difficult
-
Total Repair Time:1- 2 hours
-
Tools:Pliers, Screw drivers
Was this instruction helpful to you?
Thank you for voting!
Cartridge wire burned out
I was unable to remove the screw which held the electrical element.. so I took the new surface burner receptacle and removed the metal part, and used the old one and put in the new one in the old metal part and rewired, and it is like new.. now I need to do another one.
Parts Used:
-
Robert from San Francisco, CA
-
Difficulty Level:A Bit Difficult
-
Total Repair Time:30 - 60 mins
-
Tools:Pliers, Screw drivers, Socket set
Was this instruction helpful to you?
Thank you for voting!
burner not operating or intermittently
Shut off power at breaker box. Removed top burner unit. Removed old receptacle (Mounting screw was rusty so I drilld out the old one.) Cut wires from old unit. Stripped wires back on old unit. Attached old and new wire with ceramic wire nut. Attached new unit. Reinserted top unit. Reconnected power and "voila". Wife was smiling again.
Parts Used:
-
Elroy from Atwater, MN
-
Difficulty Level:Easy
-
Total Repair Time:15 - 30 mins
-
Tools:Nutdriver
Was this instruction helpful to you?
Thank you for voting!
Burner was always in high temperature.
Pulled the range away from the wall and took out all the screws of the back panel. I had two different screws. Removed the dial and took two screws out behind the dial. Carefully removed the wires and placed them on the new switch. Screwed switch to panel, replaced dial and put the back panel back on range. Pushed range back into place.
Parts Used:
-
Dennis from Oak Lawn, IL
-
Difficulty Level:Really Easy
-
Total Repair Time:15 - 30 mins
-
Tools:Screw drivers
Was this instruction helpful to you?
Thank you for voting!
I had a power serge and it burned the Plug at the termial block and melted a few wire.
After we got the part in the mail my husband put it on and shortened the wires and put new plugs on the ends of the wires and we had to get a new plug put it on and it was fixed.
Parts Used:

-
Robin from Vanderbilt, PA
-
Difficulty Level:Really Easy
-
Total Repair Time:15 - 30 mins
-
Tools:Socket set
Was this instruction helpful to you?
Thank you for voting!
Burner stayed on "high", could not adjust heat
I UNPLUGGED STOVE, removed panel covering the controls, removed the knob on front and the two screws there that hold the control in, inserted new control and replaced the two screws on the front that hold it onto the stove, used needle nosed pliers to unplug one connection at a time from the old control and onto the new control in the back. When I had all connections plugged onto the new control I re-installed the panel cover with a screwdriver, plugged the stove back in, and the burner is now working good as new!
Parts Used:
-
Deborah from Hodgen, OK
-
Difficulty Level:Really Easy
-
Total Repair Time:15 - 30 mins
-
Tools:Pliers, Screw drivers
Was this instruction helpful to you?
Thank you for voting!
Not heating
Was easy cut the wires of as told to do wire nut the ends together and put back together and tested and worked great. Done
Parts Used:
-
Darwin from wisconsin rapids, WI
-
Difficulty Level:Really Easy
-
Total Repair Time:15 - 30 mins
-
Tools:Pliers, Screw drivers
Was this instruction helpful to you?
Thank you for voting!
burners would not come on without moving them around
took old screw out of stove top that held them in and cut the two wires off close to the burner stripped the wires and used the screw caps to put each line together it doesn't matter which line goes where and screwed it back on with the old screw and tried the two burners and they both worked job done ps it took longer for me to type this but i am slow at typing
Parts Used:
-
Ronald E. from Marissa, IL
-
Difficulty Level:Really Easy
-
Total Repair Time:15 - 30 mins
-
Tools:Screw drivers
Was this instruction helpful to you?
Thank you for voting!
Burner was in full hot.
Turned off the power. Pull the range away from the wall and removed the eight screws holding the cover in place. Carefully pulled the wires off the old switch. Removed the old switch and replaced it with the new. Put all the wires on and replaced the back cover and was done. Burner works fine. This part replaces a lot of different number switches.
Parts Used:
-
Dennis from Oak Lawn, IL
-
Difficulty Level:Really Easy
-
Total Repair Time:15 - 30 mins
-
Tools:Pliers, Screw drivers
Was this instruction helpful to you?
Thank you for voting!