















9114558813 Kenmore Range - Instructions
Keep searches simple. Use keywords, e.g. "leaking", "pump", "broken" or "fit".
Finish coming off of bowls
Removed burner from each one. removed drip bowl. Inserted new bowl. Replaced burner. Excellent help from order people so I got the correct bowl was irreplacable.
Parts Used:
-
Robert from Ledyard, CT
-
Difficulty Level:Really Easy
-
Total Repair Time:Less than 15 mins
0 of 2 people
found this instruction helpful.
Was this instruction helpful to you?
Thank you for voting!
Burner replacement
-
Robert from Tucson, AZ
-
Difficulty Level:Really Easy
-
Total Repair Time:Less than 15 mins
0 of 2 people
found this instruction helpful.
Was this instruction helpful to you?
Thank you for voting!
instructions could be better
it was hard to figure out the instructions from A switch to B switch to my switch. The first switch was no good the second one was good. prayer book didn't hurt.thank
Parts Used:
-
WILLARD from GLOVERSVILLE, NY
-
Difficulty Level:A Bit Difficult
-
Total Repair Time:30 - 60 mins
-
Tools:Pliers, Screw drivers
0 of 6 people
found this instruction helpful.
Was this instruction helpful to you?
Thank you for voting!
Burners would not lay flat
Removed the burner elements, removed and disposed of old drip pans, cleaned the area, relaced with new drip pans and replaced the burner elements. Verified all burners were level - good as the day it was new!
Parts Used:
-
Alfred from Forest, VA
-
Difficulty Level:Really Easy
-
Total Repair Time:Less than 15 mins
8 of 36 people
found this instruction helpful.
Was this instruction helpful to you?
Thank you for voting!
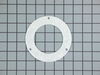
Light in oven had blown and needed to be replaced
I did not do it, I instead had my neighbor put the gasket around the light lens cover and replace it. He considers himself a handy man, so it was easy for him.
Parts Used:
-
Sandra from Marietta, GA
-
Difficulty Level:Really Easy
-
Total Repair Time:Less than 15 mins
-
Tools:Screw drivers
Was this instruction helpful to you?
Thank you for voting!
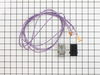
Right Front [surface burner terminal block kit]
We did the repair by following the inclosed instructions. we are elderly retired average ages 82. This was our first repair and it went very well. We are so pleased to have saved over $80.00 compared with hired labor 3 yre. ago for the same part. Thanks so much for your good service.
Parts Used:
-
Wayne from Montoursville, PA
-
Difficulty Level:Really Easy
-
Total Repair Time:Less than 15 mins
-
Tools:Nutdriver, Screw drivers
Was this instruction helpful to you?
Thank you for voting!
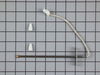
uneven heating of oven
This repair was super easy. I removed the two screws holding the oven sensor in place, pulled the sensor from the oven wall to expose the two wires attached to the sensor cut and spliced in the new sensor as per instructions. The supplied wiring kit made this splice very easy. I then reinserted the wires and sensor from the oven wall, put the screws back in place tested the oven. Oven now works like new and I got bonus points from a happy wife!
Parts Used:
-
John from Sandstone, MN
-
Difficulty Level:Really Easy
-
Total Repair Time:Less than 15 mins
-
Tools:Pliers, Socket set
Was this instruction helpful to you?
Thank you for voting!
Burner would not heat
Took the old burner out and inserted the new one. The burner was received two days after ordering. I was very satisfied with the service.
Parts Used:
-
Craig from Bangor, PA
-
Difficulty Level:Really Easy
-
Total Repair Time:Less than 15 mins
Was this instruction helpful to you?
Thank you for voting!
Burner stopped heating up.
Searched the internet for the replacement part, placed the order and then disconnected the old one and inserted the new burner prongs into the socket. Worked perfectly!!!
Parts Used:
-
Robin from Chicago, IL
-
Difficulty Level:Really Easy
-
Total Repair Time:Less than 15 mins
Was this instruction helpful to you?
Thank you for voting!
burner fell apart
-
judy from coarsegold, CA
-
Difficulty Level:Really Easy
-
Total Repair Time:Less than 15 mins
Was this instruction helpful to you?
Thank you for voting!
The burner stopped heating
Unplugged the old one and plugged in the new, which you sent promptly. No tools. Easiest fix ever.
Parts Used:
-
Geraldine from Falls Village, CT
-
Difficulty Level:Really Easy
-
Total Repair Time:Less than 15 mins
Was this instruction helpful to you?
Thank you for voting!
Burner failure
-
Robert from Brookfield, CT
-
Difficulty Level:Really Easy
-
Total Repair Time:Less than 15 mins
Was this instruction helpful to you?
Thank you for voting!
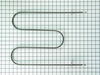
Broiler Element Burned Out
1)Undid two hex nuts holding broiler element in place. 2)Slipped fasteners off pegs connecting element to oven. 3)Simply reversed the process, when installing new element.
Parts Used:
-
Arthur from Midlothian, VA
-
Difficulty Level:Easy
-
Total Repair Time:Less than 15 mins
-
Tools:Socket set, Wrench (Adjustable)
Was this instruction helpful to you?
Thank you for voting!
Finding a drip pan that fit so that pots could sit level.
Ordered the drip pan from ParSelect.com. Unplugged element and took out old pan. Placed new pan in and replaced element. For the first time in many years, the part fit.
Parts Used:
-
Ann B from Hueytown, AL
-
Difficulty Level:Really Easy
-
Total Repair Time:Less than 15 mins
Was this instruction helpful to you?
Thank you for voting!
Knob had broken off
My husband was able to easily remove and replace the switch and know with-in 15 minutes.
Parts Used:
-
DeeAnn from Clinton, MO
-
Difficulty Level:Really Easy
-
Total Repair Time:Less than 15 mins
-
Tools:Screw drivers
Was this instruction helpful to you?
Thank you for voting!